

Bp Premier includes an obstetrics and antenatal section of the patient record.
When you add a pregnancy to a patient record, the antenatal cycle will begin based on the expectant times recorded for the pregnancy.
View a list of all pregnant patients
- From the main screen of Bp Premier, select Clinical > Pregnancy list. The Current pregnancies screen appears.
- Click Print to print the list.
Add a pregnancy Record
- Open the patient record from the main screen of Bp Premier.
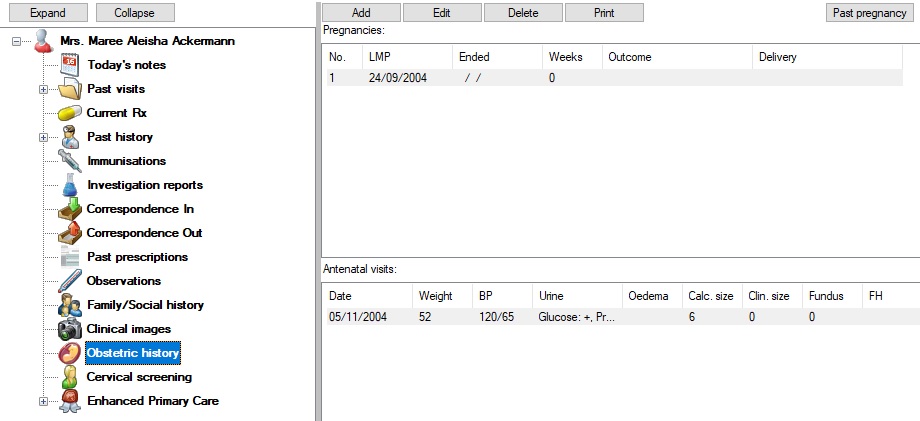
- Select Obstetric History from the tree on the left hand side. The Pregnancies list will be displayed to the right.
- Click Add. The Gestational Age screen will appear.
- Enter the Date of LMP and Date of scan. The Cycle length defaults to 28 days. The EDC date is calculated from the LMP.
- Click Save to record the pregnancy. The Pregnancy details screen will appear, showing the Pregnancy number.
- Add additional obstetric information about the patient:
- IVF pregnancy
- Gravidity
- Parity
- prior miscarriages, if any
- prior terminations, if any.
- Bp Premier will display warnings if the patient is on any medication that may affect pregnancy. You must choose to continue with the medication or end the prescription.
- Click Save to return to the patient record. The pregnancy will be displayed in the Pregnancies section of the screen.


Record an antenatal visit
After a pregnancy record has been created, you can add antenatal visits. You can only add one antenatal visit per day for a patient.
- From the patient record, select Obstetric History from the tree on the left hand side.
- Click Add. The Antenatal Visit screen will appear.
- Select the date of the visit from the Date picker, if not the current day.
- Record the details of the visit in the fields in this screen.
- Enter any Comments related to this visit or the pregnancy.
- Click Save to record the details to the patient record. The visit will now appear under the Antenatal Visits section.

After you have recorded at least one antenatal visit, a Results button will become visible above the Pregnancies list, allowing you to record ongoing results related to the pregnancy for the patient.
- Click Results to display the Antenatal results screen.
- Click Lookup to view the Lookup results screen, which shows all reports and results received for this patient.
- Select a date for the visit from the date picker, and enter any results information applicable to the pregnancy stage. Dates that have not yet occurred according to the expectant dates will be disabled.
- To add Imaging reports, click Add and select a result from the Lookup results screen.
- To add any other results, click Add next to the Other list and enter details in the Other antenatal result screen.
- Click Save to save the results and return to the patient record.

Record a pregnancy outcome
You can record pregnancy outcomes for current and past pregnancies. You can choose to add newborns to your practice's patient list.
- From the patient record, select Obstetric History from the tree on the left hand side.
- For a current pregnancy, double-click on the pregnancy in the Pregnancies list. The Pregnancy outcome screen will appear.
- Select the Finish date and the Outcome will become active.
- Select the Outcome from the drop down list.
- Select any birth Complications that occurred.
- Click Next. Record clinical details about the birth and click Next.
- Click Add to add details of the first child born in the Birth details screen, such as name, sex, weight, and Apgar scores.
- Click Add to patient database to open the New patient screen to record patient details.
- Click Save to return to the Pregnancy outcome screen.
- Click Finish to finish recording the pregnancy outcome.
For a past pregnancy, click the Past pregnancy button.


