This article describes how to set up printing preferences for document types at your practice.
Send different document types to different printers
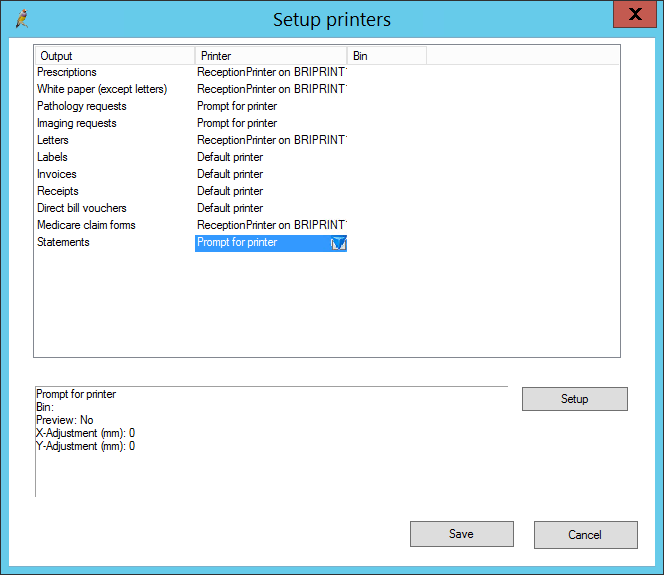
For each document type in your installation of Bp Premier, you can set the default printer or printer tray, or set Bp Premier to prompt the user to select a printer. For example, scripts could print from Tray 1 on a Kyocera printer, invoices could print from Tray 1 on the Canon printer, and letters could print from Tray 2 on the Canon printer.
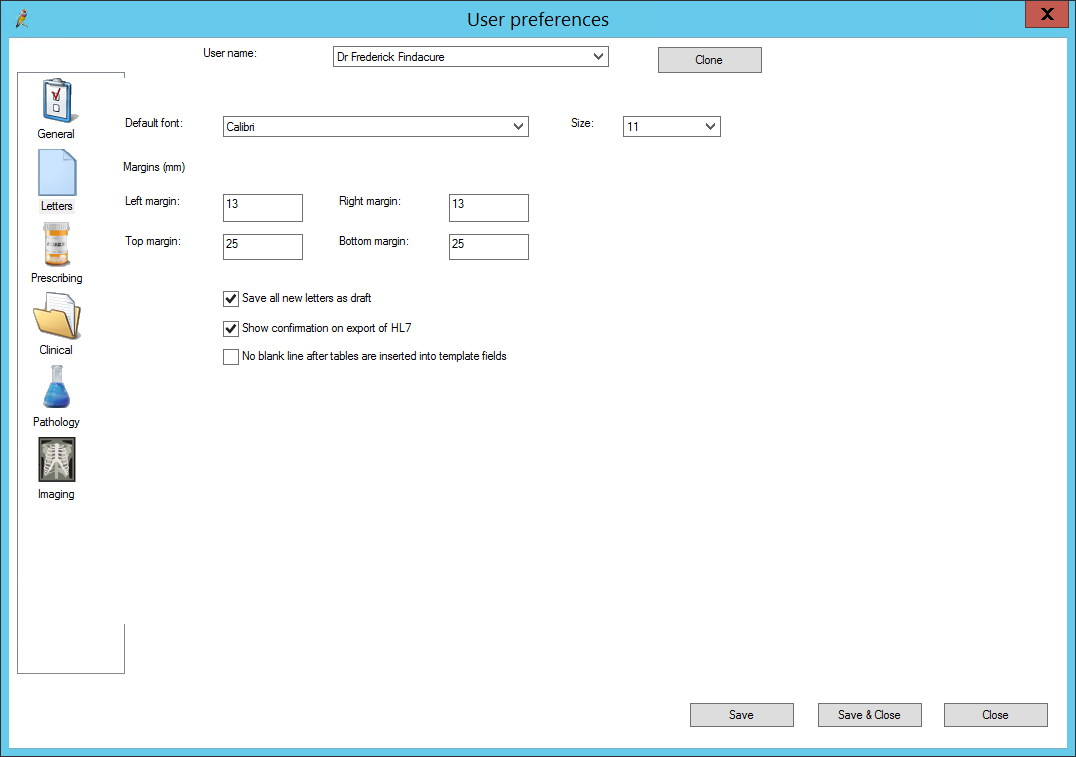
Users can also set default layout preferences for new documents. For example, when a blank document is opened from the word processor, the margins and default paragraph font are automatically set for the user.
To set up printers, a user must have the Printer permission set to 'Allow Access'.
Printing on terminal servers
If your practice uses terminal servers, where a workstation uses a local printer rather than a network printer, Best Practice Software recommend selecting 'Default Printer' from the Setup printer screen, because printer names change for each terminal session.
When setting up printing for a terminal server, test print each document type to ensure that printing is functioning as expected on that workstation.
IMPORTANT Every user in the practice who is using the terminal server must log out of their Windows session after each use. If not, and the user logs into the terminal server on another workstation, Windows may automatically recover the previous session's incorrect workstation name and printer settings.
Set up printers
NOTE Only users with the Printers permission set to Allow access are able to set up printers. See User Permissions for more information.
- From the Bp Premier main menu, select Setup > Printers .
- Select the document type from the Output column you want to assign a printer to.
- Select the Printer column for that document type, and click the blue down arrow that appears. The list of installed local and network printers will be displayed.
- Select a printer from the Printer column, or select Prompt for printer to prompt the user with the windows Printer screen each time the document type is printed.
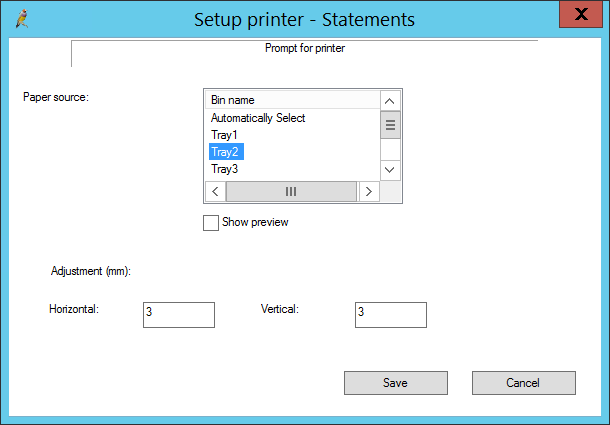
- Click Setup. The Setup printer screen will appear.
- Select the Paper source to use from the selected printer.
- Tick Show preview to display a print preview before printing.
- Enter Horizonal or Vertical adjustments from the left and top if required for the printer.
- Click Save.

NOTE Prompt for printer is suitable for document types used by staff without a fixed workstation, for example, who need to be able to print to any printer.

The horizontal and vertical settings allow negative values, if the printer prints the margins too far to the right or from the top.
Set word processor user preferences
- Select Setup > Preference > Letters.
- Select the Default font and Size.
- Set the default margin spacing.
- Tick Save all new letters as draft to default to saving all new letters as drafts and not final documents. Saving as a draft allows the letter to be opened and modified later.
- Tick Show confirmation on export of HL7 if you want Bp Premier to prompt a confirmation when a document is successfully exported using HL7.
- Tick No blank line after tables are inserted into template fields if you do not want a blank line automatically inserted after a table is inserted into a template field.
- Click Save & Close.

Set page size and orientation
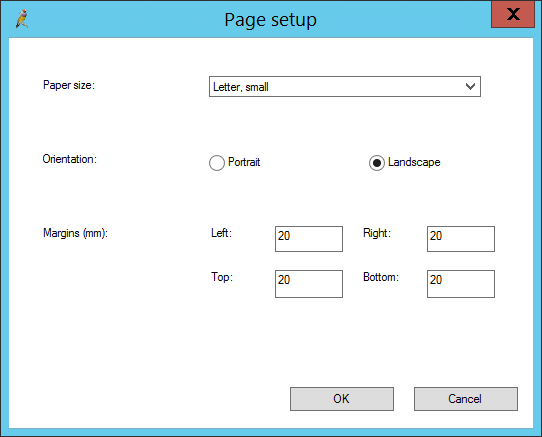
You can change the page orientation for open documents.
- From the word processor, select File > Page setup. The Page setup screen will be displayed.
- Select the Paper size and paper Orientation.
- Enter the margin spacing for the current document.
- Click OK.

Print in colour
If you wish to print in colour, select the Prompt for printer option from the Setup Printers screen, and select the properties option from the Windows Printer screen.
