

Follow the instructions to convert data from Practix practice management software. Read the checklist summary in Conversion Checklist before following the instructions.
1. Read all documentation
To assist you in the conversion process, we have provided comprehensive documentation to guide you through the steps required such as installing the Bp Premier product, performing a trial conversion, checking the converted data, configuring your system and then going live with the software in your practice.
2. Check prerequisites
Obtain up-to-date version of Bp Premier
Please check with Best Practice support via phone on 1300 40 1111 or email support@bpsoftware.net.
NOTE If an (old) previous installation of Bp Premier is present on the server, you should either upgrade to the latest version or uninstall completely and reinstall if the version is too old to upgrade.
Obtain latest conversion utility
Please check with Best Practice support via phone on 1300 40 1111 or email support@bpsoftware.net prior to running the conversion to ensure that you have the most update to date
Confirm Hardware Requirements
Ensure all machines that will be required to run Bp Premier meet the System Requirements.
Confirm Hard Disk space
By default, Bp Premier program files and databases are installed to the C:\ drive. It is recommended that prior to GO LIVE that an estimate of the disk space requirements is made to ensure that there is sufficient space on the server on the C:\ drive to cater for:
- Size of the Bp Premier databases (following the import of your clinical data)
- Sufficient room for expansion of the databases due to normal operation.
If compressed backups are to be performed, there will need to be free space approximately twice the size of the Bp Premier databases to allow for temporary files to be created during the backup process (i.e. 6 GB of databases will need approximately 18GB free space to perform compressed backups)
To check the size of the databases following the data import, check the size of the databases stored in the folders. These are the default locations. You may have installed your data to another folder during installation:
- SQL Express 2008 Installations - C:\Program Files\Microsoft SQL Server\MSSQL10.BPSINSTANCE\MSSQL\DATA
- SQL Express 2008R2 Installations - C:\Program Files\Microsoft SQL Server\MSSQL10_50.BPSINSTANCE\MSSQL\DATA
- SQL Express 2012 Installations - C:\Program Files\Microsoft SQL Server\MSSQL11.BPSINSTANCE\MSSQL\DATA
- SQL Express 2014 Installations - C:\Program Files\Microsoft SQL Server\MSSQL12.BPSINSTANCE\MSSQL\DATA
- SQL Express 2016 Installations - C:\Program Files\Microsoft SQL Server\MSSQL14.BPSINSTANCE\MSSQL\DATA
3. Will staff require training?
Consider whether any staff will require training. You will find details on the training that Best Practice offer on our web site www.bpsoftware.net/learning.
4. Check data condition
Make sure your
- Synchronise your data with any third party billing package
- Run any maintenance functions that might be required
- Ensure that there are no unallocated results and documents.
5. Perform a Trial Conversion
A Trial conversion must be performed a minimum of two weeks prior to the date you wish to go live with Bp Premier. If you are unsure how to perform any of the processes, contact your IT technician for assistance.
Why a trial conversion?
- To ensure that the source data converts successfully and correctly
- To resolve any issues related to the conversion prior to the GO LIVE
- To allow you to understand the process and identify the time required to complete the conversion
- To ensure that Bp Premier meets your surgery's clinical and / or management requirements prior to purchase.
IMPORTANT When running the conversion on a virtual machine, the utility must be executed through a console connection, for example, TeamViewer, LogMeIn.
Start trial conversion
- Ensure that you have read all the documentation and have addressed all the Prerequisites listed at the beginning of this document.
- Identify a secondary computer that can be used for the conversion machine:
- Must meet System Requirements.
- Must also meet the hardware requirements recommended for
- Check that the hard drive (c:\ drive) on the conversion machine has free space equal to at least 2.5 times the size of the
- Ensure that the live version of
- Backup your
Install
- Restore the
- Install Bp Premier as a Server installation on your conversion machine.
- A reboot may be required at the end of the installation
- If using a Terminal Server, you must always install applications & updates via Add/Remove Programs
- Check that the drug database date in Best Practice is up to date. Check this against the Best Practice Software website www.bpsoftware.net/resources/bp-premier-downloads/ and download and install any more recent data updates. See Updating the drug database for more information.
TIP To check the drug (data) database version you are currently using, log into Bp Premier on the server and select Help > About.
- Ensure that the machine does not have any scheduled tasks that could affect the performance of the machine or the network (i.e. scheduled backups, router reboots, server reboots, windows updates, etc).
- Turn off any background processes such as results importing, backups, etc.
- Install the
- Double click on the
Conversion instructions
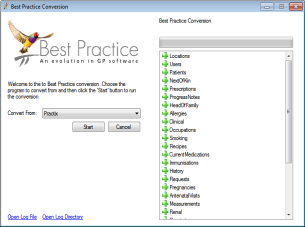
- The Practix to BP Conversion screen will appear providing a brief overview on the conversion, please read the overview. Click Continue to proceed with the conversion.
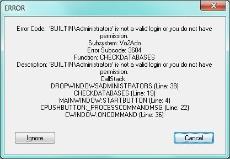
- If you receive a message like the one below, click ignore to continue.
If you already have data in the Bp Premier database, the Existing data screen will appear.
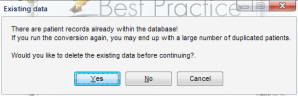
- To replace the existing data, click Yes.
- To keep the existing data and add new records to the Bp Premier database, click No.
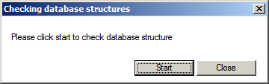
- The Checking database structures dialog box will appear. Click the Start button to continue.
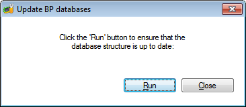
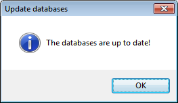
- The Update Bp databases screen will appear. Click Run to check that the Database structure is up to date. This will take approximately 5 minutes. When complete the Update databases window will appear - click Ok to continue.
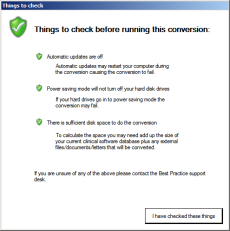
- The Things to check dialog box will appear. Please read this carefully for suggestions of things that you should check before proceeding. When you have checked all these items click the 'I have checked these things' button.
- The Connection details screen will appear.
![]()
- Server: select the name of your Practix SQL instance from the drop down box. (e.g. Servername\MSPDATA).
- Authentication: This relates to the login method used to log into the Practix Database. (NOTE: please speak to your IT technician if you are not aware of the way your SQL database has been configured).
- If the SQL database uses Windows authentication there is no need to enter Username or Password.
- Click the Connect button to check that the connection is working. A 'Connection succeeded' message should appear.
- The Practix documents folder path screen will appear. Use the browse button to the right to browse to the path where your Practixdocuments are stored. (i.e. c:\msp\mspdata\Docs\). This is the folder that has the individual folders for each year.

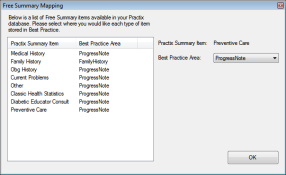
- The Free Summary Mapping screen will appear. This will display any Free Summary Items configured in your Practix data and allow you to indicate which part of Best Practice these items will be recorded in. The Options are 'Dr Note, Progress Notes, Family History, Social History and Past History’. When you select Past History, the records will be grouped together into 1 'Inactive' record
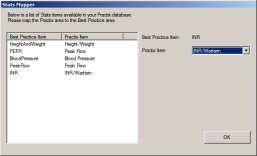
- The Stats Mapper screen will now appear. This will display 6 key areas of BP and allow you to select which of the StatsPat are relevant to convert to these sections. Click 'OK' to continue.
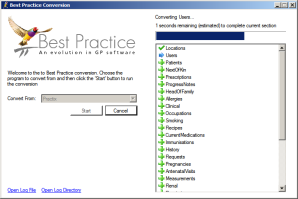
- The conversion from Practix to Bp Premier will now take place. The screen will show you the progress through each section and an approximate duration.
- The Start screen will appear. Click Start to continue with the conversion. Depending upon the size of the database this can take a few hours to 3 days.
Complete trial conversion
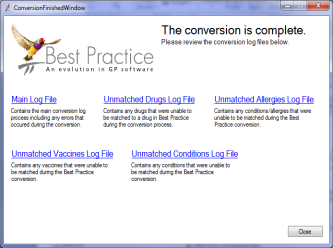
A screen will appear to indicate that the conversion is complete and whether any errors were encountered. Check each log to confirm whether any errors occurred.
The Unmatched logs show items that could not be mapped to coded items. This data will be in the patient record but will not be searchable as coded items.
Conversion order
| Order that data is converted from Practix | ||
|---|---|---|
1. Practice Details | Smoking | Renal |
2. Users | Recipes | Respiratory |
3. Patients | Current Medications | Address Book Categories |
4. Next of Kin | Immunisations | Address Book |
5. Prescriptions | History | Payers |
6. Progress Notes | Requests | Diabetes |
7. HeadOfFamily | Pregnancies | Results |
8. Allergies | Antenatal Visits | Recall Protocols |
9. Family History (clinical) | Measurements (StatsBloodPressure) | Recalls |
10. Social History (clinical) | Measurements (StatsHeightWeight) | Letters |
11. Free Summary Information Alerts | Measurements (StatsPat) | Documents |
12. Occupations |
|
|
| Data that cannot be converted from Practix | |
|---|---|
1. Ethnicity | Preferences |
2. Templates from Practix | Pathology / Radiology Layouts |
3. Contacts - some categories are not converted and need to be entered manually | Messages |
4. DVA card types |
|
IMPORTANT Financial data is not converted.
Drug mapping
We have made every attempt to match the medications from Current and Past prescriptions to the correct medication in MIMS. Occasionally this is not possible, because Practix does not always record the relevant PBSCode. An attempt is made to match on various values such as Strength, ProductID, and PackCode, but it is not always possible to match the medication exactly.
DR Note field
At the start of the conversion, you were prompted to identify where to store the Free Summary Mapping information. If you selected 'DRNote', a button will appear in the demographic section in the Patient record — this will also show any Current Medications that could not be converted. All users should be made available of what this DRNote field is used for, because this information must be created manually in the appropriate section of the patient record once the live conversion has been performed.
Passwords
Passwords for all users have been set to 'password'. Best Practice Software strongly recommends resetting passwords for all users on the live conversion.
Before continuing any further:
- Close the Conversion complete screen.
- Browse to the folder C:\Program Files\Best Practice Software\BPS\
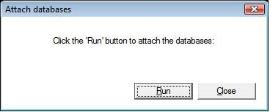
- Run the file called Attach databases.EXE. The Attach databases screen will appear .
- Click the Run button to continue. The Attach database process can take from 1–15 minutes depending upon the number of document databases. When complete a screen will appear showing all the databases that have been affected. Click Ok to close this screen.
6. What to check
Check conversion logs
After performing a Trial conversion, please check the log files generated during the conversion process. These will be found in the folder 'C:\Documents and Settings\All Users\Application Data\Best Practice\Log' or 'C:\ProgramData\Best Practice\Log' (depending on the windows version). There will be a number of files such as BPSConversion.log, UnmatchedCurrentRx, UnmatchedPrescriptions, etc.
IMPORTANT It is important to check these logs carefully to identify what could not be converted and ensure that there have been no errors recorded during the conversion that need to be addressed.
IMPORTANT Best Practice Software recommends that the principal doctors perform a thorough check of as many patient files as possible to ensure that data is present and accessible. Open a range of new to long term patients from your current software application and compare that the same data is available in Bp Premier. Also check that the last patient seen before the conversion has been transferred over correctly.
Check data
Patient demographics correct | Correspondence In and Out present and accessible |
Past Visit records present and accessible | Reminders present, correct and accessible |
Current and Past RX are present and correct | Autotext present and accessible |
Investigation results present and accessible | Custom Templates present and correct |
Immunisation records present and accessible | Contacts address book correct |
Reminders | Appointments |
Prepare Go Live plan
Now that your Bp Premier system contains your clinic data, prepare your GO LIVE plan.
TIP Best Practice Software recommended that you identify any configuration options or preferences that are required to set up the system so that decisions can be made within the practice prior to GO LIVE. Any settings made in the Trial conversion data will be overwritten when you perform the Live conversion. Remember to make note of all the settings you decide upon so they can be quickly re-entered after the Live conversion.
Submit logs and conversion form
When you are confident that all the data has been converted correctly:
- Email all the log files generated from the latest trial conversion to support@bpsoftware.net and the Best Practice Software Support team member who is assisting you with your conversion. Include your contact details and the practice name.
- Once both of these have been received, we will issue your practice a Site ID and a 30 day key and invoice to enable you to perform a LIVE conversion. This will be emailed to the email address for the main contact on the Trial Conversion completion form.
Obtain licence key
Shortly after you submit the conversion log and completion form to Best Practice Software you will be issued with an invoice and 30 day licence key. If you have not received your licence key and are ready to start the Live conversion, please contact General Products Support to check on the progress of your application.
7. Start Live Conversion
Once the Trial Conversion process is completed and you have received the 30 day key and invoice, you can perform a LIVE conversion.
- Update the conversion machine to the latest drug database update identified during the trial conversion. Check the Best Practice Software website bp-premier-downloads to see if there are any newer data updates that need to be applied.
- Commence the Live conversion following the same trial conversion steps.
- When prompted for the site ID and licence key, enter details as per the email you would have received from Best Practice Software after submitting the Trial conversion information.
During conversion
- Ensure the latest release of Bp Premierserver version is installed on your live server. This is the Bp Premier server that will be used during daily operation.
- Install the latest release of Bp Premier client (select Client when installing) on all workstations. Terminal server users can disregard workstation installation if the data is stored on the terminal server.
- Open each client installation in turn. When prompted, select the Bp Premier server from the list of servers then close the application.
NOTE If the list of services box is not populated, check that no firewall hardware or software is blocking ports between server and workstations. See Troubleshoot installation for more information. A utility is available here to assist you in opening the required ports on your server machine.When the conversion is complete
- When the Live conversion is completed, check ALL data carefully prior to going LIVE to ensure that data has converted correctly.
- Check the BPSConversion.log file again to ensure there are no errors indicated.
- Perform another check of the data to ensure that all data is present and accessible. We suggest opening a range of patients in your current application ( long term, medium term and new patients) and comparing the data with this same patient in Best Practice. We also recommend checking the last patient seen before the conversion to ensure that the most recent data has been converted.
- Ensure that only valid locations are displayed in Setup > Practice details.
Once you have confirmed that the conversion is complete and the data is correct:
- If you have not already entered the licence key, do so now.
- Back up and restore Bp Premier from your conversion machine and restore to your live server.
- Work through your Go Live plan to set up the various areas that you will be using.
Set up Clinical module
If you are continuing to use a third party billing package you will need to configure the Link options with Best Practice.
Set up Management module
- Log into
- Ensure that you have turned off any result importing and background process in
- Set up the management module.
NOTE All doctors should be made aware of the patients listed in any unmatched lists as they will need to correct the patient record when that patient is first seen.

