Appointment book layouts allow your appointment book to display different users or combinations of users. There are also a number of system layouts which are visible in the appointment book but cannot be modified.
Before you begin
Before you can set up appointment book layouts, you must:
- Tick Has appointments in User Details for users who can be booked in the apppointment book
- Assign a provider number in User Details for each location at which a provider is attending
- Set up sessions for all providers (this can be the default practice session).
Create a layout
- Select Setup > Configuration from the main Bp Premier screen.
- Select the Appointments tab and click on the Appointment book layout button. The Appointment book layouts screen will appear.
- Click the Add button in the top pane. You will be prompted to enter a name for the layout.
- Enter a name and click Save. A prompt will appear asking Would you like to populate the new layout with all providers who take appointments?
- Click Yes to add all users with defined sessions to this layout. You can remove users later.
- Click No to add users manually.

A new layout will be listed in the top pane of the Appointment Book layouts screen.
Add users to the layout
- To add users to the layout, select the layout in the top pane and click Add in the bottom pane.
- Tick the Name and Location combination to only include a doctor's appointments for that location in this layout. In the example, only appointments for Location 1 will be shown for Dr Kimberlee Skaare in this layout. Tick all providers that you want shown in this layout.
- Click Select to return to the Appointment Book layouts screen.
- Modify the order in which users are listed in the layout by selecting a user and clicking the Up or Down buttons.
- Click Save from the Appointment Book layouts screen. You can now assign the layout from the appointment book.
A list of users who have Has appointments ticked in their User Details, and have sessions defined for at least one location, will be shown.

If a provider has sessions defined for more than one location, the provider will be listed more than once. In the example above, Dr Kimberlee Skaare has sessions defined for Location 1 and Location 2.
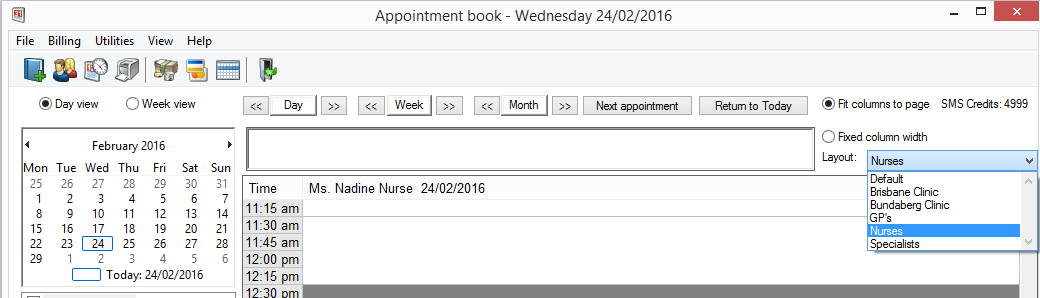
Apply an Appointment Book layout
- Press F12 from the main Bp Premier to open the Appointment Book.
- On the right hand side, the Layout drop-down box lists the layouts set up on your system.
- The Default layout is the original Bp Premier layout prior to multiple locations. The default layout displays all users who have appointments.
- Each practice location you have created will have a layout, and will display any users who have appointments at that location.
- To change to a different layout, select the layout name from the drop-down list. The appointment book will show users associated with the layout.
- When you exit from the appointment book, the layout will be remembered as well as the users that were selected for display.