Customisation Mode

Customisation Mode can be used to edit and make changes to layouts.

Access Customisation

  1. Open Client Details.
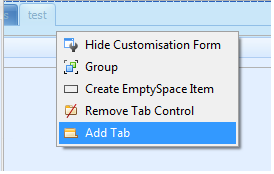
  2. Right-click at the top of one of the Client Details forms.
  3. The Customise Layout option will appear.

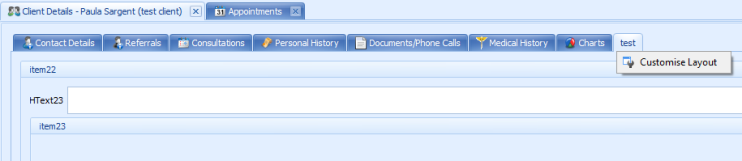
  1. Click Customise Layout.
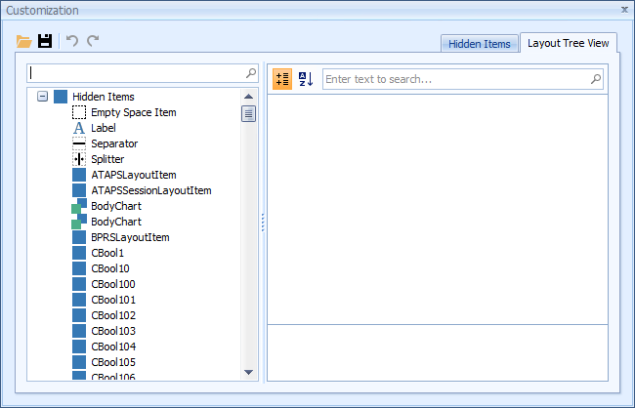
  2. The Customisation Window will open.
  3. Select the Layout Tree View tab on the right hand side.
  4. The Customisation Window has the following available options and field types to edit on the right hand side.

Field

Description

Open

This is not usually used as changes are most often being made to the Client Details layout file in use.

Save

This happens automatically on closure of the form also.

Undo

Undoes the last action. Use this function sparingly as it does not tend to respond very well.

Redo

Redoes the last action. Use this function sparingly as it does not tend to respond very well.

Hidden Items

This tab displays all items available for use in the client details but which are not usually viewed.

Layout Tree View

Displays the hidden items in a tree layout.

ToolBar

Categorises the item options.

Alphabetises the item options.
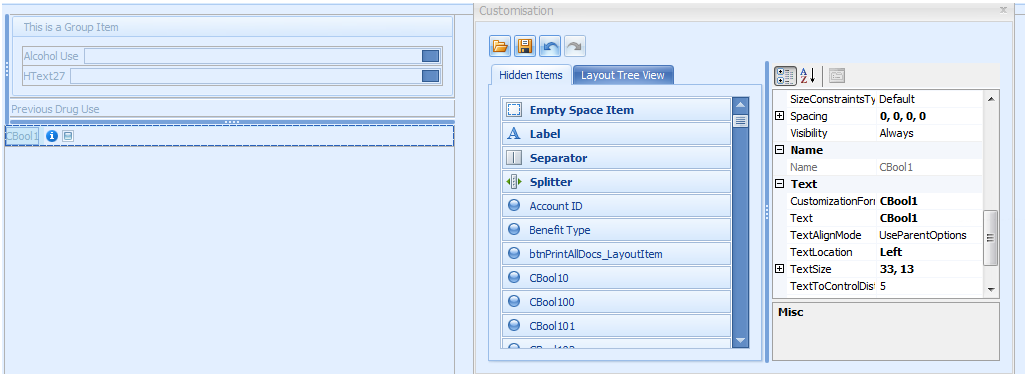
Field Options

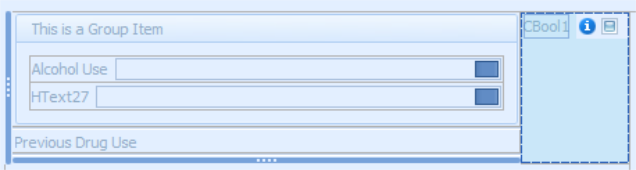
When a field is highlighted on the screen, the properties of that item are displayed. A field is highlighted when a blue dashed line can be seen around the edge of it.

Editing the field options changes the properties of the field. For example, edit the Text field to change what the field is called and hence the name that is displayed.

Empty Space

Inserts an empty space onto the form. It is used to change how the form is laid out.

  • Click and drag it onto the Client Details form.
  • Let the mouse go when it is in the correct position.

Label

Allows additional text to be added onto the form that is not related to a field, i.e. informational text or a heading as above.

  • Click and drag it onto the Client Details form.
  • Let the mouse go when it is in the correct position.

Separator

These are used to slightly separate one field or label from another. A separator is used on either side of the heading in the example above.

Can be used both horizontally and vertically.

  1. Click and drag it onto the Client Details form.
  2. Let the mouse go when it is in the correct position.

Splitter

Used to split information more distinctly than the separator.

  • The spacing of the information can be resized on the screen by a user by clicking on the.
  • Can be used both horizontally and vertically.
  1. Click and drag it onto the Client Details form.
  2. Let the mouse go when it is in the correct position.

Predefined Fields

These are fields that can be inserted but that have already been defined to hold some specific data. These fields could be used elsewhere in the system, for example, in reports so generally it is not a great idea to use them for a purpose different from what they were intended.
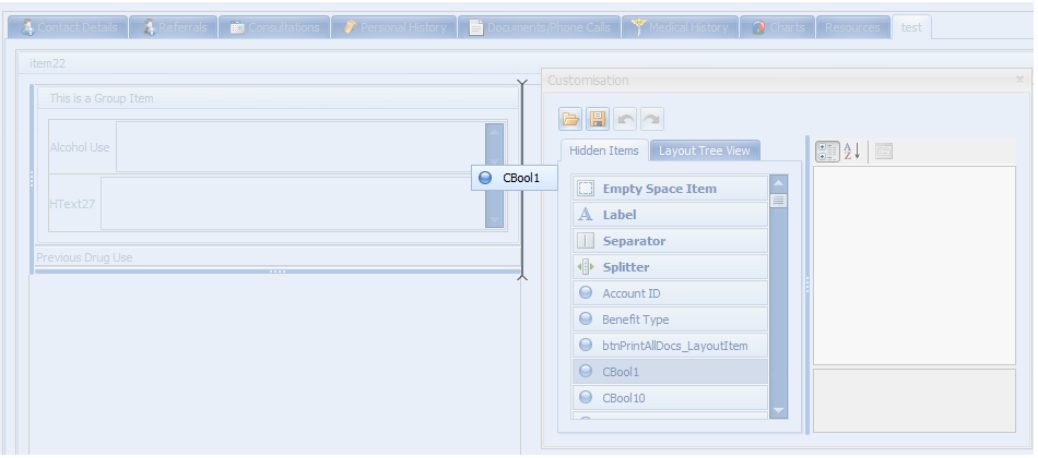
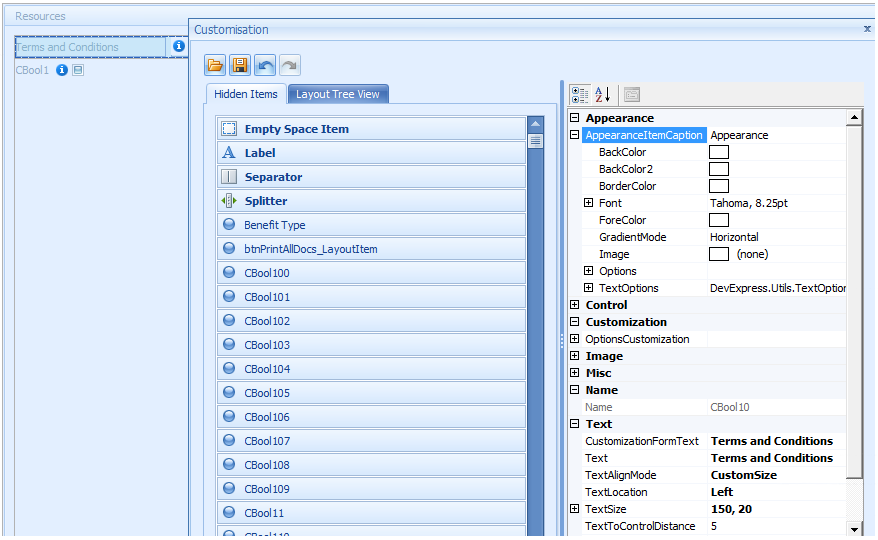
Customisable Fields

These fields are available to insert and use to collect any additional information required.

There are two types of fields, Consultation and History Fields, denoted with a C and H respectively.

There are four types of data that can be collected:

Text - these are called CText# or HText# - used to collect text information.

Numeric - CNumeric# or HNumeric# - used to collect number information.

Dates - CDate# or HDate# - these are used to collect date information and display the information in a date format.

Tick boxes - CBool# or HBool# - these are used for Yes/No or True/False type information.

# denotes the number of the field.

Adding a New Tab

Additional tabs can be added to the Client Details form when in Customisation mode.

  1. Right-click on the empty space next to the current tabs.
  2. Click Add Tab.
  3. A new tab will display next to the last tab.

Change a tab location


To change the Tabs location in the tab Order:

  1. Click on the tab and drag.
  2. A grey box will display to show where the tab can be drop.
  3. Drop (or let the mouse button go) in the correct location for the tab.
  4. The Tab can then be renamed.

Adding a Field

Fields, Labels, Empty spaces, Separators and Splitters are all added to a form using drag and drop with the mouse. This method can also be used to add a pre-created Tab and drag and drop into the location for a Tab.

  1. Right-click at the top of a layout and click Customize Layout to enter customisation mode and open the Customisation Window.
  2. Choose the field item to add from the Customisation Window. Keep the left mouse button down after selecting
  3. With the left mouse button still clicked, drag the field off the Customisation window and over the Client Details layout.
  4. A grey line (or box) will display as the field is moved across the form in any of the places available for the field to be inserted.

    Move the field around until the correct insertion line is displayed.

  5. Let go (or drop) the left mouse button to insert the field at the point of the insertion line.
  6. If it is not in the correct position, click on the field and drag again into the correct position.

    The changes are automatically saved when exiting the Customisation Window.

Editing a Field or Tab Name

  1. Enter Customisation Mode.
  2. Click on the field you want to update the field or tab name. A blue dotted line can be seen surrounding the field.
  3. Right-click on the name and select Rename from the context menu.
  4. Enter in the updated name of the field and press Enter. The field name viewed on the form will be updated.
  5. The Customisation Window text field will also be updated when the field is unselected and reselected.
  6. The changes are automatically save when exiting the customisation form.

If a field is not longer required, changing the Text field back to its original Name, e.g. CBool1 will ensure that it does not display in letters or in the Client print options.

Change the Width for Field Name and Wrap the Text

  1. Enter Customisation Mode.
  2. Select a field to resize. Hover the mouse over the borders of the field; the mouse cursor will turn into a double-headed arrow icon.
  3. Pull the borders of a field to change the width for the field text.
  4. Keep the field selected. Find the field in the Customisation Window.
  5. In the right hand side of the Customisation Window, open the option TextTextAlignMode. Change the value for TextAlignMode field to 'CustomSize', as shown above.

Change Word Wrap Settings

  1. Select the field to update from the Customisation Window.
  2. Expand the AppearanceItemCaption selection from the right hand side of the Customisation Window.
  3. Expand Text Options.
  4. Change Word Wrap to 'Wrap'.
  5. The text will appear on multiple lines at the width specified.


Last Updated: 19 December 2022