Invoice payments can be entered into Bp Allied on creation of an invoice, from the New Payment button in the top menu of the Invoices screen, or from the Add Payment button at the bottom of the invoice.
Create a Tyro Payment for a selected Invoice
- Navigate to Invoices from the left-hand panel in Bp Allied.
- Locate the invoice to be paid.
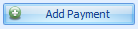
- Select Add Payment at the bottom of the invoice screen.
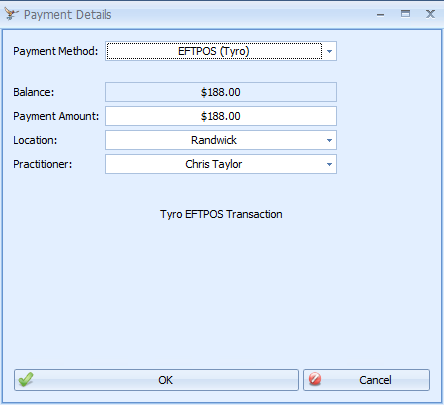
- Select the Payment Method = EFTPOS (Tyro).
- Enter the Payment Amount.
- The Location and Practitioner will populate with details from the invoice. These fields can be edited if need be.
- Click OK to proceed to the Tyro Screen.
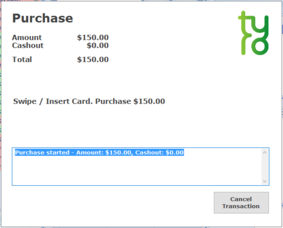
- The customer can now their card and pin details.
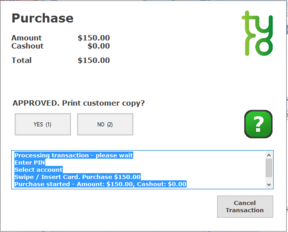
- Click Yes to proceed.
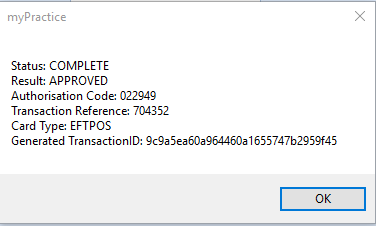
- When the transaction is approved a confirmation message will display.
- Click OK.
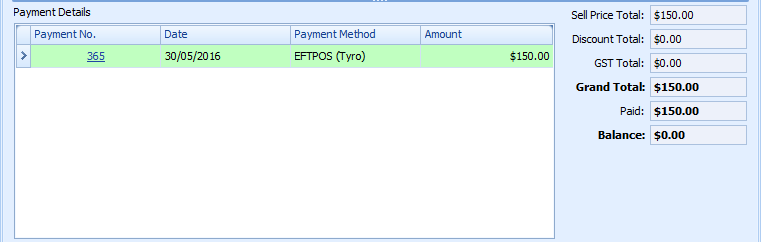
- The payment can be seen in the Payment Details of the invoice.
- Click Save. Invoices related to payments can be reprinted using the Print button.
NOTE The Practitioner entered will determine which bank account the payment is sent to if EFTPOS integration is used.
NOTE If the payment fails, a message is sent to Bp Allied to allows for the transaction to be resent or paid in a different way.
Edit Payments
To edit a payment, click the Payment No. link from the invoice under Payment Details.
Editable fields:
-
Location
-
Payment Date
-
Notes
-
Cheque No. This field is only editable if the payment type is Cheque.
All other fields are locked. Payments must be deleted and recreated if any locked fields are incorrect.
Create a Tyro Refund
- Click the Payment No. link from the invoice under Payment Details.
- Click on the X under the Remove column at the end of the invoice line.
- Bp Allied will prompt to confirm the removal. Click Ok to confirm. The amount of the invoice will display in Credit Available.
- Click Refund.
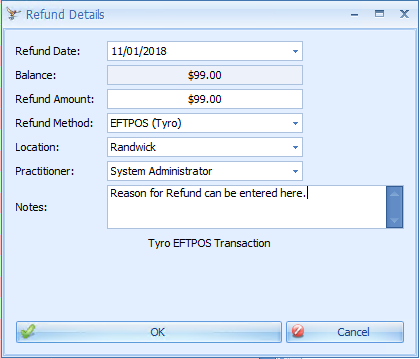
- Enter the Refund Method. Location and Practitioner. Partial refunds are not available.
- Click Ok.
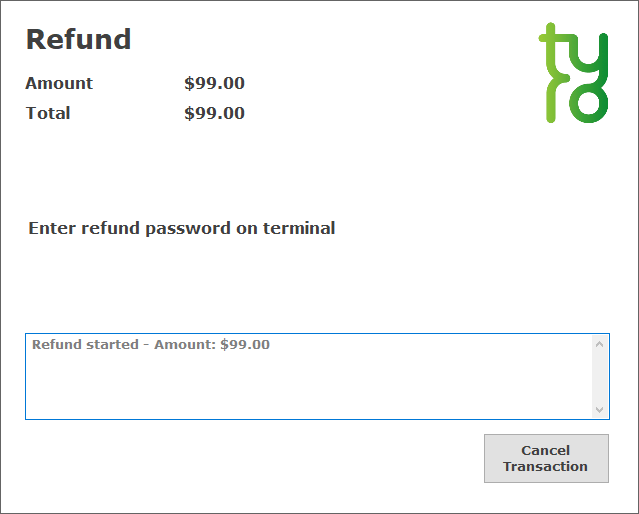
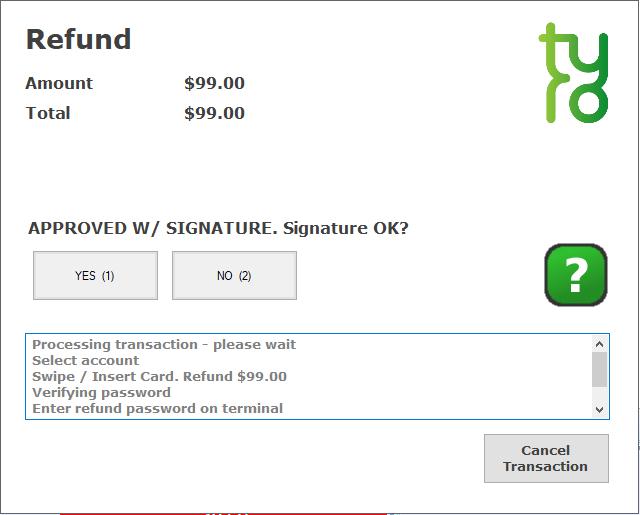
- The Tyro refund screen will display. Follow the instructions on your Tyro terminal, until the receipt requiring a signature prints.
- Click Yes to approve the refund.
- Choose whether to print another copy of the receipt.
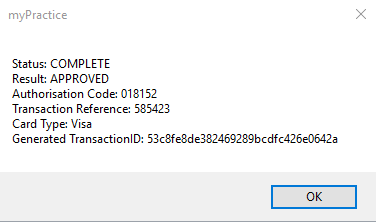
- The final status screen will display. Click OK to finalise the transaction.
Last updated: 13 January 2023


 AU
AU 