After you have entered Customisation mode, the Customization window will be displayed over the layout being customised.
- Hover the mouse over a field in the layout. A light border will appear around the field.
- Right-click while inside the border and and the Customisation context menu will be displayed, allowing you to edit that part of the layout. Or click in an empty space to insert a new field or label.
- The customisation options in the context menu are:

|
Field |
Description |
|---|---|
|
Hide Customisation Form |
Hides the Customisation window. |
|
Best Fit |
Orders the items according to the systems Best Fit criteria. Use with caution. |
|
Size Constraints |
Used to lock the field sizes so that they don't change when the form is resized. This can cause issues if customised layout are used on different computers with different screen sizes and resolutions. |
|
Rename |
Used to rename the field. |
|
Hide Text |
Hides the selected text. |
|
Text Position |
Positions the text that names a field in relation to the field entry box. By default the field names are set on the left. See the examples below.
|
|
Hide Item |
Hides the selected item. |
|
Add Empty Space item |
Creates an empty space item that can be used to manage empty space in a form. This is the same as the Empty Space item in the Customisation window. |
Undo a layout edit
If you make an error using the customisation context menu, you can reverse the change using the Undo / Redo arrows in the top left of the Customisation Window. Bp Allied may take a few seconds to process the undo action.
Group items for tabbing and appearance
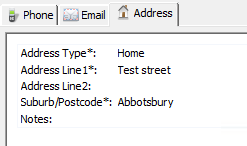
A Group is a way of grouping a number of related fields together. A Tabbed group can also be created that creates a tab effect as shown.
To create a group or a tabbed group:
- Select a field.
- Right-click and select Group or Create Tabbed group.
- A group effect will be shown around the item indicating a tab or group area.
- Additional fields can be dragged and dropped into the tab or group.
To add a second Tab:
- Select a field.
- Right click and select the Create Tabbed group option.
- Drag the new Tab up alongside the first tab and drop into place.


 AU
AU 