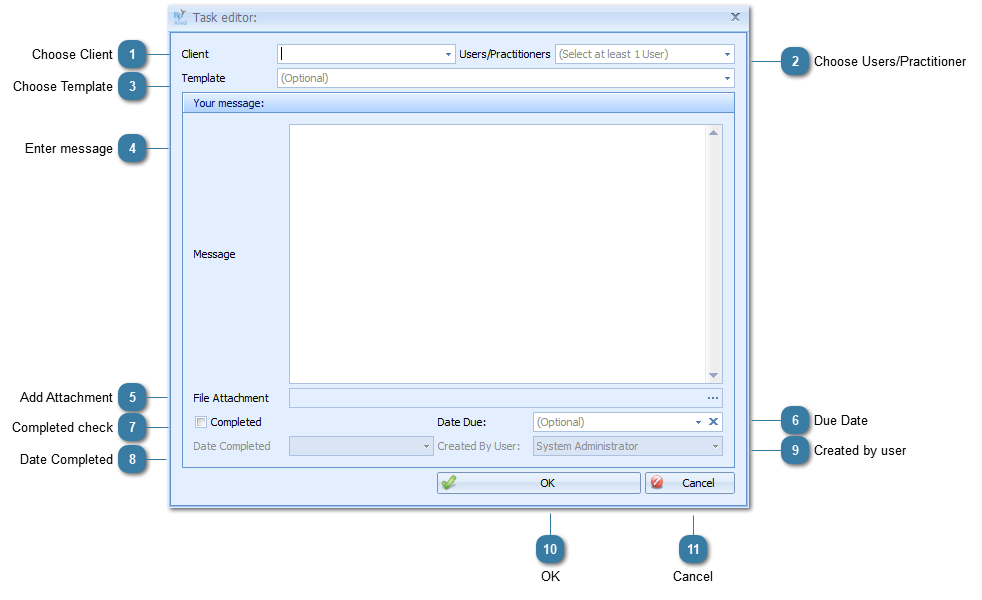
 Choose ClientTo create a task relating to a Client select the Client's name from the drop down list.
|
 Choose Users/PractitionerSelect a User to be assigned the task. This field is mandatory.
Task can be created for Users other than yourself. Who creates them for who and when will be a practice process.
Tasks can be assigned to multiple people but once that task is completed by one person, and marked completed, that's it done. A task is a single unit of work therefore if 2 people need to do the similar tasks, then that is 2 tasks and should be recorded as such.
|
 Choose Template |
 Enter messageEnter in details about the task to be done, if no template is selected.
|
 Add AttachmentAttach a file if required.
If a template is selected then that may automatically attach a required file.
|
 Due DateA Due Date may be automatically entered when a Task Template is selected. This date can be changed.
|
 Completed checkTick this when the task is completed. This will remove the task from your tasks "to do" list.
|
 Date CompletedThe is entered when a task is ticked as complete.
|
 Created by userThis is the user that was logged in and created the task.
|
 OKClick OK to save the Task
|
 CancelClick Cancel to cancel the Task
|
|

