Use Print Setup to change the way your calendar will print.
The quickest way to print a daily calendar is to use the
Daily Appointment List. The
Print Setup option is found on the Appointments Navigation Bar. Clicking on Print Setup opens the
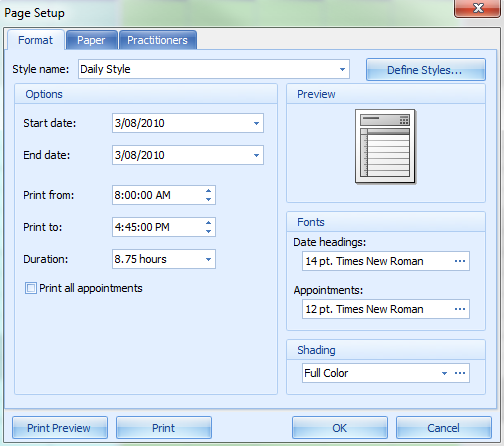
Page Setup dialog box. There are three areas that can be changed:
Each of these areas is explained below.
Changing the Format
Select which Style Name you would like to print from the drop down menu
Style name options
|
Daily Style
|
Prints the calendar for the date you select
|
|
Weekly Style
|
Prints the calendar for the week you select
|
|
Monthly Style
|
Prints the calendar for the month you select
|
|
Tri-fold Style
|
Prints a Left Section, Middle Section and Right Section and allows you to change which type of calendar you wish to print in each section. Eg, Left - Daily, Middle - Weekly, Right - Monthly.
|
|
Calendar Details
|
Prints a summary of Appointment Times, Client Name, Consultation Type and any notes relating to the client appointment
|
|
Memo Style
|
Prints a more detailed summary of Appointment Start and End time, Client Name, Location, whether the appointment is a recurring one and any notes relating the appointment. NB. You must first select the Appointment you wish to print before going into Print Options
|
|
Create your own style by using the Define Styles option.
|
Click on Define Styles
Choose the Style type to base you style on
Enter in a New style name
Click Add
Click Close
This will then be saved and show up in the list of Style Names to be used again
Select your style under Style Name
The changes made in the options will be saved when OK to the Page Setup dialog box is clicked.
|
Options
 Some fields are only relevant to some Style types. An example only is discussed below.
For the Daily Style choose the following:
Choose the Start date and End date for the range in which you want the calendar to be printed
Select the time range (Print From and Print To) for the calendar to be printed and the Duration defaults
OR
Simply select the Duration of time you wish to print. Eg, 1 Day
Tick the Print all appointments tickbox if relevant
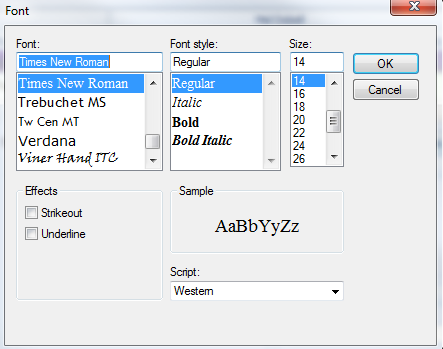
Fonts
The font for both the Date Headings and the Appointments.
Select the

to display the Font dialog box
Choose the Font, Font Style and Font Size as required
Click OK
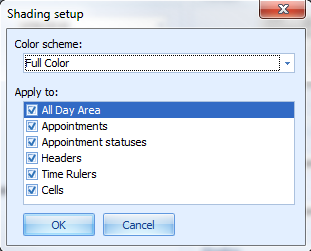
Shading
Use the drop down to select whether to print the Calendar in Full Colour, Grey Scale or Black and White.
OR
Click on the
to customise the calendar shading
The Shading setup dialog box is displayed
Select the Colour Scheme
In the Apply to box tick the areas to apply the colour scheme to.
Click OK
View how your Calendar will look when printed by clicking Print Preview. Once you are happy with the appearance of your Calendar click Print.
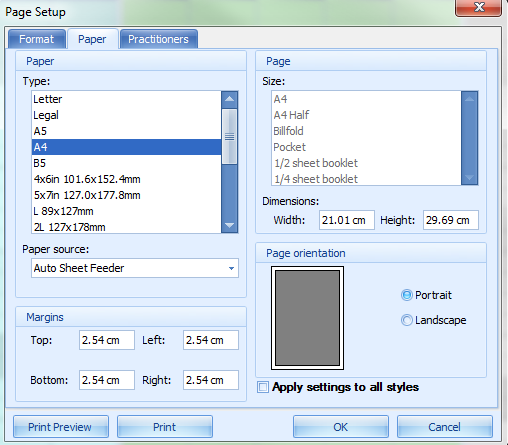
Paper
This section is used to set the margins, the size of paper to use and whether the calendar is to print in landscape or portrait mode.
Select the paper Type to use
-
The most common size paper is A4
Change the Top, Bottom, Left and Right Margins as required
-
Adjusting the margins enables more information to fit on one page.
In the Page Orientation section, select whether the Calendar is to be printed in Portrait or Landscape.
Check the tickbox next to Apply settings for all styles to apply the paper tab settings to all calendar styles.
View how your Calendar will look when printed by clicking Print Preview. Once you are happy with the appearance of your Calendar click Print.
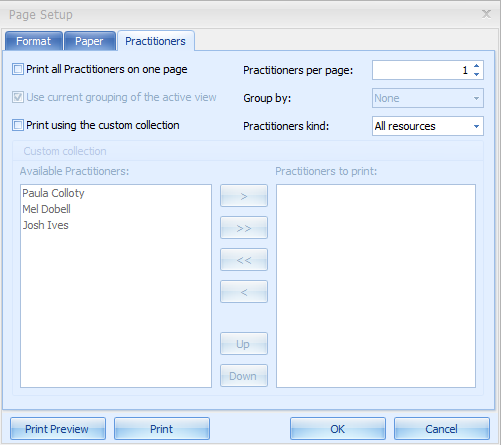
Practitioners
The Practitioners tab is used to select which Practitioner Calendars you wish to print out.
Tick Print all practitioners on one page to print all selected Practitioner Calendars on one page
-
This is ticked by default
OR
To specify how many Practitioners to print per page
Untick the Print all Practitioners on one page tickbox
Tick Print using the custom collection tickbox
In the Available Practitioners box
Click on a Practitioner name
Click the Arrow button

to select that Practitioner and move into the Practitioners to Print box
OR
Click on the double Arrow button

to select all Practitioners
To shift a Practitioner out of the list click the backward Arrow button

In the Practitioners per Page drop down select how many Practitioners to print per page.
 The Use current grouping of the active view and the Group By boxes have been disabled.
View how your Calendar will look when printed by clicking Print Preview. Once you are happy with the appearance of your Calendar click Print.
Click OK to save your changes