
This article explains how to use the Document writer to create correspondence in Bp Omni.
The Document Writer in Bp Omni can be accessed from the patient or client clinical record, or via the top bar by selecting Admin > Create a document. Regardless of where the Document Writer is accessed, the process remains the same.
In this article:
Open the Document writer
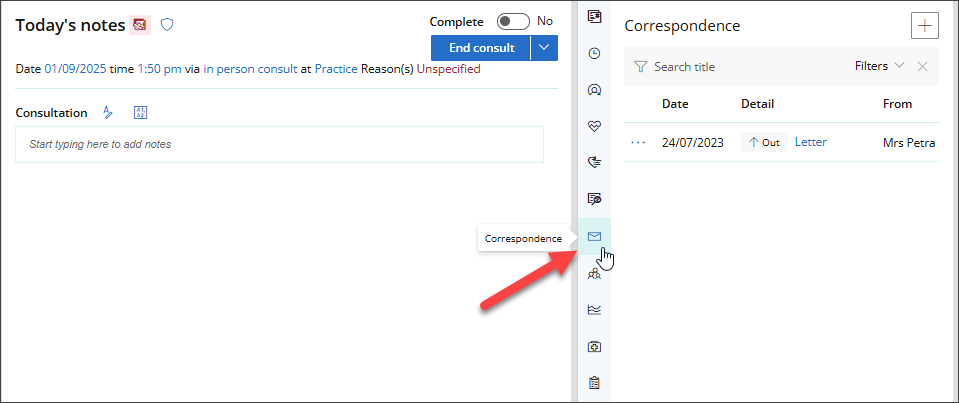
- From the patient/client tree in the clinical record, click Correspondence (the envelope icon). The Correspondence panel will appear.
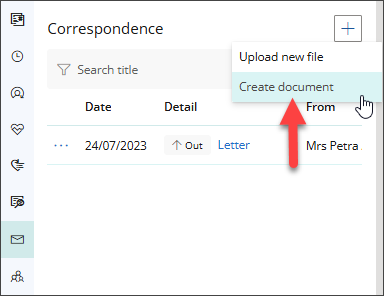
- To create a new document, select the plus icon and click Create Document.
-
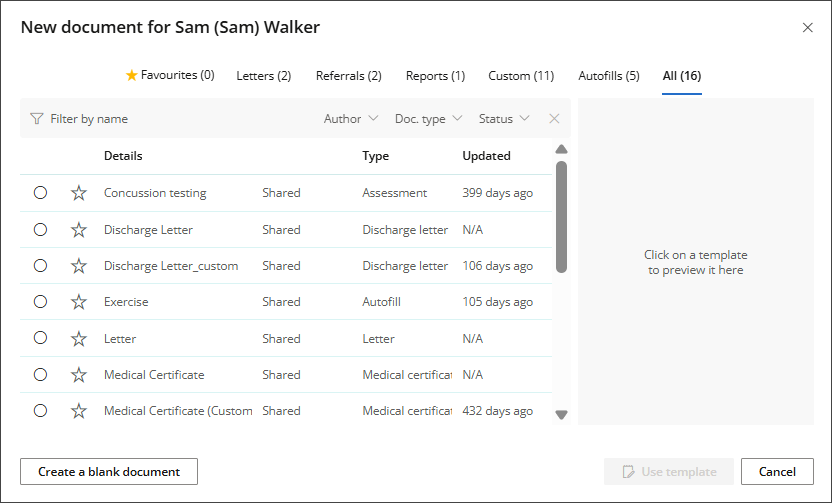
To create the document using a template, select one from the available options and click Use template.
If you do not want to use a template, click Create a blank document.
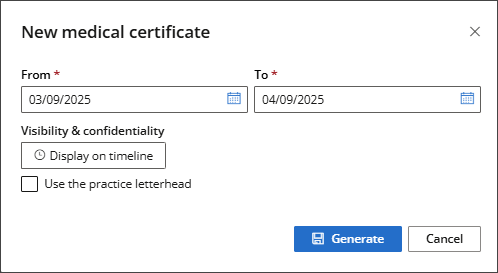
- Depending on your selected option, the next screen will prompt you for additional information, such as a recipient or a date range.
- Complete the mandatory fields and click Generate.
Specify whether the document should appear on the timeline in the clinical record.
The Document Writer modal will open.
Using the Document writer
Click Edit details in the top-left of the screen to change the document details.
If you select Edit details, you will have the option to change the document's Subject, which changes the Title of the document in the Correspondence screen.
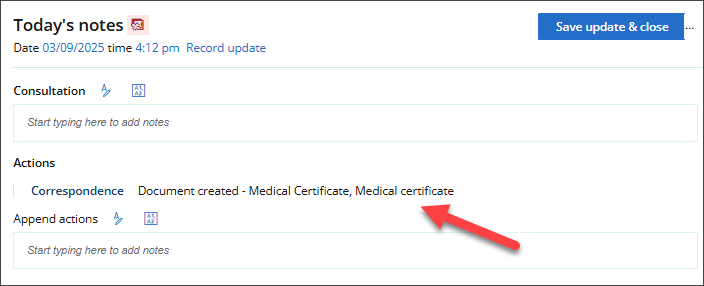
If you change a subject of a document during a consultation, the new subject will appear in the Today's notes.
If you change the subject of a document after the consultation has been finalised, the updated name will not appear in Today's notes.
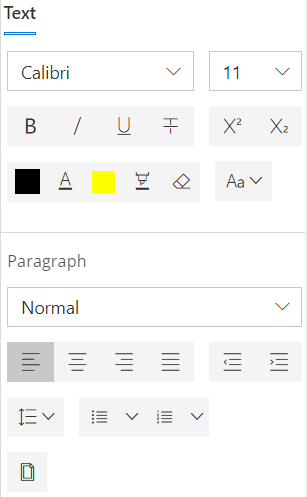
Format the document using the options at the top of the screen.

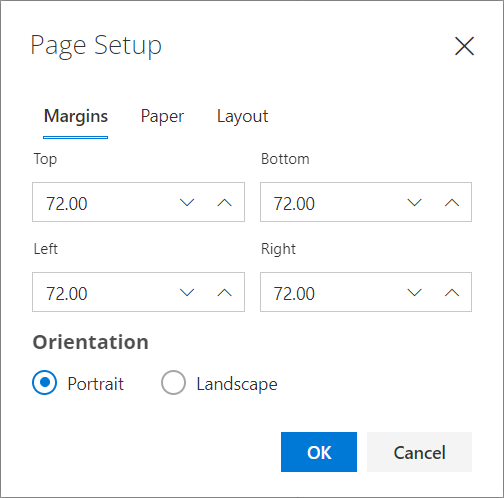
To change margins, paper and layout options, click Page Setup.
Use the options to the right of the document to format the document text.
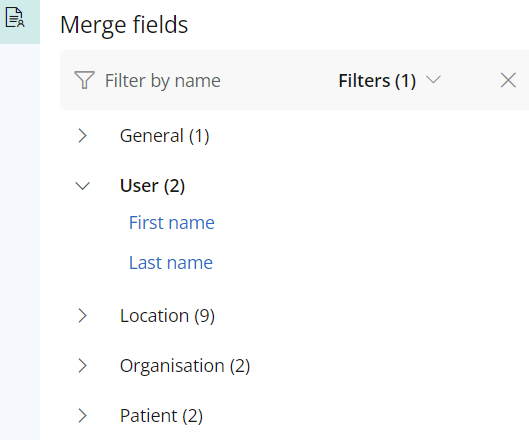
Merge fields
You can add a database value to a document, for example, the patient's name, or the practice's phone number. To add a value, place your cursor where you want the value to display in the document, then select from the options available in Merge fields to the right of the screen.
Finalise the document
Save the document as a draft
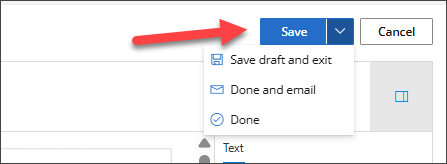
If you have finished editing your document but you still have further changes to make, click Save draft and exit.
The document will be saved to Correspondence with the status of Draft, and an action will be added to Today's Notes.
To view a document's status in the Correspondence section, maximise the right hand-section of the clinical record by clicking the left arrow at the bottom of the screen.
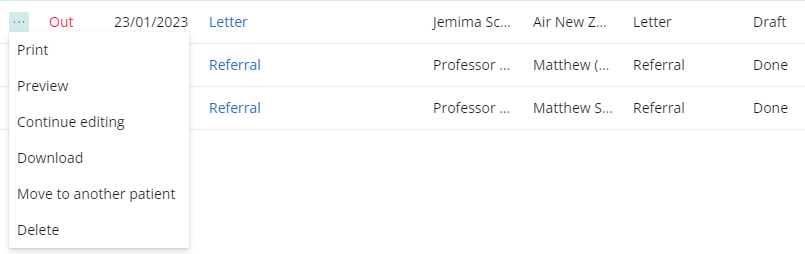
Click the draft document's title in Correspondence to continue editing, or click the ellipsis next to the document for the following options:
- Edit: return to the document writer to continue working on the document.
- Preview: View the draft document's contents.
- Print: Print a copy of the draft document.
- Task Outcome: If applicable, indicate the outcome, such as attempted contact, informed, booked, given, or none.
- Move to: Move the document into a different Patient or Client's clinical record, to Investigations or Clinical Images.
- Delete: Delete the document.
Save the document as done and send it via email
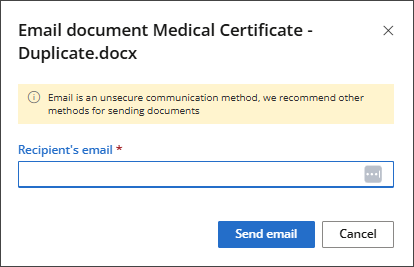
If you are ready to finalise your document, click the down arrow next to Save and select Done and email.
The Email Document modal will appear. Enter the Recipient's Email and click Send Email.
The document will be sent as an attachment in .DOCX format.
The document will be saved to Correspondence with the status of Done. Once a document is finalised, you will no longer be able to edit its contents.
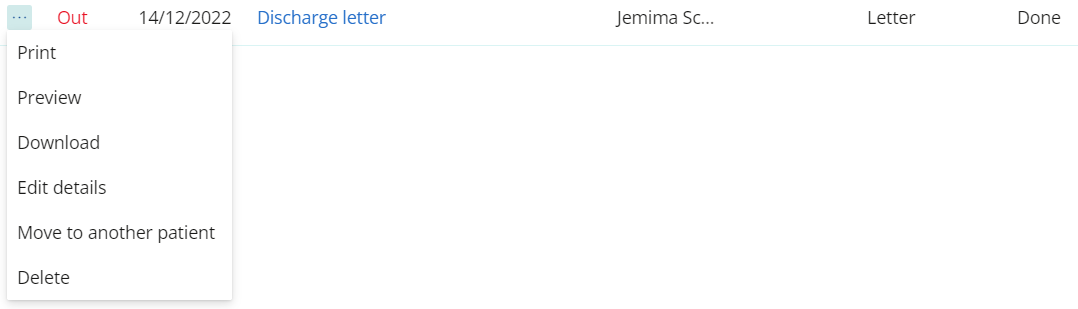
Click the finalised document's title in Correspondence to view a preview of it, or click the ellipsis next to the document for the following options:
- Preview: View the document's contents
- Email: Email the document as an attachment in .DOCX format.
- Duplicate: Create a duplicate of the document.
- Edit details: Change details about the document such as the file name and date.
- Print: Print a copy of the draft document.
- Task Outcome: If applicable, indicate the outcome, such as attempted contact, informed, booked, given, or none.
- Move to: Move the document into a different Patient or Client's clinical record, to Investigations or Clinical Images.
- Delete: Delete the document.
Save and mark the document as done
If you are ready to finalise your document, click the down arrow next to Save and select Done.
The document will be saved to Correspondence with the status of Done. Once a document is finalised, you will no longer be able to edit its contents.
Click the finalised document's title in Correspondence to view a preview of it, or click the ellipsis next to the document for the following options:
- Preview: View the document's contents
- Email: Email the document as an attachment in .DOCX format.
- Duplicate: Create a duplicate of the document.
- Edit details: Change details about the document such as the file name and date.
- Print: Print a copy of the draft document.
- Task Outcome: If applicable, indicate the outcome, such as attempted contact, informed, booked, given, or none.
- Move to: Move the document into a different Patient or Client's clinical record, to Investigations or Clinical Images.
- Delete: Delete the document.
Last updated: 04 September 2025.


 AU
AU 