
The Bp Premier Reporting Tool extracts information on possible inherited and rare diseases from clinical data and correspondence for practices working with Pryzm Health.
In this article:
Download and Install the Bp Premier Reporting Tool.
- Click here to Download the Bp Premier Reporting Tool.
- The file will download to the default download directory for your version of Windows, such as Favorites > Downloads. You may be asked to confirm that you want to download the file.
- Copy the downloaded file to the Bp Premier server or any workstation and double-click the file to start the installation.
- Windows User Access Control or SmartScreen may prompt for permission to proceed. Click Yes. The Application Install screen will appear.
- Click Install. A progress dialog will show the report utility being installed.
- When the utility has been installed, the Bp Premier Reporting Tool will open. A Bp Premier Reporting Tool icon will also be created on the Windows desktop.


Installation is complete.
Run the reporting tool
Double-click the desktop icon to start the reporting tool.
- Click Pryzm Health - Rare Disease Patient Stratification Report. The Login panel will open.
- Select the user name and enter the password of a Bp Premier user.
- Click Next. The Settings panel will open.
- The four options for Data to Include are all selected by default. Untick any data sources you do not wish to generate a report for. Each source will generate a separate file.
- If you are generating a report from patient referrals correspondence, you can supply Advanced Filtering options to only include correspondence that matches your criteria. If you do not need to filter referrals, click the X at the end of the Advanced Filtering rows to remove the default options. Click Add to add more filter rows.
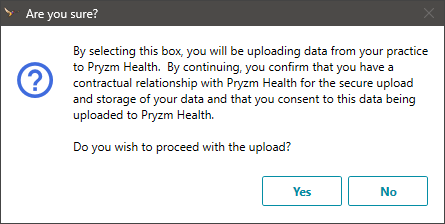
- Tick Upload generated data to Pryzm to confirm that you want to send the data extraction report to Pryzm.
- An alert will appear. Click Yes to continue with the upload.
- Click Next. The Generating panel will open and the Reporting Tool will show a progress bar while the selected reports are generated.
- Click Save to open a Windows File Explorer and select a folder to save the files. Reports are generated as XML files only. The report filenames will match the type (Referrals, Clinical, or Structured) and will also have a timestamp in the filename.

The user must have the Reports permission set to 'Allow access'.

Advanced filtering
Select 'Like' to match the expression in the right hand field, or 'Not Like' to match the opposite of the expression. The expression in the right hand field uses SQL Server's Transact-SQL syntax for the LIKE logical operator. More information on the LIKE operator can be found in the SQL Server documentation here.
In the example above, only correspondence that includes the words 'referral' or 'specialist' in the subject line will be included in the report.
Data upload

Only untick the Only include data created/updated since last Pryzm Upload check box if you need to resubmit reports to Pryzm that have been sent previously. This will take longer than submitting data created or updated since your last upload.

Report generation is complete.
Download data from Pryzm and view reports in Bp Premier
Once you have uploaded your reports to Pryzm, you will then need to download the returned results based on the report data from Pryzm via the reporting tool. The results are imported into Bp Premier like a pathology or imaging result, and managed from Incoming Reports.
Download data from Pryzm
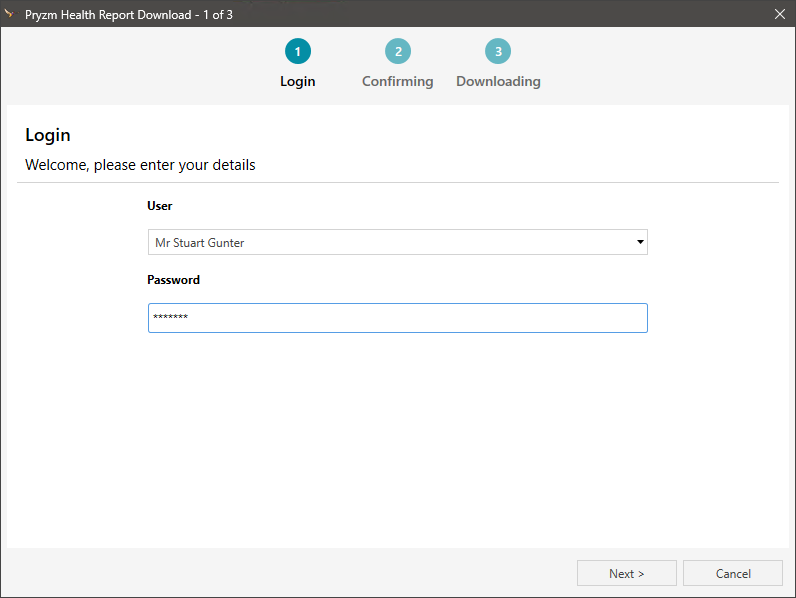
- In the Reporting Tool, click Pryzm Health - Rare Disease Patient Stratification Data Download. The Login panel will open.
- Select the user name and enter the password of a Bp Premier user.
- Click Next. The Confirmation panel will open. The panel will show when your last download occurred.
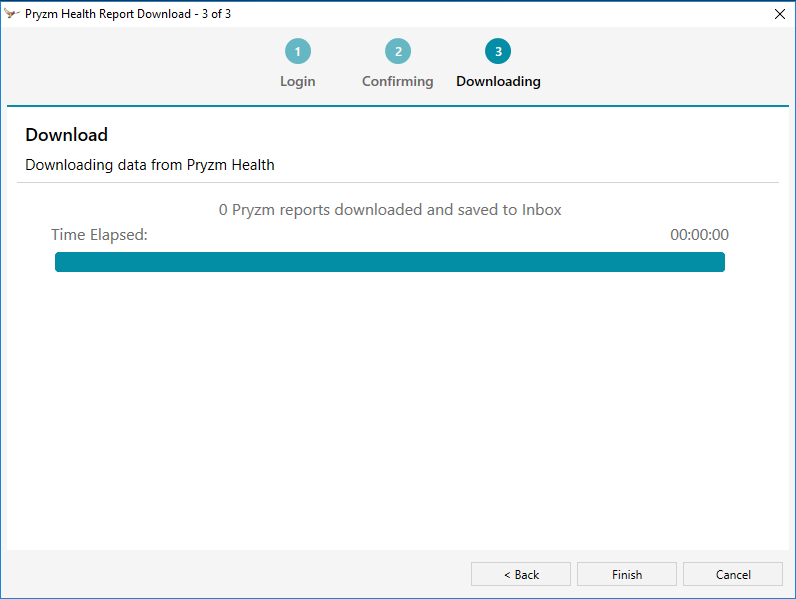
- Select Next. The Download panel will open and the Reporting Tool will show a progress bar while the reports are downloaded.
- Click Finish to end the download process.
The user must have the Reports permission set to 'Allow access'.
View Pryzm reports in Bp Premier
Once you have downloaded data from Pryzm, any reports will be available to view and allocate from Bp Premier.
- From the Bp Premier home screen, select View > Incoming reports. The incoming reports screen will appear.
- To allocate a Pryzm report, select it from the list of incoming reports and click Allocate to user. The laboratory name on the report will be Pryzm Health. Pryzm reports are PDF documents.
Schedule Pryzm Reports and Data Downloads
You can schedule your Pryzm report or data download to run automatically at an appropriate time.
For Pryzm reports, it is recommended that you set the data upload to run every Friday evening, and the data download to run every Sunday evening. These are the default times for scheduled uploads and downloads. You are able to change the default scheduling if you wish.
You must schedule the data download to run on a computer that will also be running when the upload is scheduled (e.g. the practice server machine).
- Click Schedule Reports on the Bp Premier Reporting Tool home page. The Login screen will appear.
- Enter your Bp Premier credentials and click Next. The Select Report screen will appear.
- Select the report you wish to schedule and click Next. The Settings screen will appear.
- If required, change any report settings and click Next. The schedule screen will appear.
- If you have scheduled the Rare disease Patient Stratification report (upload), by default it will now run automatically on Friday evenings. If you have scheduled the report download, by default it will run automatically on Sunday evenings. If you wish to modify this schedule, you can do so using the Task Scheduler.

Modify default download and upload schedules
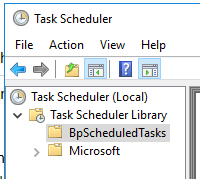
- Select Open Task Scheduler in step 4 of the scheduling wizard.
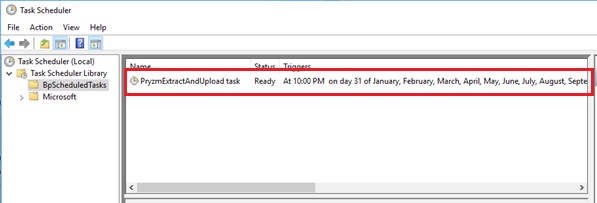
- Open the BpScheduledTasks folder on the left side of the wizard. You may need to expand the parent Task Scheduler Library folder to see it. A list of tasks will appear in the panel to the right.
- Double-click on a task to schedule it. The properties screen for the task will appear.
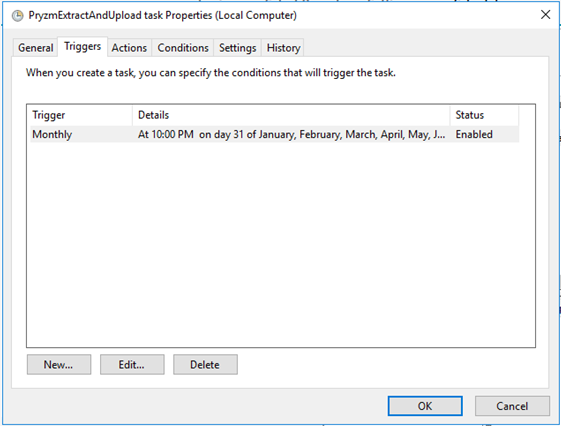
- Select the Triggers tab from the top of the properties screen.
- Select the default trigger and click Edit. The Edit Trigger screen will appear.
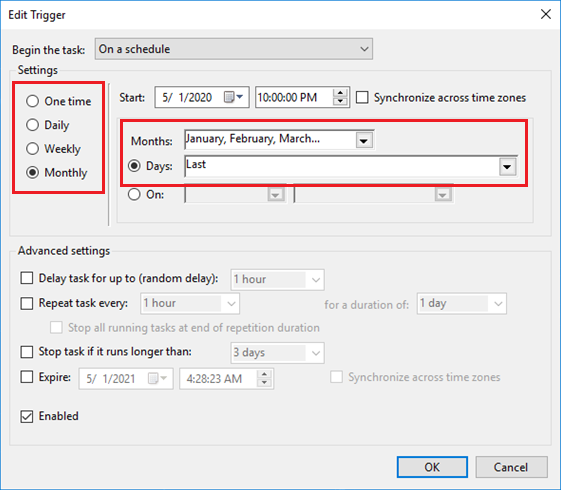
- Select a new schedule for the job to operate on, and click OK.
- Click OK in the Properties screen and close the Task Scheduler.
- Repeat for any other required reports or downloads to be scheduled.

Last updated: 06 May 2025.


 AU
AU 