After you set up your practice profile for display, work your way through the left side tabs to finish setting up online booking:
1. Configure your online booking settings
- Select the Online Settings tab.
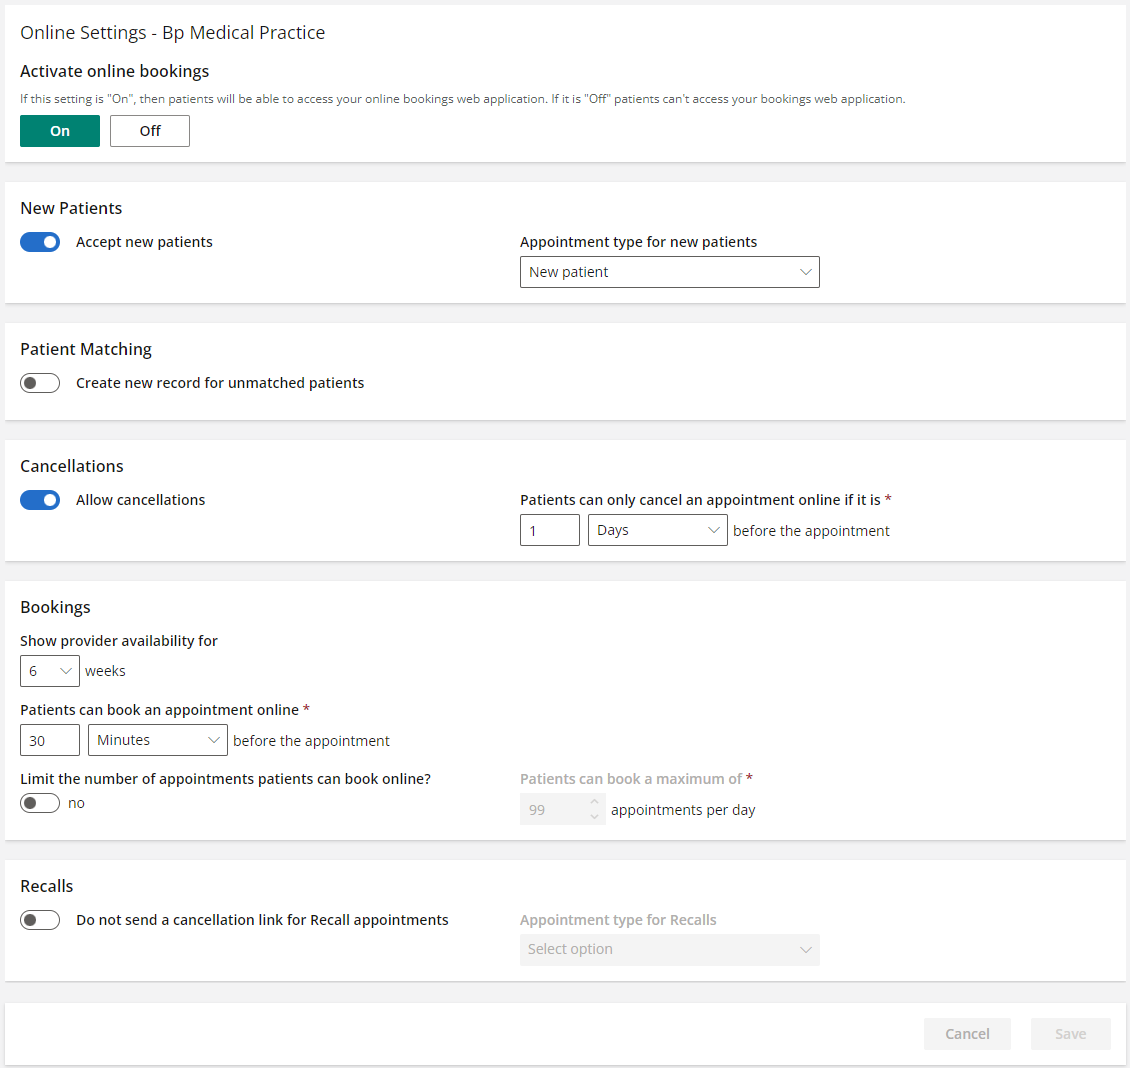
- Set the New Patients toggle to 'Accept...' if you will allow new patients to book appointments online. If you accept new patients, select the default Appointment type for new patients on the right.
- Set Patient Matching on if you want to automatically create a new patient record in Bp Premier if a patient books online, and no matching record is found in Bp Premier. The record will be created with the information supplied during online booking. A Bp Premier operator will complete the record when the patient is arrived at the practice.
- Set Cancellations to allow or deny the ability to cancel an appointment online. If you allow cancellations online, set the time period before the appointment during which the patient can cancel.
- Set Show provider availability for to the number of weeks into the future that patients can check a provider is available.
- Set Patients can book an appointment online to a period before the desired appointment time during which patients can book online.
- Set Limit the number of appointments patients can book online? to 'yes' or 'no'. If you select yes, set the maximum number of apppointments a patient can book in a day
- Set Do not send a cancellation link for Recall appointments to 'no' (left) if you do not allow recall appointments to be bookable online, or you allow recalls to be booked online but you do not want patients to be able to cancel a Recall appointment online
- Otherwise, set Do not send a cancellation link for Recall appointments to 'yes' (right) if you allow recall appointments to be bookable online, and you want patients to be able to cancel a Recall appointment online. Select the default appointment type for Recall appointments.
- Select Save.
This tab sets your practice's rules for managing bookings for new patients and appointment cancellations. Leave Activate online bookings set to 'Off' until you have completed all the steps in this article.
The patient can still change their appointment type during booking.
If you select 'No' to Patient Matching, if a matching patient record is not found in Bp Premier, Bp Premier will create a 'non-patient appointment' in the appointment book, and an operator can manually add the new patient before or when he or she arrives. See Manage an unmatched patient for more information.
For example, if set to '2 Hours', patients can book a 12:00 pm appointment at any time up to 10:00 am that day.
IMPORTANT Best Health Booking recommend selecting the system appointment type of 'Recall' or a custom equivalent, so that cancellations of recall appointments can be limited to specific user groups in Bp Premier. Not all Bp Premier user categories can cancel Recall appointments. You will need to make the Recall appointment type bookable online in the next section.
2. Add the available appointment types
- Select the Appointment Types tab.
- Select an appointment from the Type column to open the Edit Appointment Type popup.
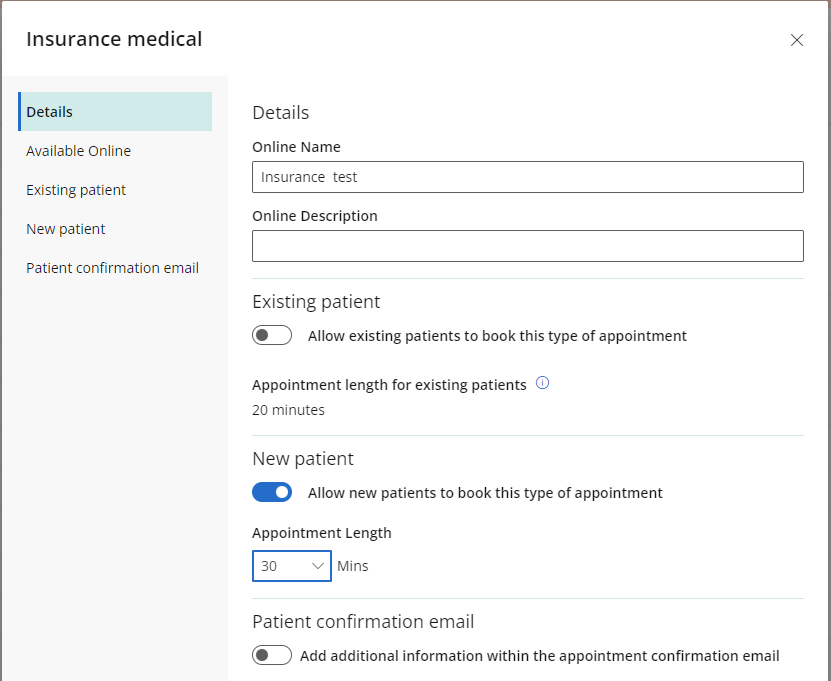
- The Online Name and Online Description are displayed to patients when booking online. You can override the definitions from Bp Premier to suit your online booking, for example, to supply more guidance about why a patient should select a certain appointment type.
- Set Available Online to Yes (toggle to the right) to make this appointment type bookable online.
- Select Save to save the appointment type definition.
- Go through the list of appointment types and enable all types you want available from Best Health Booking.
- Select the direction icon
 and drag and drop to re-order the list as it appears to the patient online.
This tab sets the appointment types available for booking online, with options to modify descriptive text for patients. The list will show all appointment types defined in Bp Premier (Configuration > Appointments > Appointment Types).
A warning at the top will show any unassigned appointment types you may have missed. Start typing text into the search field on the right to filter the appointment types shown.
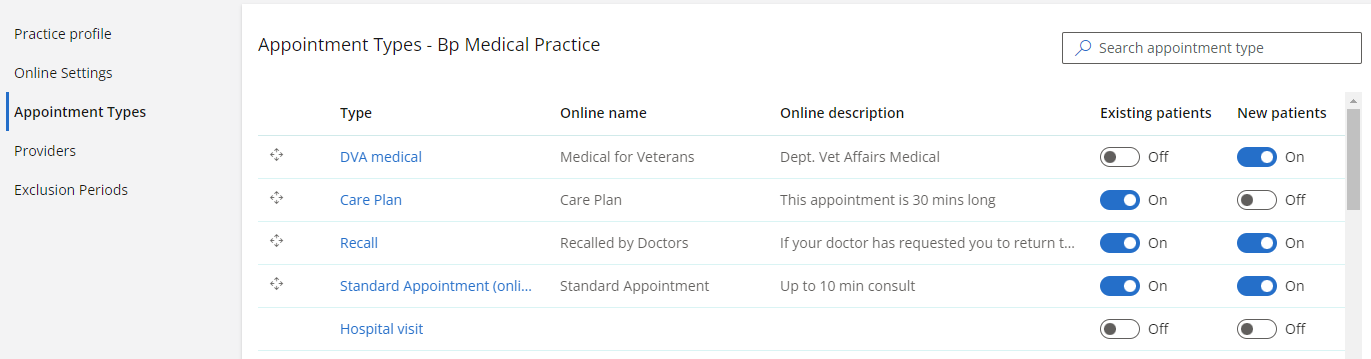
You may wish to disable some appointment types from being booked online, such as a long Enhanced Primary Care consult. If you have selected a default appointment type, you cannot disable it from online booking.
3. Set your exclusion periods
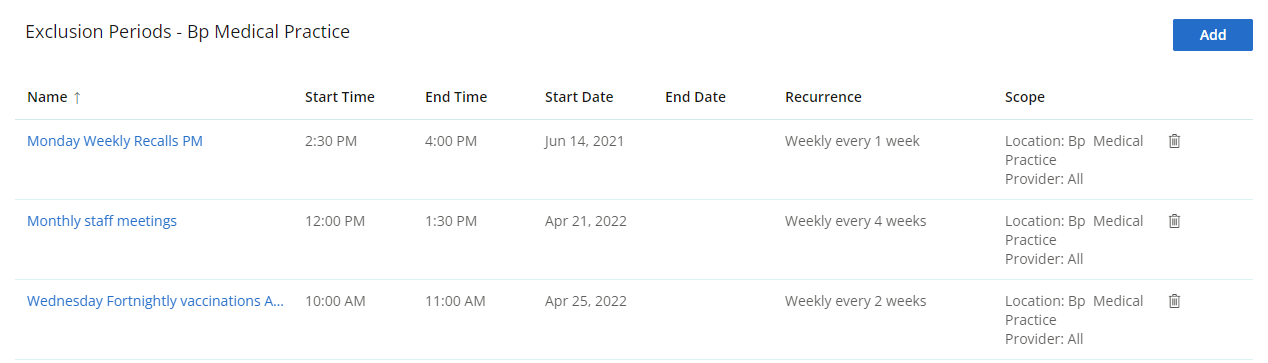
- Select the Exclusion Periods tab.
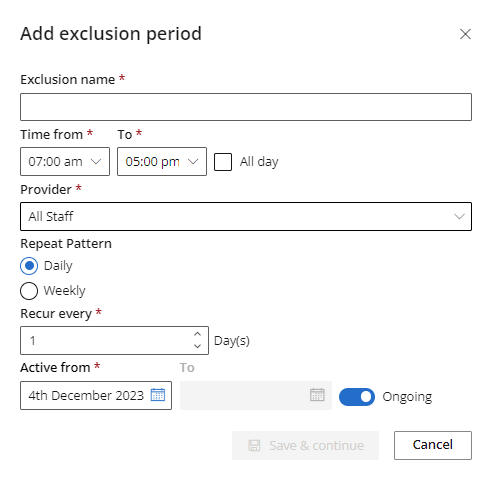
- Select an existing period from the list, or select Add in the top right to create a new exclusion period. The following example creates an exclusion period of 2:30 pm to 5:00 pm every Friday afternoon.
- Enter a descriptive Exclusion Name and select a Schedule Duration start and end time.
- Select the Provider or providers to which the exclusion period applies, or apply the exclusion to 'All staff'.
- Set the Repeat Pattern:
- Reoccur Daily or Weekly.
- If Weekly, set the nth number of weeks the exclusion should apply to in Recur Every.
- Select the days of the week the exclusion should apply to.
- Set the Range into the future the exclusion should apply for.
- Select Save.
Exclusion Periods are periods of time in your appointment book that are unavailable for booking online. For example, you may wish online-booked appointments to be no earlier than 10am, or no later than 4pm. Or you can set up recurring blocks of time.
You can now select which of your doctors can be booked online, and create an online booking profile for doctors who opt in.
What do I do next?
Last updated 06 September 2022


