
This article describes how to configure online booking settings, including appointment types, patient recalls, cancelled appointments, and patient matching in Bp Premier.
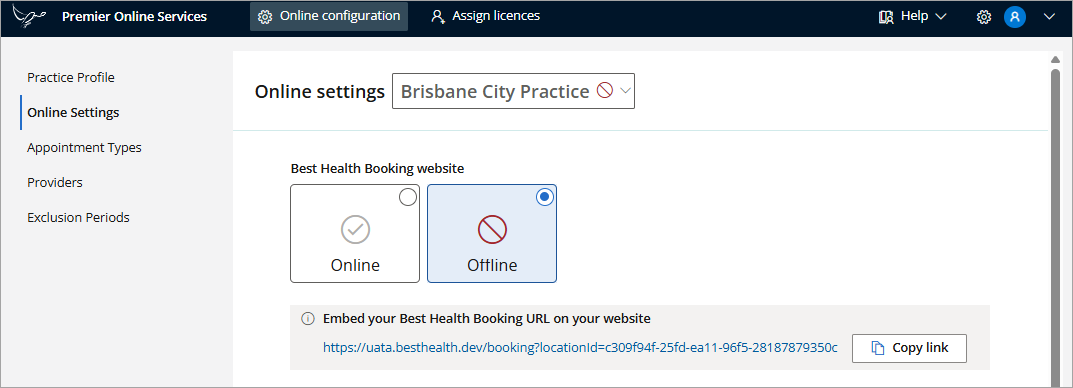
IMPORTANT To avoid incomplete online bookings, leave Best Health Booking set to Offline until all configuration steps are complete.
In this article:
- From the left-hand menu, select Best Health Booking > Online Settings.
- The Best Health Booking URL is a unique URL for your practice that is used to embed online booking on your practice's website, social media pages, or Google Business Profile.
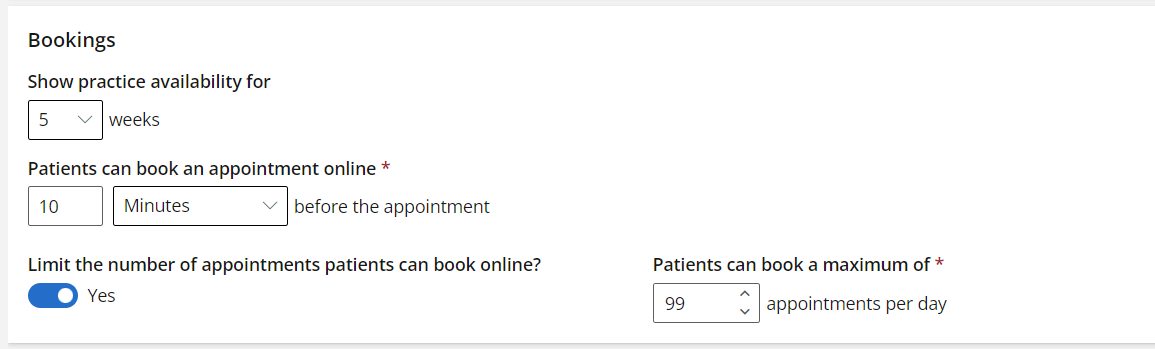
- Set Show appointment book online for to the number of weeks into the future that patients can check a provider is available.
- Set Online bookings can be made to a period before the desired appointment time during which patients can book online.
- Set Limit the number of appointments a patient can book to 'yes' or 'no'. If you select yes, set the maximum number of appointments a patient can book in a day
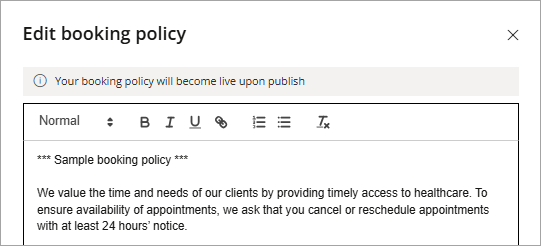
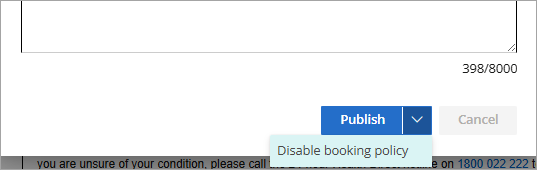
- Create a Booking policy that is shown to patients when they start the online booking process, using the text editor controls.
- To publish or disable a booking policy, select Publish or Disable booking policy from the Edit booking policy modal.
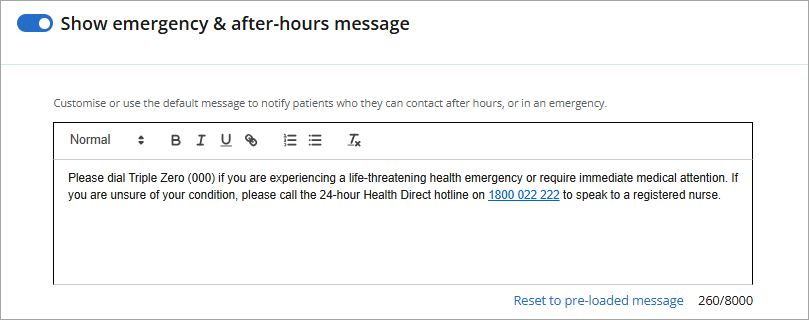
- Create a custom Emergency & after-hours message or use the pre-loaded message to notify patients who they can contact in case of emergencies. Alternatively, you can turn this message off by toggling the switch to the left (off).
- Set Unmatched patients to the option that suits your practice requirements.
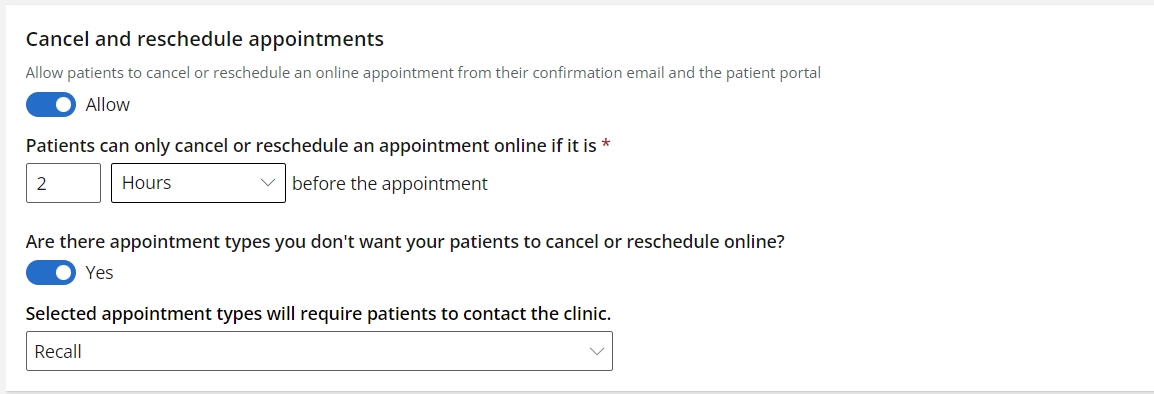
- Set Cancellations to allow or deny the ability to cancel or reschedule an appointment online. If you allow cancellations online, set the time period before the appointment during which the patient can cancel.
- Set Selected appointment types that require patients to contact the clinic and cannot be cancelled online. This is useful to direct patients to call the clinic when wanting to cancel or reschedule certain appointment types such as Recalls.
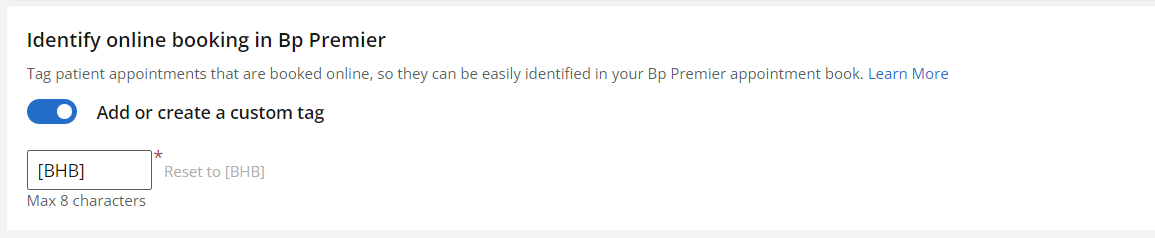
- Create a tag or utilise the default tag [BHB], to Identify online bookings in your Bp Premier appointment book. You may customise your tag with a maximum of 8 characters, to suit your practice needs.

Practices often incorporate the Best Health Booking URL by having their IT team create a 'Book Appointment' or 'Book Now' button on the homepage of their website, as shown in the example below.

The Link icon  inserts a hyperlink, while the Clear Text icon
  removes styling from any selected text.
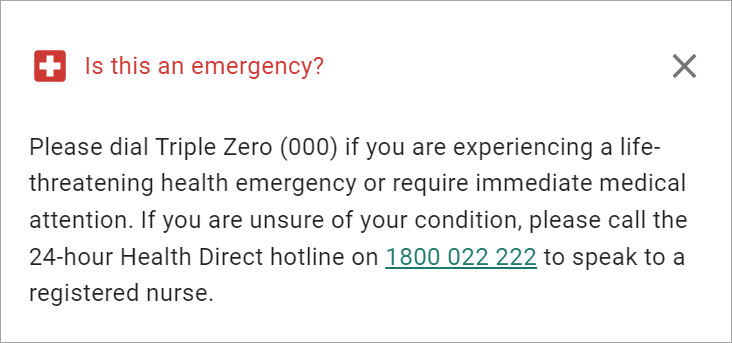
This message will display when patients click the 'Is this an emergency?' button while booking an appointment.
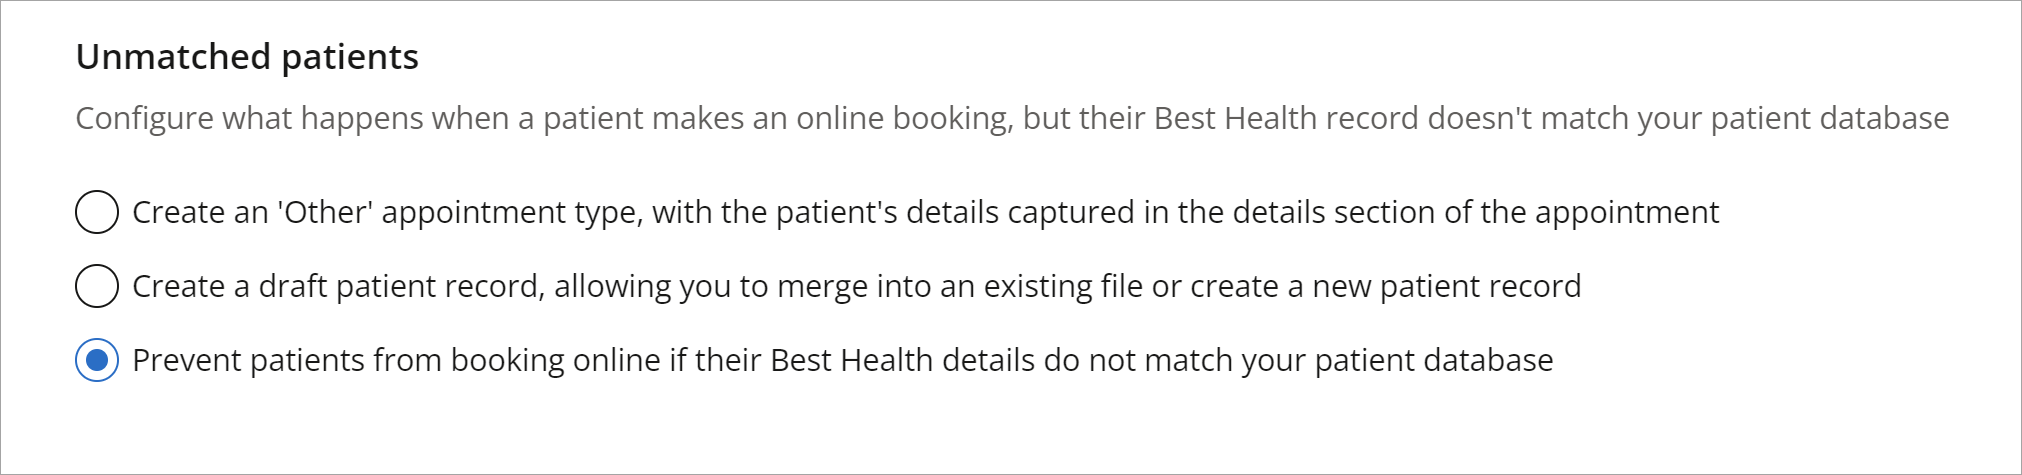
NOTE 'Prevent patients from booking online if their details do not match your database' will only function correctly if the option to accept new patients is toggled off in Appointment Types and for any customised appointment rules set by providers.
To learn more about how to match patients, see the section below on managing unmatched patients.
How do I manage unmatched patients?
What is an unmatched patient?
An unmatched patient is referred to as a patient, usually a new one, who booked an online appointment via Best Health Booking and created a Best Health account; however, they do not have a patient demographic record created in Bp Premier.
Bp Premier has a patient matching function in the appointment book that displays unmatched patients and allows you to create a new patient record or merge it with an existing one.
If a visit with an unmatched patient is started from the appointment book, Bp Premier will automatically display the Unmatched Patient screen and allow you to merge or create a new patient before the visit begins.
Your practice may want to consider implementing an 'Unmatched patient check' as a daily or routine activity after introducing Best Health Booking.
What is the patient matching criteria?
Premier Online Services will attempt to match a Best Health account holder with a patient record in Bp Premier using the following criteria in descending order:
- Name: First name & Last name. If the unable to match the first name, the Bp Premier will search for a preferred name if there is one recorded.
- DOB
- Mobile number
- Postcode.
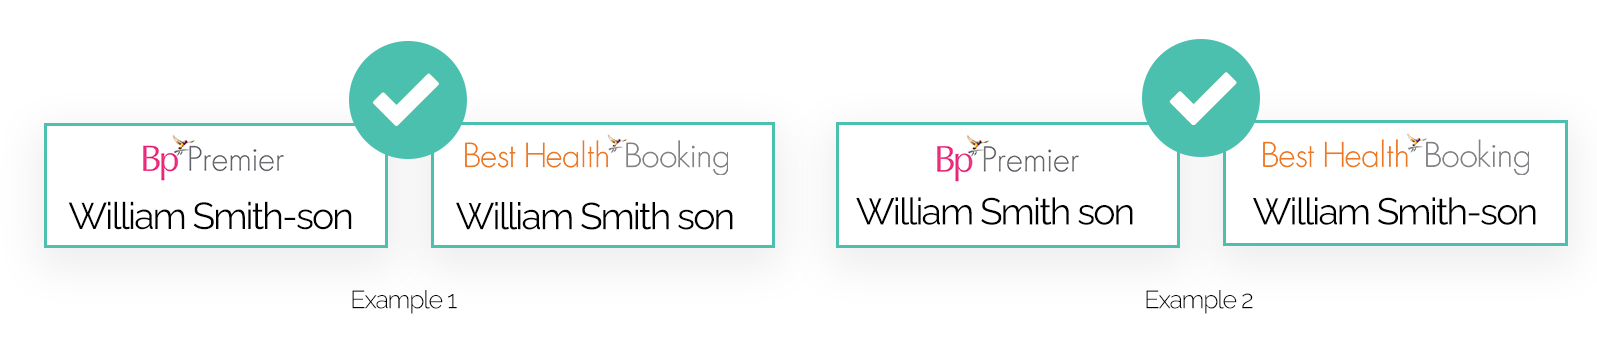
If the previous criteria match and the names are not abbreviated (Will instead of William, for example) the following examples will match, regardless of hyphens.
Note that capitalisation is ignored and is read as a letter.
Can I take notes for an unmatched patient?
The Unmatched patient workflow is designed to minimise disruptions to normal operations. You can update patient demographic information, start a visit, take notes, and perform other clinical functions in Bp Premier for Unmatched patients.
Unmatched patients will not appear in the standard patient lists in Bp Premier until the Match or Add new option is selected from the Unmatched Patient Details screen.
Can I tell if an appointment is for an unmatched patient?
The red silhouette icon in the appointment book in Bp Premier indicates that an appointment's patient is unmatched.

Match unmatched patients in Bp Premier
- From the appointment book, select View > Unmatched patient details. The Unmatched patient details window will show all current unmatched patients.
- Click Match patient to open the Match patient window.
- The Match patient screen will suggest patients that have matching details such as first name, surname, and address. Or you can Search for an existing patient to merge with.
- If you find an existing record and have confirmed the unmatched patient and the existing patient should be the same record, select the patient from the list and click Match.
- Click Yes to merge patients and remove the unmatched patient.
- If you cannot find an existing record to merge the new patient with, click Add new. The Edit demographics screen will open. Complete any additional fields and click Save to create a new record.

The Open button opens a clinical record for the unmatched patient. You can take today's notes and perform any clinical action for an unmatched patient, and match the record later.
The View details button opens a demographic record for the unmatched patient, using details from the online booking signup.


Match or create a new patient on visit start
If you start a new visit for an unmatched patient from the appointment book, Bp Premier will prompt to match or create a new patient.

What do I do next?
You can now select which of your providers can be booked online, and create an online booking profile for the doctors who opt in from the Providers tab.
Last updated: 12 June 2025.


 AU
AU 