This step enables Online booking for a provider from the Bp Premier database, and which appointment types can be booked online for that provider.
In this article:
Set up Providers
- From the left-hand menu, select Best Health Booking > Providers.
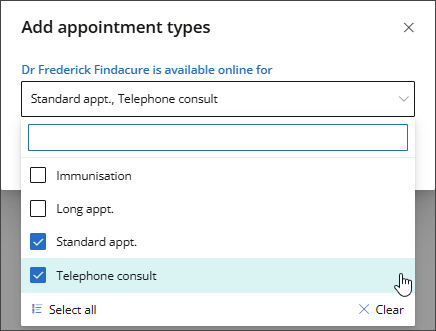
- To accept Online Bookings, you must first set the Appointment Types that each Provider will offer. Click Add appointment types.
- Search for or select from the available list the Appointment Types to be offered for online bookings, and then click Save.
- In Available Online, select Yes, No, or Call Clinic to determine whether the appointment types for the provider can be booked online, requires the patient to call the Clinic, or is not available online.
- From the available list, tick the Appointment Types that this provider will offer for online bookings and click Save.
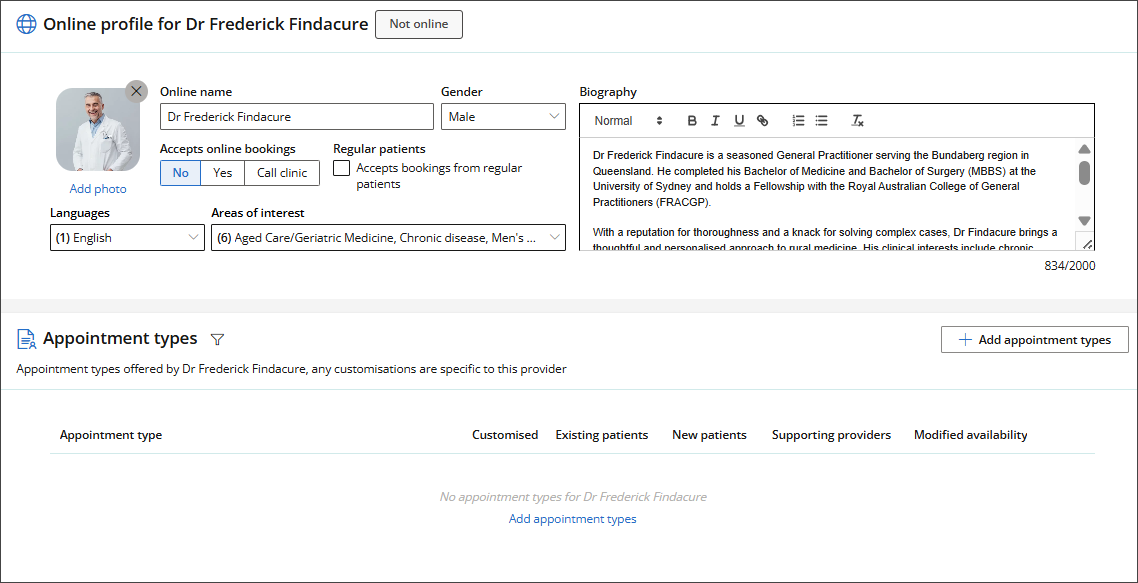
- Select a provider from the list to open the Provider profile.
- The Online name is the provider's name as displayed to the patient during booking.
- Select the provider’s Gender.
- Set Accepts Online Bookings to Yes if this provider has approved bookings online.
- If the provider only accepts bookings from their regular patients, tick Accepts bookings from regular patients. A green badge
 will be displayed next to their name on the Providers screen.
 - Set the Languages spoken by the provider.
- Add the doctor's Areas of interest.
- Use the text box and editing toolbar to create an engaging Biography for the provider, which will be presented to patients when they select a provider.
- Changes will be Saved automatically.
- Repeat for each doctor who wishes to be bookable online.

The Providers screen is used to manage provider availability for Online Bookings and configure the Appointment Types available for each provider.
Use the Filters at the top of the screen to refine the list of Providers. Filter by Keyword, Appointment types, or limit the view to providers who Accept online bookings.
The Appointment Type modal will appear for the selected provider.

IMPORTANT This will require the patient to have their 'Usual Provider' nominated in their Bp Premier demographics. See the FAQs about the patient demographic for more information on how to do this.

Writing Provider biographies
NOTE The information and other material contained are for general informational purposes only. Best Practice Software makes no representation and assumes no responsibility for the accuracy of the information, as such information is subject to change. You are encouraged to do your own due diligence.
When writing Provider biographies that include descriptions of profession, title and qualifications, it is important to consider the below. This information has been sourced and summarised from the AHPRA advertising guidelines.
Information about titles, claims about registration, and competence and qualifications of practitioners must be correct or the advertising may be considered false, misleading or deceptive.
A practitioner may only use a protected title if they are registered in that profession. A list of protected titles can be found in the advertising guidelines.
While 'Doctor' or 'Dr' is not a protected title, if the title is used in advertising it should state the practitioner's profession (if they are not a medical practitioner). For example, Dr Jones (dentist) or Dr Lee (osteopath).
Only a practitioner who holds specialist registration in a recognised speciality may use a specialist title in advertising. Practitioners who do not hold specialist registration should be wary of using words or phrases such as 'specialises in', 'specialty', or 'specialised' as it is likely to mislead the patients to believe the practitioner holds a type of specialist registration approved under the national law.
The Australian Health Practitioner Regulation Agency (AHPRA) has helpful articles on writing provider descriptions.
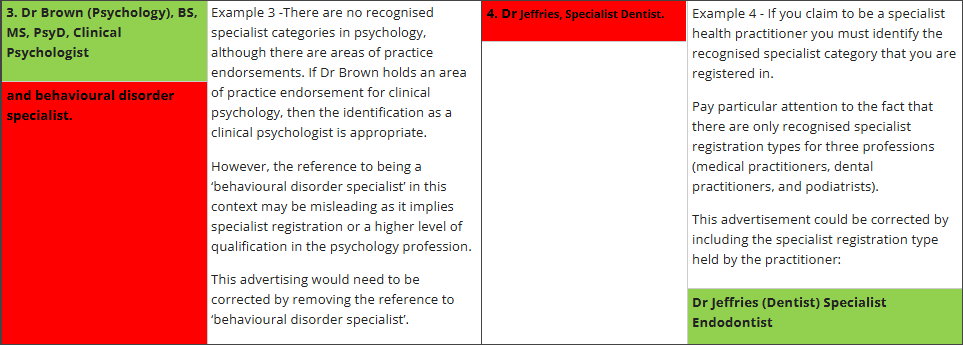
Below are some examples that AHPRA has created to highlight the relevant areas that may be affected by these guidelines. Do note that these are only some of the examples provided.
Online Booking preferences
This section describes how to manage scenarios where a provider may choose not to accept online bookings or prefers patients to call the clinic to book appointments.
What if a provider prefers to be booked by phone?
If a provider prefers to be booked by phone, set Accepts Online Bookings to 'Call Clinic'.

The provider will still be listed in the online booking portal, but with a message that the patient must call the practice to book their appointment with that provider. The 'Call Clinic' option ensures that the provider is still seen as available to patients who are booking online.
Click Add Appointment Types then select the appointment types that your provider prefers patient’s Call the clinic to book.

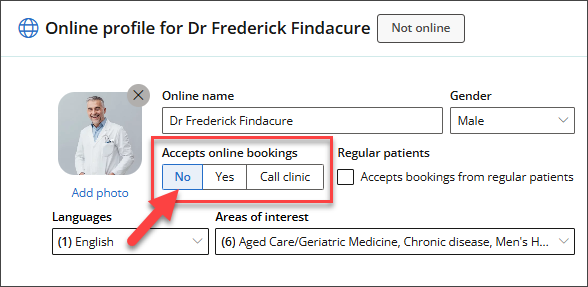
What if a provider prefers not to be booked online?
If the provider chooses not to accept online bookings, set Accepts Online Bookings to 'No'. The provider will not be included in the list of available providers for patients making online bookings.
Modify availability and customise patient and appointment types
Modify availability
Availability can be applied either weekly, for a specific week, or for a set number of days over a specified period. Benefits include increased clarity and predictability for the provider, as well as reduced reception and administrative workload.
For example, a skin check appointment may only be performed by a specific provider. In this case, the provider can set a customised rule that allows them to accept skin checks only on a particular day, for a set duration (e.g., every Monday from 7:00 am to 5:00 pm).
This allows providers to remain available for bookings during these times, but only for set appointment types.
- From the left-hand menu, select Best Health Booking > Providers.
- Select the Provider whose availability or appointment types you want to modify.
- The provider's Online profile will appear. In Appointment Types, select the Appointment type to which you want to add a custom rule or modify availability.
- The settings for the selected appointment type will appear. In Modify availability, you can specify the days and times that this appointment type is available for booking with the provider.
- Click + Modify availability or the pencil icon if you already have modified availability for this appointment.
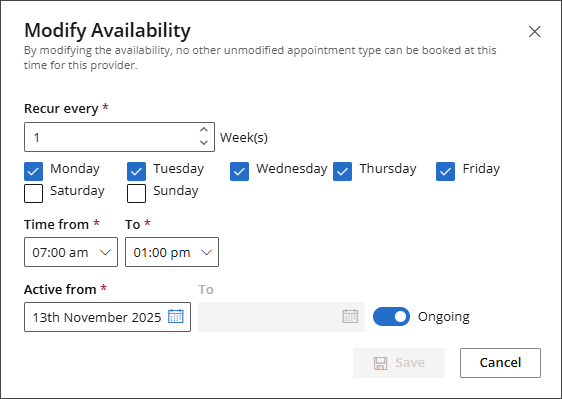
- The Modify Availability modal will appear. Set the Recur every frequency, select the Days, and set the Time from and To fields. Specify the Active from and To dates, or turn on the Ongoing switch if the availability has no end date.
- Click Save to return to the previous screen.

If you have created a modified availability rule for your provider, the 'Total appts' column and the modified appointment type will reflect these changes with a green dot.

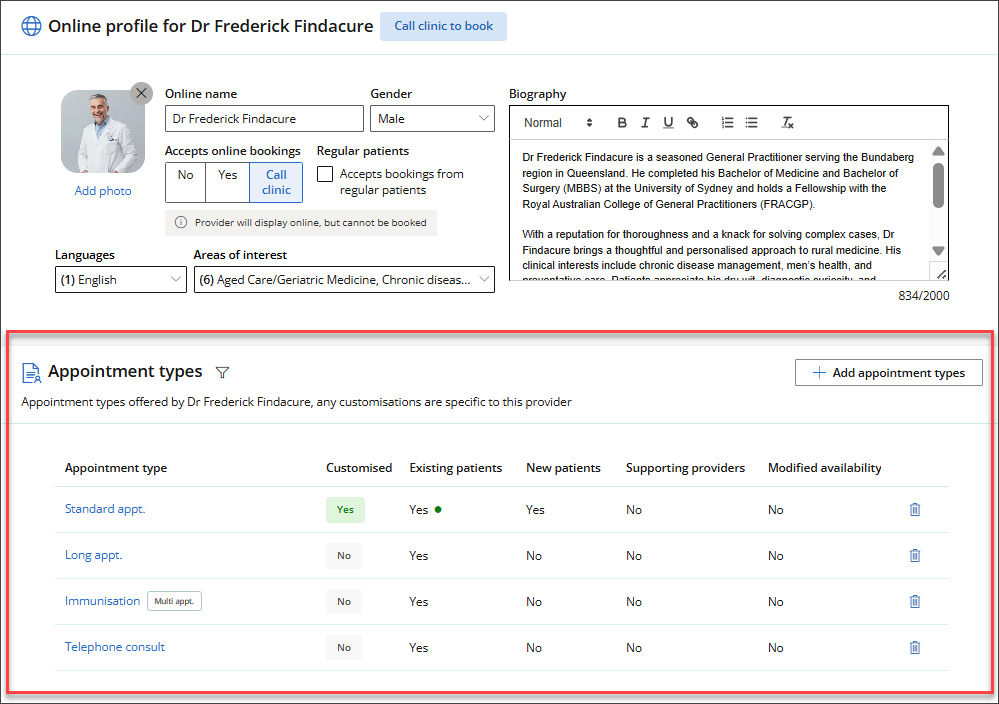

To delete existing modified availability, click the trash can icon.

IMPORTANT By modifying the availability, no other unmodified appointment type can be booked at this time for this provider.
Customising Patient Types
NOTE Patient type customisations can be created with or without a modified availability rule. These two options are not mutually exclusive, and this change affects only this provider with no changes required in Bp Premier.
- From the left-hand menu, select Best Health Booking > Providers.
- Select the Provider whose availability or appointment types you want to modify.
- The provider's Online profile will appear. In Appointment Types, select the Appointment type to which you want to add a custom rule or modify availability.
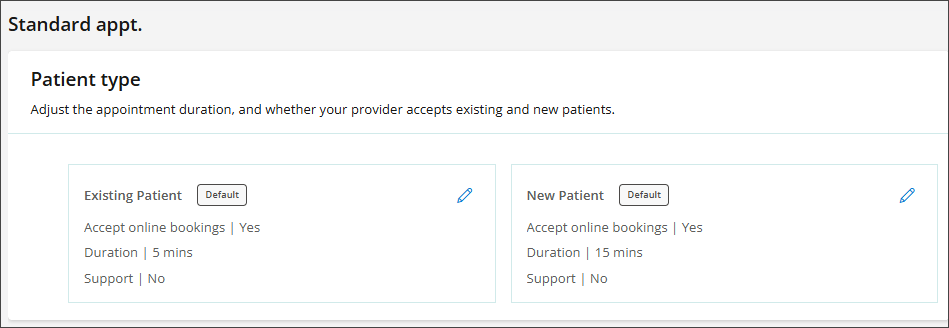
- In Patient type, you can adjust the appointment duration and specify whether your provider accepts existing or new patients.
- Click the pencil icon in either Existing Patient or New Patient.
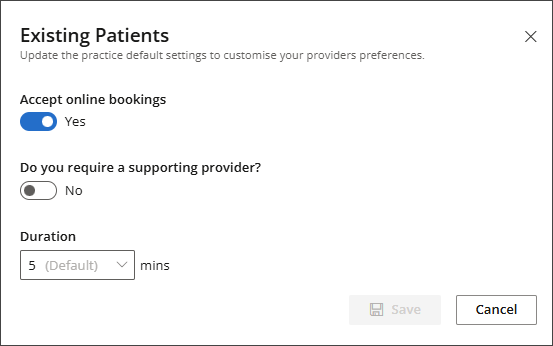
- To Accept online bookings for Existing Patients or New Patients, slide the switch to Yes and enter the appointment Duration.
- Click Save to return to the previous screen.
Create multi-provider appointment types
Some services may involve multiple providers; for example, a doctor and a nurse may provide services during an appointment, either simultaneously or one after the other. Best Health Booking allows you to specify the involvement of multiple providers and the sequence in which they will participate in the appointment.
- From the left-hand menu, select Best Health Booking > Providers.
- Select the Provider whose availability or appointment types you want to modify.
- The provider's Online profile will appear. In Appointment Types, select the Appointment type for which you want to add a supporting provider.
- Click the pencil icon in either Existing Patient or New Patient.
- Slide the switch to Yes for Do you require a supporting provider?
- Select the time interval, specify whether it is before, after, or simultaneously with the appointment, and select the supporting Provider.
- Click Save.

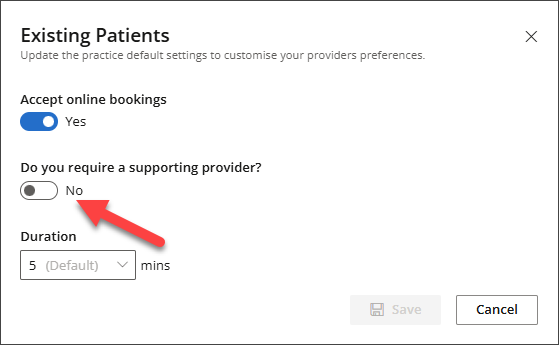
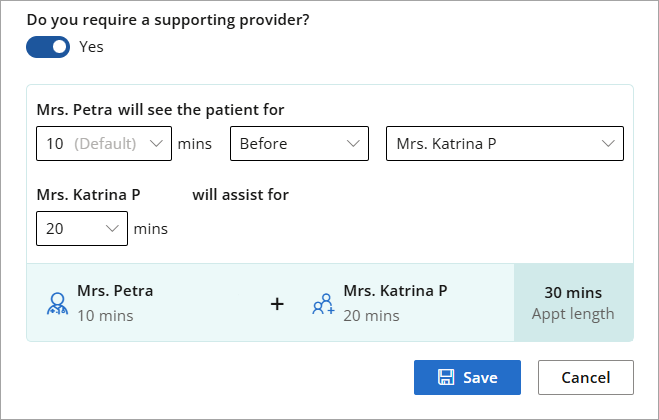
When this appointment type is booked for a provider through online booking, the supporting provider will also be automatically booked for the same duration.
Activate Online Booking
Once you have completed entering your configuration details for all practice locations that offer online booking, and you are ready to test live, you can now activate Online Bookings.
- Return to the Online Setting tab.
- Set Activate online bookings to 'On'. The On button will be coloured solid.
- Repeat for each practice location you want to active online booking for.
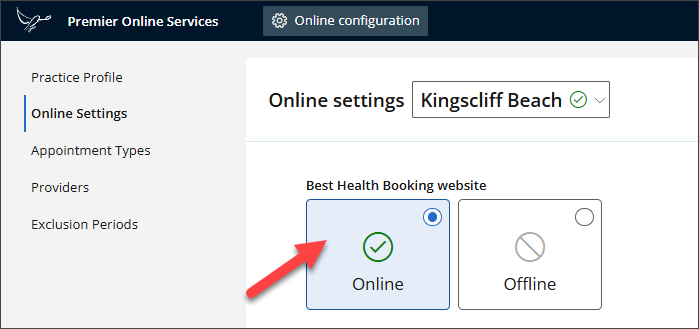
Patients can now book appointments through your website or their Best Health App.
Last updated: 12 November 2025.