The purpose of this guide is to detail how to install a single, standalone copy of Bp Allied for trial purposes.
Before you start
The Bp Allied trial will only run on Windows 8 or 10 operating systems. Please ensure that your windows updates are up to date. See System Requirements for more information.
For Mac users please speak to our sales team about a demo of our hosted subscription option.
![]() How to install a single copy of Bp Allied.
How to install a single copy of Bp Allied.
How to install
After signing up for a trial, there will be an email sent with a link to download your trial.
- Click on the email link to download.
- If you see a dialogue box similar to below, click Save.
- Navigate and view your Downloads folder.
- Double click to run Bp_Setup.exe
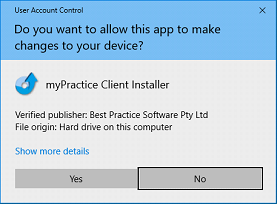
- Click Yes, if the following message appears.
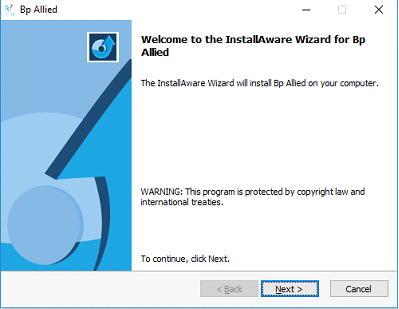
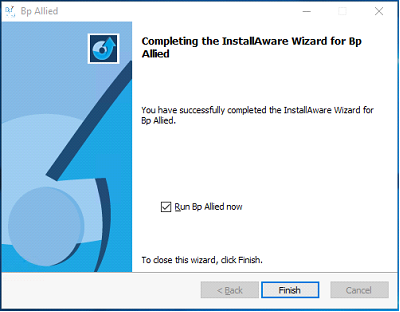
- The Install Aware Wizard will display.
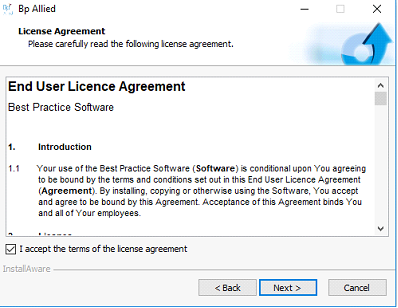
- Check the I accept the terms of the license agreement check box.
- Click Next.
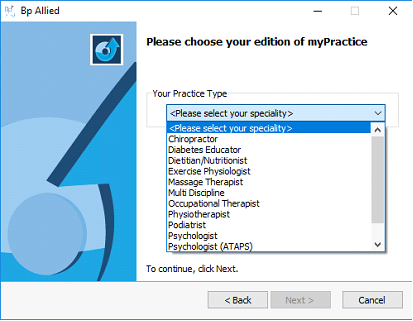
- Select the Practice Type to install.
- This can be changed by our support team after installation if required.
- Click Next.
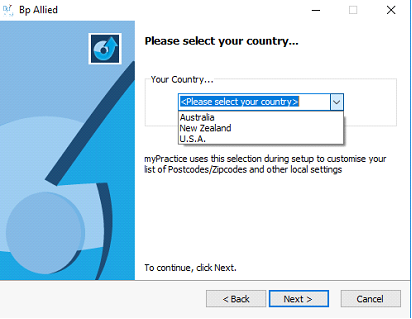
- Select the Country to install for.
- Click Next.
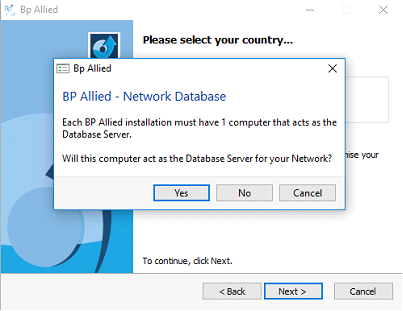
- Select Yes, this computer will act as the Database server for your network.
- Wait while the installer installs Microsoft SQL Server.
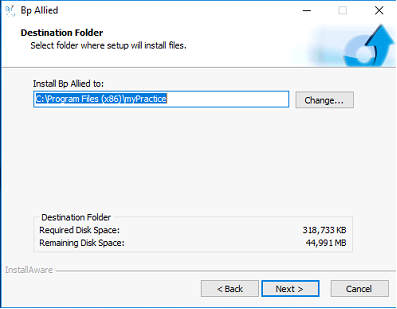
- Click Next to install to the default location.
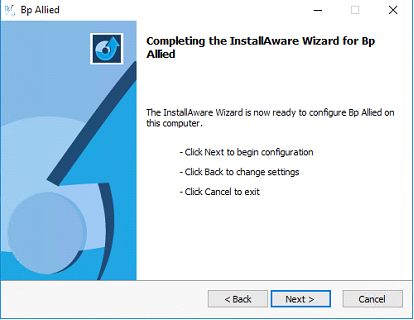
- Click Next to install Bp Allied.
- Wait while the installer installs and configures Bp Allied.
- Click Finish to Run Bp Allied now and start your trial.
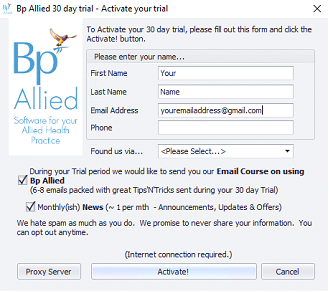
- Bp Allied will load the Trial Activation screen.
- Click Activate.
- Your activation will be confirmed.
- Click OK.
- To create your initial Log in, either:
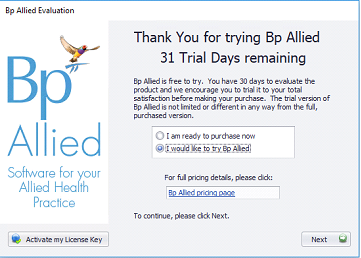
- When you run Bp Allied during your trial the trial screen will display with a countdown of the number of days to go.
- Click Next.
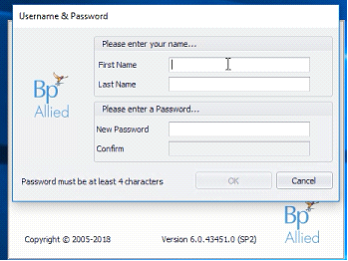
- When you open it for the first time, you will need to set-up your initial Username and Password.
- Fill in your First Name and Last Name.
- Enter & confirm your Password.
- Click OK.
- And then restart Bp Allied to log in for the first time.
![]()
Some internet browsers will just automatically download and save the Bp_Setup.exe file without asking you to choose to Run or Save.
Bp_setup.exe will be saved to your Downloads folder.
Click Next.
This database can be shifted to another server/computer if required on purchase.
This can take a few minutes.
If your computer already has SQL Server installed then it might skip past this part.
Enter in your details to activate your trial.


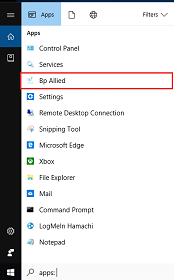
Double-click on Bp Allied shortcut to open it.
Or open it from your Windows Start menu.


 AU
AU 