The process below needs to be followed and settings filled in to allow Bp Allied to access your Xero account and transfer across information.
Before you start
- You will need your Xero account login name, password and if in Australia, access to the authenticator app for two stage authentication of your login.
-
According to Xero,
- Watch a video on how to create a Xero connection.
- The Xero settings can be accessed via System > Options > Financial Exports.
- See Set up and Send to Xero for details on running the Xero export report.
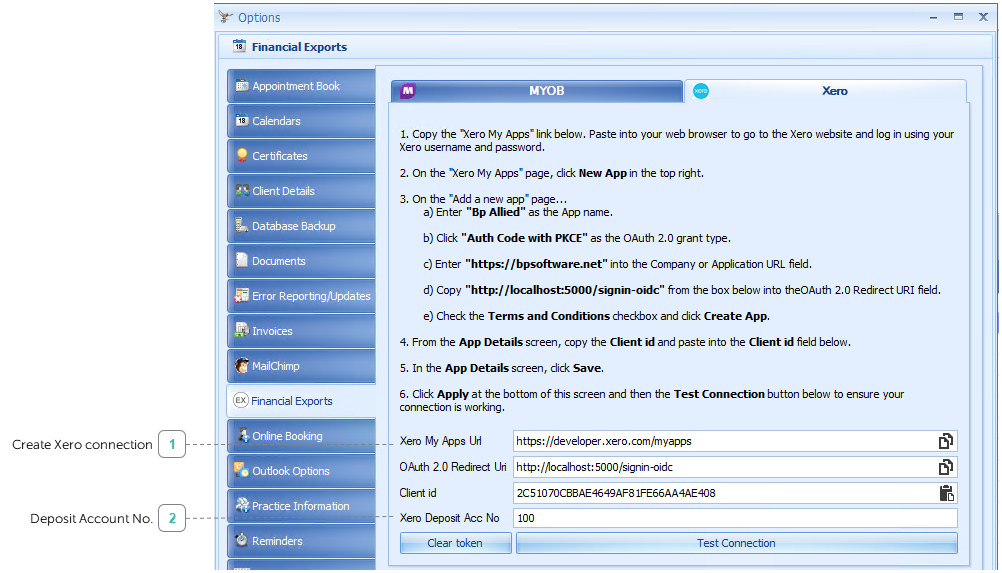
Create Xero connection

- Copy the Xero My Apps URL link on the Options screen and paste into your browser. Log in using your Xero login name and password.
- On the Xero My Apps page, click New App and enter in Bp Allied as the App Name.
- Select the Integration type Mobile or desktop app.
- Enter https://bestpracticesoftware.com into the Company or application URL.
- Enter http://localhost:5000/signin-oidc into the Redirect URI field.
- Tick the check box to agree to the Terms & Conditions.
- Click Create App.
- Close the Xero developer browser window.
- The App Details screen will display.
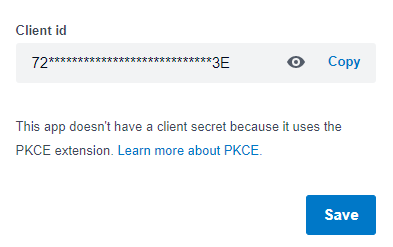
- From the App Details screen, scroll up to select the Configuration tab.
- Copy the Client ID.
- Paste into the Xero Client ID field in the Bp Allied Options screen.
- Click Apply, then click Test Connection.
- Log into Xero using your username and password.
- Enter in your authentication code.
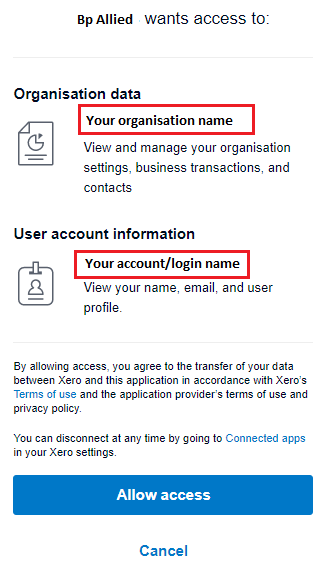
- Select the Organisation for your data to be uploaded to.
- Click Allow access.
- Click OK to close it.
New organisations may be presented with a screen to confirm login details.
TIP If you get the error: "failed to create app (#FBDD)" change the App Name as an app connection with the name used already exists.

The Xero login screen will display in a browser.
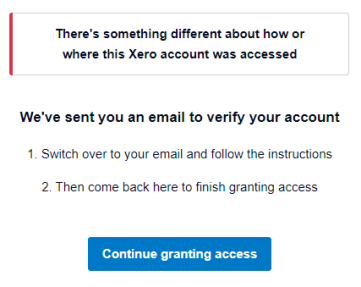
If you receive the message to the right from Xero then please follow their instructions.
The Xero connection test "Connection successful" dialogue should display.
How to check your App Connection
- When logged into your Xero account, c lick on the drop-down under your Organisation Name, e.g. Bp Allied Test 17 in this example.
- Select Settings.
- Click the Connected Apps option. This will display any Apps connected to your Organisation, including Bp Allied.

This will display the Organisation Settings web page.


NOTE Your connection will be named as per the App Name given as part of creating the connection.
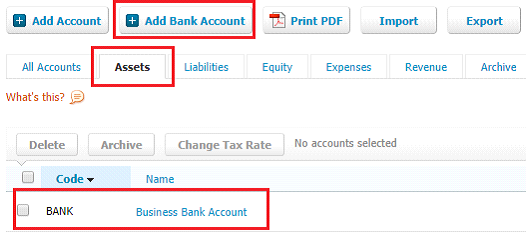
Deposit Account No.
![]()
This is the Bank Account Code in Xero where payments are to be saved into.
IMPORTANT Only one bank account can be used.
To find the Bank Account Code:
- Go to www.xero.com (if you were logged into the Developer section of Xero in section 1 of this page above, close out of there).
- Log in to Xero using your usual credentials.
- Go into the organisation you have linked with Bp Allied.
- Click Accounting > Chart of Accounts.
- Add a Bank Account if you haven't done so.
- Enter this Code e.g. BANK into the Xero Deposit Account No.

OR
Go to the Assets tab and find the Bank Account code just set up.
Last Updated: 27 September 2022


 AU
AU 