On this page
- Export your data out of Bp Allied
- Modify the Bp Allied exports for Import into Xero
- Exporting Clients (Contacts) ready to import into Xero
- Exporting Products and Services (Items) ready to import into Xero
- Exporting Sales (Invoices) ready to import into Xero
This page includes details on how to use Xero Import function to import Clients (Contacts), Items (Products & Services), Sales and Payments in the event that the Xero API connection is unavailable.
Before you start
- Ensure that all the set up options on the page Setup for Xero Export have been followed.
- Any Clients with the same name should have an identifier added to their name e.g. John Smith 1 as Xero requires the Contact Name to be unique.
- These instructions are dependent on the Xero import files not changing.
- Payments are only able to be imported via your bank statement and manually matched with an Invoice.
Export your data out of Bp Allied
- Go to Reports > Exports > Xero Export.
- From the Exports section, select Clients.
- Click Get Data.
- Click Export CSV File.
- Save the file to your local computer.
- Repeat for Products and Services, Sales and Payments.
For Sales, we recommend exporting only Paid invoices which can be filtered using the Invoice Status field as any adjustments to an invoice or payment in Bp Allied will need to be duplicated in Xero.
Modify the Bp Allied exports for Import into Xero
The data required for the Manual import is slightly different than that required for the API that the Xero Export screen is used for, so some data manipulation is required. Below is some information to help you through this.
Exporting Clients (Contacts) ready to import into Xero
In Xero, got to Contacts > All Contacts and click Import.
- Download the Xero template file.
- Open the Contacts.csv file.
- Add a new worksheet to the file.
- Open the Bp Allied MPCustomers_xxxxxxxx_xxxxxx.csv file.
- Copy and paste all of the information, including headings, exactly as it is from this file into the new worksheet "Sheet1" in Contacts.csv.
- Go back to the Contacts tab.
- Copy the following formula exactly as it is in the cell immediately below the Contact Name field. It is the field named "A2" in the spreadsheet.
- Press enter.
- Use Autofill in Excel to copy the formula all the way down the spreadsheet to where your Client list ends.
- Copy the following formula exactly as it is in the cell immediately below the Account Number field. It is the field named "B2" in the spreadsheet.
- Press enter.
- Copy the following formula exactly as it is in the cell immediately below the Email Address field. It is the field named "C2" in the spreadsheet.
- Press enter.
- Use Autofill in Excel to copy the two new formulas all the way down the spreadsheet to where your Client list ends.
- Save and close your spreadsheet as a CSV file.
- When you save this as a CSV file - the second sheet and all your formulas will not be saved as they can not form part of a CSV file. The data you have copied into the Contacts worksheet will be saved.
- If you want to save your workings then save a copy of the spreadsheet as an XLSX file.
- Your file is now ready for importing into Xero from the Contacts > Import page.
- Follow Xero's import instructions.
=CONCATENATE(Sheet1!B2," ",Sheet1!A2)
This should display the name of your first Client in "First name Last name".
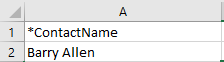
For example Sheet1 information looks like this:

And becomes this in the Contacts sheet.
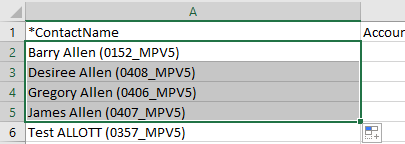
Xero requires the Contact Name field to be unique and will not accept Customers will the same name so we add the Client ID on the end of the name.
=Sheet1!C2
This should display the Client ID for your first client.
=CONCATENATE(Sheet1!D2)
This should display the Email Address for your first client.
Exporting Products and Services (Items) ready to import into Xero
- In Xero, got to Business > Products and Services and click Import > Items.
- Download the Xero template file.
- Open the InventoryItems.csv file.
- Add a new worksheet to the file.
- Open the Bp Allied MPItems_xxxxxxxx_xxxxxx.csv file.
- Copy and paste all of the information, including headings, exactly as it is from this file into the new worksheet "Sheet1" in InventoryItems.csv
- Go back to the Inventory Items tab.
- Enter the formulas into the cells below the field in the Inventory Items tab.
|
Xero field |
Excel cell name |
Formula |
Bp Allied field name |
|---|---|---|---|
|
Item Code |
A2 |
=Sheet1!A2 |
Accounting Item Code |
|
Item Name |
B2 |
=CONCATENATE(Sheet1!D2," (",Sheet1!C2,")") |
Description + Item Code |
|
Sales Description |
G2 |
=CONCATENATE(Sheet1!D2," (",Sheet1!C2,")") |
Description + Item Code |
|
Sales Unit Price |
H2 |
=Sheet1!E2 |
Selling Price |
|
Sales Account |
I2 |
=Sheet1!B2 |
Income Acct |
|
Sales Tax Rate |
J2 |
=Sheet1!F2 |
GST Code |
NOTE Missing fields are not required BUT the order of the fields and all the field names MUST be kept as they are so that the import will work.
- Use Autofill in Excel to copy the all new formulas all the way down the spreadsheet to where your Item list ends.
- Save and close your spreadsheet as a CSV file.
- When you save this as a CSV file - the second sheet and all your formulas will not be saved as they can not form part of a CSV file. The data you have copied into the Contacts worksheet will be saved.
- If you want to save your workings then save a copy of the spreadsheet as an XLSX file.
- Your file is now ready for importing into Xero from the Contacts > Import page.
- Follow Xero's import instructions.
Exporting Sales (Invoices) ready to import into Xero
- In Xero, got to Business > Invoices and click Import.
- Download the Xero template file under Step 1.
- Open the SalesInvoiceTemplate.csv file.
- Add a new worksheet to the file.
- Open the Bp Allied MPItems_xxxxxxxx_xxxxxx.csv file.
- Copy and paste all of the information, including headings, exactly as it is from this file into the new worksheet "Sheet1" in SalesInvoiceTemplate.csv
- Go back to the Sales Invoice Template tab.
- Enter the formulas into the cells below the field name in the Sales Invoice Template tab.
|
Xero field |
Excel cell name |
Formula |
Bp Allied field name |
|---|---|---|---|
|
Contact Name |
A2 |
=CONCATENATE(Sheet1!B2," ",Sheet1!A2) |
First Name + Co./Last Name |
|
Invoice Number |
K2 |
=Sheet1!D2 |
Invoice No |
|
Invoice Date |
M2 |
=Sheet1!F2 |
Date |
|
Due Date |
N2 |
=Sheet1!F2 |
No equivalent field so setting to Invoice Date |
|
Inventory Item Code |
O2 |
=Sheet1!G2 |
Accounting Item Code |
|
Description |
P2 |
=CONCATENATE(Sheet1!H2," ",Sheet1!I2) |
Description + Item Code |
|
Quantity |
Q2 |
=Sheet1!N2 |
Quantity |
|
Unit Amount |
R2 |
=Sheet1!J2 |
Nett Price - this includes GST and any discounts applied |
|
Discount |
S2 |
DO NOT IMPORT |
Discount is applied as a percentage in Xero so can not be imported |
|
Account Code |
T2 |
Enter the Xero account code e.g. 200 for Sales Income |
Assigns the income to the correct account code in the Chart of Accounts |
|
Tax Type |
U2 |
=Sheet1!U2 |
GST Code |
|
Tracking Name 1 |
V2 |
Type in the word "Practitioner" |
Creates a Category for splitting invoices and payments by practitioner |
|
Tracking Option 1 |
W2 |
=CONCATENATE(Sheet1!T2, " ", Sheet1!S2) |
Practitioner First Name + Practitioner Last Name |
NOTE Missing fields are not required BUT the order of the fields and all the field names MUST be kept as they are so that the import will work.
- Use Autofill in Excel to copy the all new formulas all the way down the spreadsheet to where your Item list ends.
- Save and close your spreadsheet as a CSV file.
- When you save this as a CSV file - the second sheet and all your formulas will not be saved as they can not form part of a CSV file. The data you have copied into the Contacts worksheet will be saved.
- If you want to save your workings then save a copy of the spreadsheet as an XLSX file.
- Your file is now ready for importing into Xero from the Sales overview > Import your sales invoices page.
- Follow Xero's import instructions.
- Import as Price includes GST.


 AU
AU 