You are accessing documentation for myPractice version 4.
Support for this version of myPractice has ended. This documentation is available for reference only.
 
Please contact our support team on 1300 401 111 about upgrading to the latest version of BpAllied.
View the latest (V7) documentation here.
Version 4
×
Menu

Customisation window


The information below give information about what the different parts of the Customisation Window do.
Customisation window
1

Action Buttons

1. Action Buttons
The Actions buttons control the following functions (in order from left to right)
  • Open - this is not usually used as changes are most often being made to the Client Details layout file in use
  • Save - this happens automatically on closure of the form also
  • Undo - undoes the last action. Use this funtion sparingly as it does not tend to respond very well.
  • Redo - redoes the last action. Use this funtion sparingly as it does not tend to respond very well.
2

Hidden Items tab

2. Hidden Items tab
This tab displays all items available for use in the client details but which are not usually viewed
3

Layout Tree View tab

3. Layout Tree View tab
Displays the Hidden items in a tree layout.
4

ToolBar

4. ToolBar
  • Categorises the item options
  • Alphabetises the item options
5

Field Options

5. Field Options 
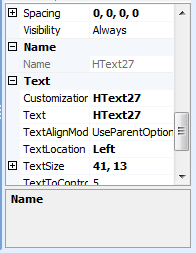
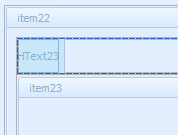
When a field is highlighted on the screen the properties of that item are displayed. A field is highlighted when a blue dashed line can be seen around the edge of it.
Editing the Field Options changes the properties of the field, for example:
  • Edit the Text field to change what the field is called and hence the name that is displayed
6

Empty Space

6. Empty Space
Inserts an empty space onto the form. Used change how the form is laid out.
  • Click and drag it onto the Client Details form
  • Let the mouse go when it is in the correct position
7

Label

7. Label  
Allows additional text to be added onto the form that is not related to a field i.e. Informational text or a heading as above.
  • Click and drag it onto the Client Details form
  • Let the mouse go when it is in the correct position
8

Separator

8. Separator  
These are used to slightly separate one field or label from another. A separator is used on either side of the heading in the example above
  • Can be used both horizontally and vertically.
  • Click and drag it onto the Client Details form
  • Let the mouse go when it is in the correct position
9

Splitter

9. Splitter 
Used to split information more distinctly than the separator.
  • The spacing of the information can be resized on the screen by a user by clicking on the
  • Can be used both horizontally and vertically.
  • See the Chiropractor Contact Details screen which uses the Splitter in several places.
  • Click and drag it onto the Client Details form
  • Let the mouse go when it is in the correct position
10

Predefined Fields

10. Predefined Fields
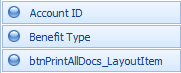
These are fields that can be inserted but that have already been defined to hold some specific data. These fields could be used elsewhere in the system, for example, in reports so generally it is not a great idea to use them for a purpose different from what they were intended.
11

Customisable Fields

11. Customisable Fields
These fields are available to insert and use to collect any additional information required.
There are two types of fields - Consultation and History Fields which are denoted with a C and H respectively
There are four types of data that can be collected:
  • Text - these are called CText# or HText# - used to collect text information
  • Numeric - CNumeric# or HNumeric# - used to collect number information
  • Dates - CDate# or HDate# - these are used to collect date information and display the information in a date format
  • Tick boxes - CBool# or HBool# - these are used for Yes/No, or True/False type information
 
# denotes the number of the field