Editing an Invoice
Invoices can be edited both at the time of creation or at a later date. The fields on the Invoice screen are explained below.
To edit an Invoice
The fields are are greyed out will become editable
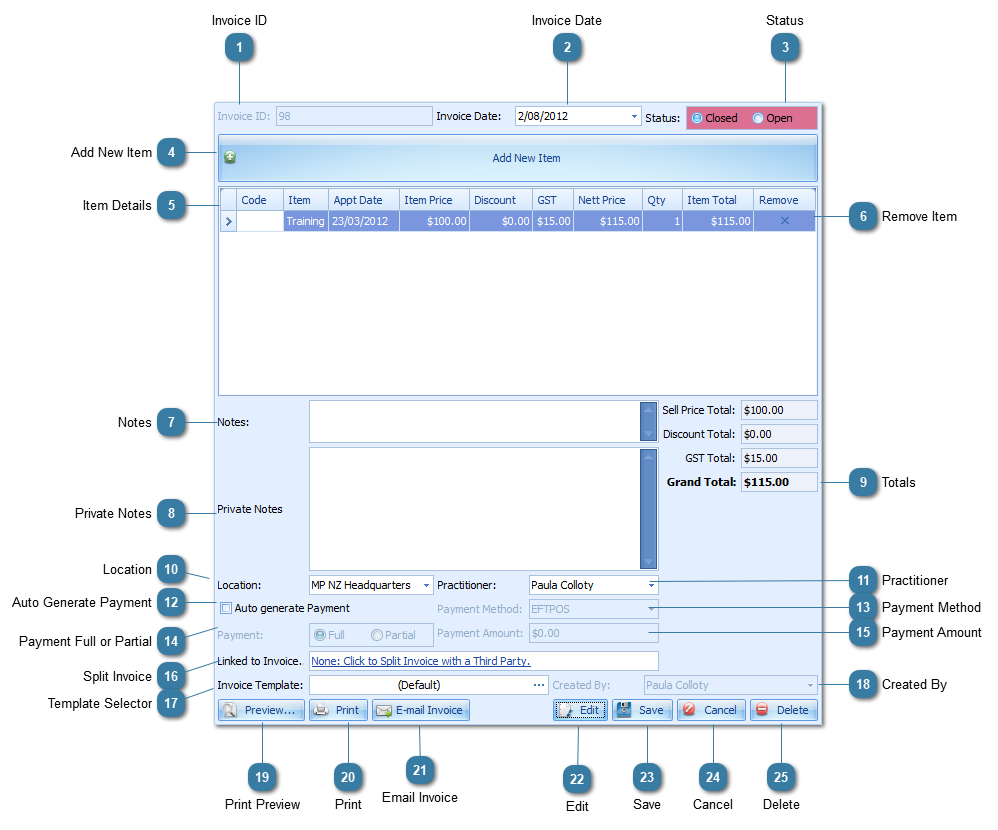
Invoice IDDisplays the Invoice ID number, please note this number is automatically generated but you can set your next Invoice ID and Payment ID under System > Options > Invoices > Invoice Numbering Options.
|
StatusThe Status of an Invoice can be closed or open.
CLOSED: no further items/appointments can be added to this invoice. Client Invoices are closed by default when generated
OPEN: additional items/appointments can be added. Third Party Invoices remain open by default.
To see a list of all Open Invoices go to Reports > Open Invoices Report.
|

Item DetailsDisplays you a summary of your Item Details.
From here the Item Price can be edited. Ensure Item Price Editing is enabled within System > Options > Invoices.
A Discount can be applied by typing in the discount field.
|
NotesEnter any Notes relating to the invoice here, these notes can be displayed on the printed invoice.
See details on Customisation of Invoice Templates to have this field added
The size of the Notes and Private Notes fields seen on the screen can be customised as fields within the Client Details can be. These are the only fields within the Invoices screen that can be changed.
|

Auto Generate PaymentIf ticked a payment will be automatically generated once the invoice is generated for the same dollar value as the original invoice.
To turn off Auto Generate Payment go to System > Options > Invoices. Third Party Invoices will not automatically generate a payment.
|
Payment MethodDisplays the selected payment method that is either set by default or the actaul payment method once payment has been made and associated with the invoice.
|
Split InvoiceClick to Split an Invoice with a Third Party. Click to see more information here.
This field does not display on a Third Party Invoice.
|
Template SelectorAllows you to select different templates to print your invoices.
Set your default Client and Third Party templates within System > Options > Invoices.
|
Email InvoiceClick to Email the Invoice
|