This article explains how to manage incoming results in the Inbox, and how to add results directly to the clinical record.
Manage results in the Inbox
- From the menu bar, select To do > Inbox. Your personal Inbox will appear.
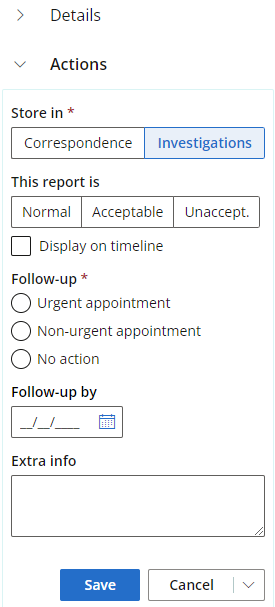
- Select a file to review it. The Details and Actions sections will appear on the right.
- If required, edit the report details by selecting Details > Edit.
- Under Actions, select where the file should be stored in the clinical record: Correspondence or Investigations.
- Normal
- Acceptable
- Unacceptable.
- Indicate if the document should display on the Patient or Client's timeline in the clinical record.
- Select whether an Urgent appointment or Non-urgent appointment should be arranged, or if No action is required.
- Enter a date to Follow-up by, and any Extra info if required.
- Click Save. the report will be removed from the Inbox.
Any reports that have been allocated to you will appear under Files on the left-hand side of the screen.
If you select Investigations, Indicate if the report is:

Selecting Urgent appointment or Non-urgent appointment will create a task in the Follow-up tasks list.
Add results to the clinical record
- In the clinical record, select Investigations from the options on the right-hand side of the screen. the Investigations section will appear.
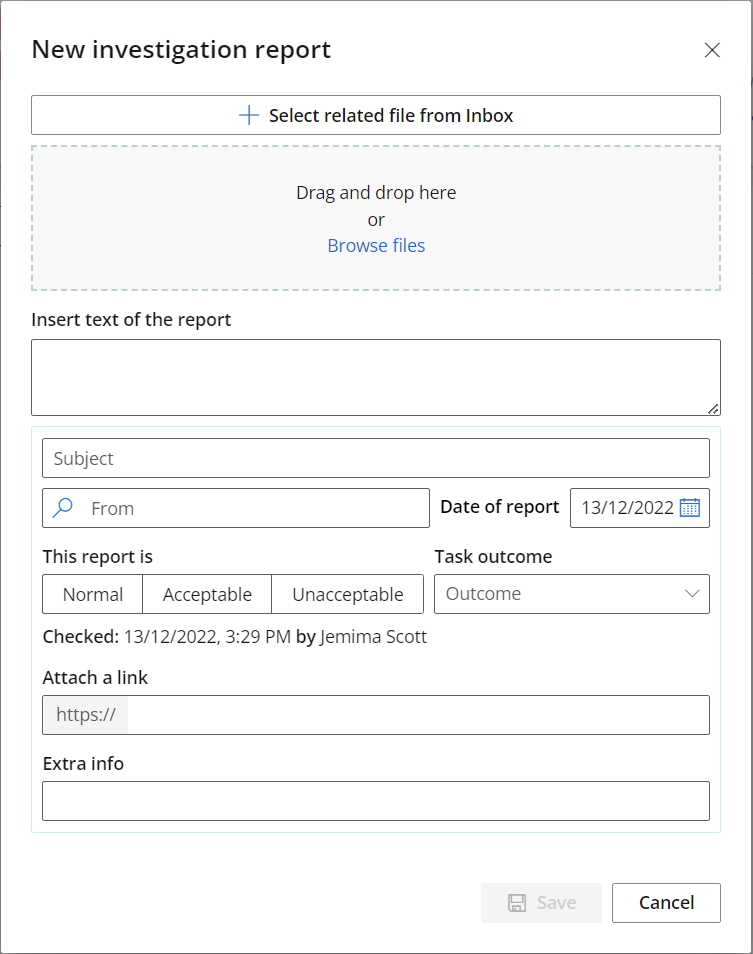
- Click the + icon next to Reports. The New investigation reportscreen will appear.
- Add the report in one of the following ways:
- To check if the report is in the inbox, click Select related file from Inbox. Select the file and click Select.
- If you have a copy of the report on your PC, drag and drop the report onto the screen, or click Browse files to navigate to the report and select it.
- Enter the report Subject, who the report is From, and the date the report was authored.
- Indicate whether This report is:
- Normal
- Acceptable
- Unacceptable
- Indicate the Task outcome from the list of options:
- Attempted contact
- Informed
- Booked
- Given
- None.
- You can Attach a link if the report contains images that have been uploaded online.
- Add Extra info if required.
- Click Save.

Last updated 13 December 2022