This article explains how to set up and use the four report types available in Bp Omni.
To access reports in Bp Omni, select Reports.
In this article
Before you begin
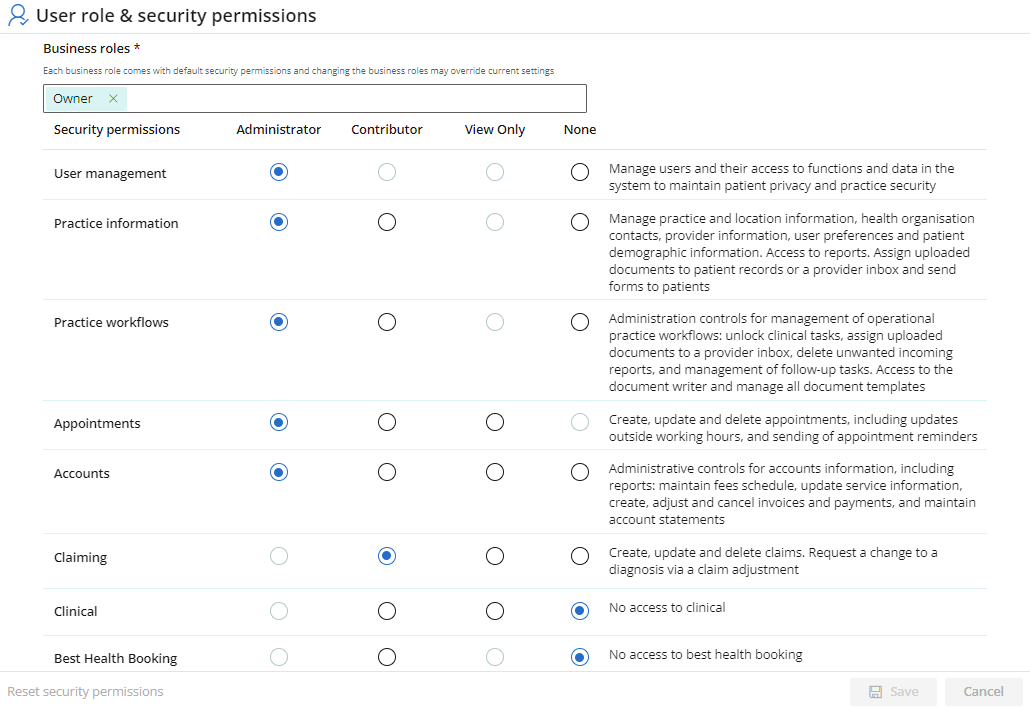
Access to reports in Bp Omni is determined by the Security Roles selected in the User Profile screen, such as physiotherapist, receptionist, or practice manager. See Configure Business Roles and Security Permissions
The following Security Roles grant users the ability to access all reports and share reports with other users in the Practice:
- Administrators
- Owner
- Practice Manager
There are two steps involved in granting users permission to access reports:
- For the type of user, configure the appropriate user Security Roles in Settings > Users.
- Determine which users will require access to reports and what data will be shown in them. See Report types for more information.
Configure Security Roles for Users
You must log in as a user with the security role of Owner, Administrator, or Practice Manager.
- Select your profile icon in the top-right corner of the menu bar and select Settings. The Users screen will appear.
- Enter the user name in the search box, and click to edit.
- Enter the user's roles in the security section. Roles define the user's access privileges and are used for security. Users who have a clinical role, for instance, will have access to patient records. A user may have several roles assigned to them.
- Click Save.

Report types
There are four different types of reports in Bp Omni. These types are:
- Base Reports
- Preset Reports
- Public Reports
- My Reports.
Access to all four report types is granted to users who have the security roles of Owner, Administrator, or Practice Manager. Users with less privileged security roles will only be able to see My Reports and Public Reports.
|
Base Reports |
There are four different categories of base reports in Bp Omni. These categories are:
Base reports are the raw unfiltered data available to each of the above categories in Bp Omni. You can modify base reports and save a copy to provide more meaningful and useful data for your practice. |
|
Preset Reports |
Preset reports are a collection of reports created by Best Practice Software from the data available in base reports. Preset reports have been modified to provide more useful information for practices, that can answer business questions. Only administrators can view Preset reports. Preset reports cannot be overwritten (saved over) or deleted. |
|
Public Reports |
Public Reports are reports that have been saved from either Base or Preset reports, and have been made public when saved. Public reports are available to users without administration permissions, and can be deleted. |
|
My Reports |
My reports are only viewable by the user who saved them. They are reports that have been saved from either Base, Preset or Public reports. They are not available publicly. My reports can be created by users without administration permissions by saving a public report, and by users with administration permissions by saving a public, Preset or Base report. My reports can be deleted. |
NOTE Base reports are for advanced users. You may find it easier to construct your custom reports by editing Preset Reports.
Only administrators can view base reports.
Base reports cannot be overwritten (saved over) or deleted.
Set the date range for a report
Two options are available for selecting a date range for reports in Bp Omni. You can select a From and a To date, or you can choose a Standard range, for example, the last three calendar months.
The Standard range is relative to the current date. For example, if it is mid-August and you set the standard range to the last calendar month, the report will show data for July. If you go back and run the report again in mid September, the report will show data for August, without the need to change any date settings.
If you choose a standard range, the From and To dates will change to reflect the dates that are included in the Standard range.

Modify the data that appears in a report
You can modify the columns that are included in a report based on your requirements.
Only administrators can add new columns to reports.
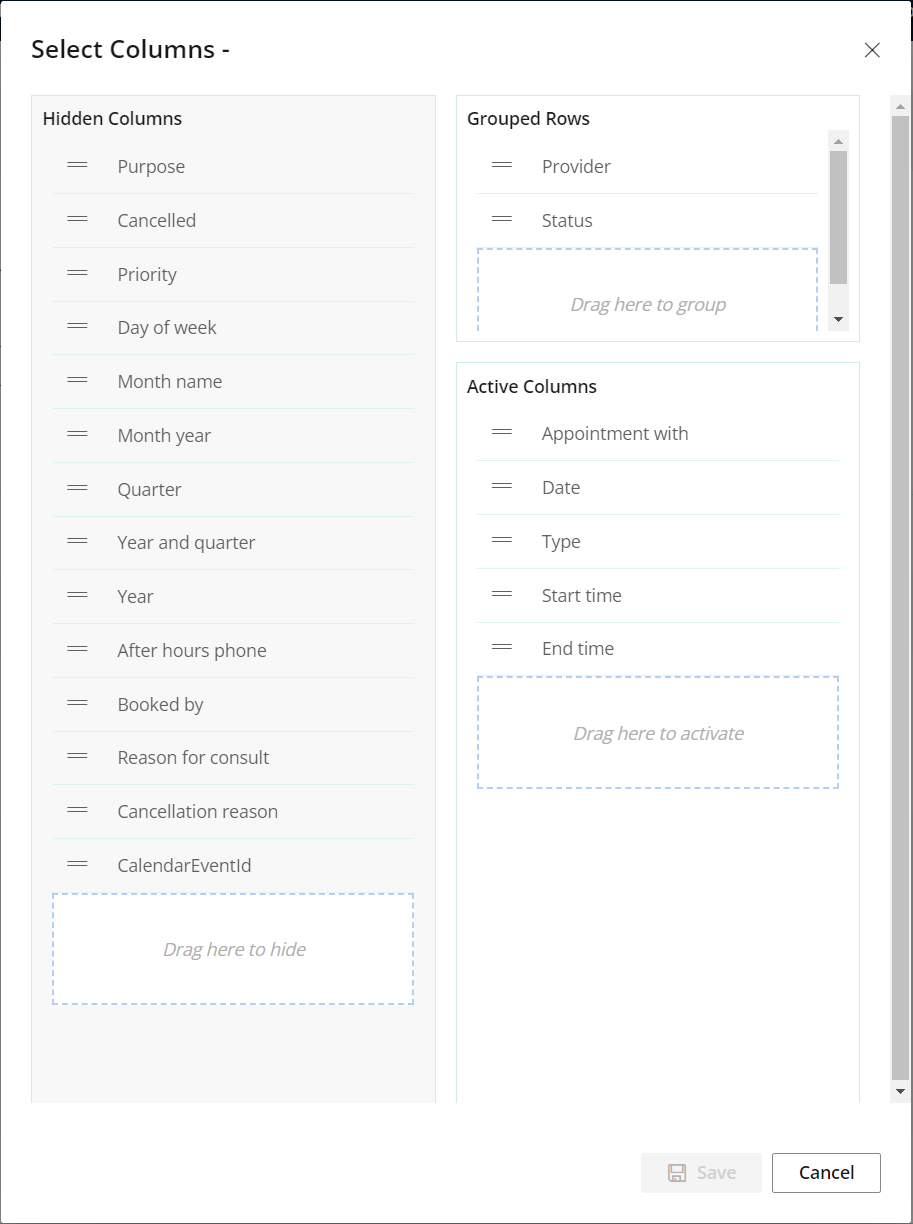
- Click Columns on the right-hand side of any report. The Select Columns screen will appear.
- To add new columns to the report, drag an option from the Hidden Columns section on the left into the Active Columns section on the right.
- To remove columns, drag an option from the Active Columns section into the Hidden Columns section.
- You can also drag an option into the Grouped Rows section to group rows related to these columns together.
- Click Save to implement your changes in the report.

The available columns will differ depending on the type of report you are using.
Saving a report
Base and Preset Reports cannot be saved over, you can only save a new copy of these reports.
My and Public Reports can be saved over, or you can save a new copy of these reports
When you save a copy of a report, you can make the report available to other staff members (Public Reports), or you can limit access to just yourself (My Reports).
Public reports can also be restricted so that the provider accessing the report can only see information relevant to them.
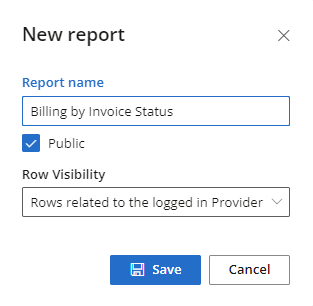
- Click Save As or click the down arrow beside Save and select Save a copy . The New report screen will appear.
- Enter a Report name.
- If you only want the report to be available to you, ensure Public is unticked and click Save. The saved report will appear in the My reports section.
- If you want the report to be available to other staff members, tick Public. If the report contains appointment, billing, or payment information, the Row Visibility menu will appear.
- If the Row Visibility menu appears, select whether the person viewing the report will be able to see all rows, or just the rows related to the logged in provider.
- Click Save. The saved report will appear in the Public Reports section or the My reports section depending on whether it was made public or not.

Exporting a report
You can export reports to PDF and XLSX formats by clicking PDF or Excel in the top right of the reports screen.
Last updated 10 February 2023