
Bp Premier offers a Guidance-based Request (GBR) workflow for imaging requests. The workflow for GBR is slightly different to the process of manually creating an imaging request.
The main steps in a guidance-based request are:
- Select the clinical contexts that apply.
- Select the tests to include
- Include relevant clinical information if required, such as Rx and Past History.
- Submit the request and print the patient form.
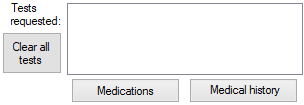
At any time, you can click Clear all tests to restart the GBR request.
Select clinical contexts
- From the patient record, press Shift+F6 or click the Imaging icon
 . The Imaging Request screen will appear.
 - Expand a context and click one of the expanded options once to view the context details in the window below the Clinical context list.
- Expand a context and click one of the expanded options in the Clinical context list. The recommended tests for the context will display in the panel to the right.
- Click a recommended test to add the test to the Tests requested field.
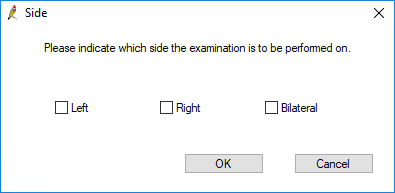
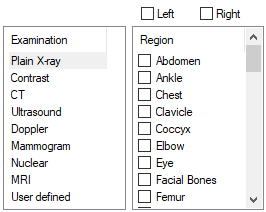
- If the context you have selected requires extra information about the location where the examination should be performed, a window will appear requesting this information.
- Double-click an Examination and tick a Region. Tick Left or Right if required. The information will be added to the Tests requested field.
- Click a button to add details. For example, if you click Medications, the Include Current Rx window will open to select applicable medications.
- Select the medications or history to include in the imaging request and click OK. The button will be updated with a green tick (
 ).
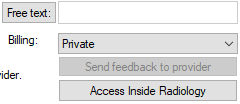
). - Tick Follow up test recommended by imaging provider to add a note to this effect to the imaging request.
- You can enter Free text to add information to the request if necessary.
- Indicate the Billing type if different to the default selection.
- Tick Add an entry to the actions database to automatically create an Action for staff to follow up this request.
- Click Print & Send to print the request for the patient and send the electronic request.
When GBR is enabled for the provider, the Imaging Request screen changes to the GBR format.
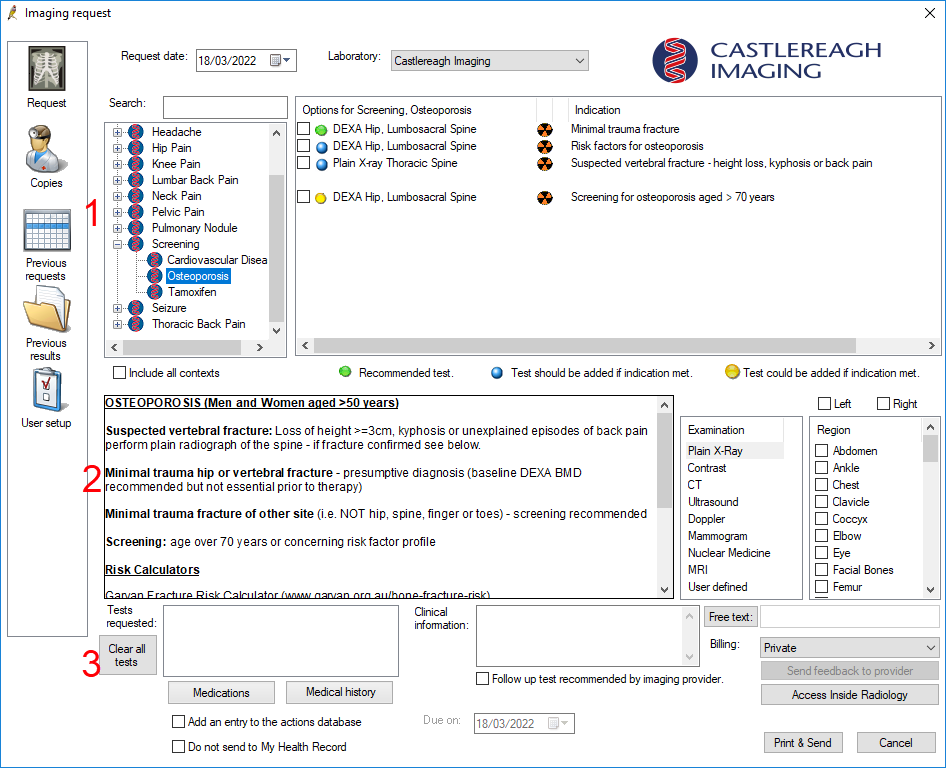
The Imaging Request screen for GBR can be divided into thirds.
The top third lists clinical contexts based on patient history and demographic data. Tick Include all contexts to remove demographic filtering from the Clinical context list and show all available contexts. Click the plus icon to the left of the context or double-click the context to display more detailed context options.
The middle third shows information about the selected context, and allows you to add tests manually.
The bottom third of the screen finalises the imaging request and allows you to enter additional clinical information as free text, or selected from medications or history.

Suggested tests will display in the panel to the right.
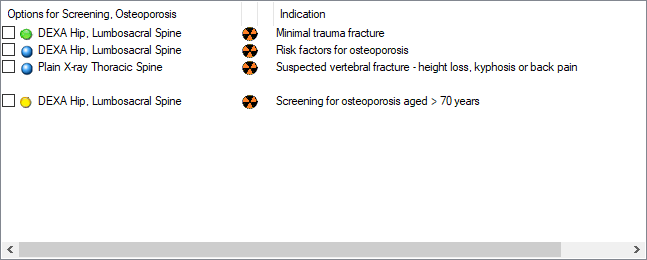
The icons in the suggested tests panel provide information about the tests at a glance.
Green, blue and yellow icons
Green blue and yellow icons indicate which circumstances the tests are recommended under.
|
Icon |
Description |
|---|---|

|
Recommended test |

|
Test should be added if the indication is met. |

|
Test could be added if the indication is met. |
Radiation icons
If a test will expose the patient to ionising radiation, a radiation symbol will appear beside the test.
|
Icon |
Description |
|---|---|

|
The study exposes the patient to low levels of ionising radiation. with an additional lifetime risk of cancer induction of < 1:20,000. |

|
The study exposes the patient to ionising radiation, with an additional lifetime risk of cancer induction between 1:20,000 and 1:4000. |

|
The study exposes the patient to ionising radiation, with an additional lifetime risk of cancer induction of over 1:4000. |
Click the radiation symbol for more information.
Dollar icons
If a test may incur out of pocket expenses for the patient, a dollar symbol will appear beside the test.
|
Icon |
Description |
|---|---|

|
Out of pocket expenses may only apply for the test under certain circumstances. |

|
The test will incur out of pocket expenses, but the test is not costly. |

|
The test will incur out of pocket expenses, and the test is costly. |
Click the dollar symbol for more information.
Select the tests to include
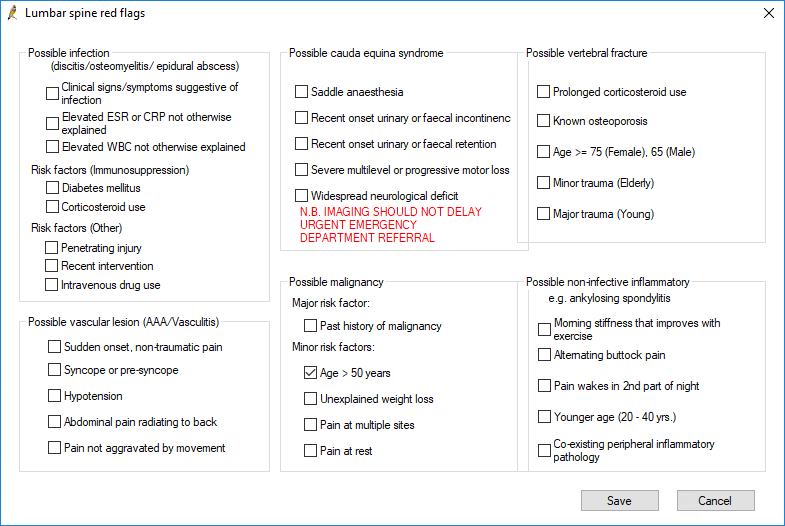
Red flag screen
For some contexts, when the context is selected a red flag screen will appear. use the red flag pop up to record further clinical information relevant to the context, then click Save.
To add additional tests not included in the suggested tests panel:
Include clinical information
If the patient has current medications prescribed or active conditions, the Medications, and Medical history buttons will appear at the bottom of the Imaging Request screen. If a button has a red plus sign, you must supply details before the request can be submitted.
Submit request
Send feedback
If you have email set up in Bp Premier, you can submit feedback about tests recommended from clinical context to the imaging lab. Click Send feedback to provider and complete the form.
Your GBR imaging request is complete.


 AU
AU 