
The Database Password Access Manager is a Bp Premier desktop utility introduced in Bp Premier Oxford SP1 that lets a practice administrator control which computers are allowed to retrieve database password credentials from the server. A workstation will not be able to connect to the Bp Premier database unless it is approved in the utility.
IMPORTANT This utility does not control access to the workstation's ability to connect to the database. Users cannot access the utility when using the Bp Premier samples database.
In this article:
Launch the Database Password Access Manager
NOTE To use the Database Password Access Manager, users must have the Setup/Configuration permission set to Add/Edit/Delete and be running a supported version of Bp Premier.
-
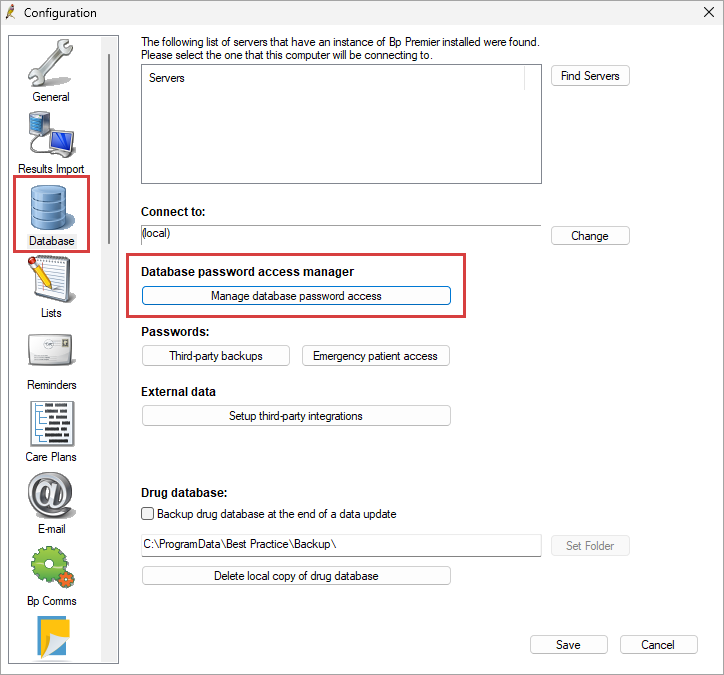
From the Bp Premier main screen, go to Setup > Config > Database > Manage Database Password Access.
- The Database Password Access Manager will launch.
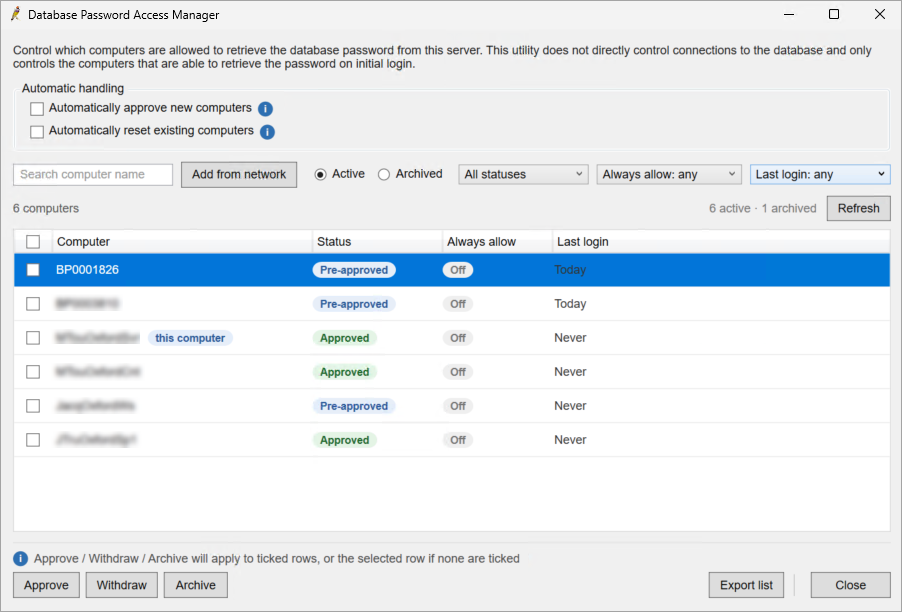
Computers list
Use the filters to find specific PCs and perform bulk actions using the Select all checkbox.
|
Column |
Description |
|---|---|
|
Computer |
List of computers that are connected, have previously connected, or are waiting to connect to the Bp Premier database. |
|
Status |
The status of the computer's access to the Bp Premier database. |
|
Always allow |
This will automatically reset access if an approved computer does not have a registry key. Menu option available from the right-click menu to turn Always allow on or off. |
|
Last login |
The last time the computer accessed the Bp Premier database. |
Statuses
|
Status |
Description |
|---|---|
|
|
The computer has attempted to connect to the Bp Premier database, however requires manual approval by the user. |
|
|
The computer has been approved, however it has not yet connected. Once connected it will automatically update to Approved. |
|
|
The computer has connected to the database and has been supplied a password. |
|
|
Access to the Bp Premier database has been Withdrawn for this computer. |
|
|
The computer was previously approved but no longer has a valid security key and cannot connect to the database. |
|
|
If a computer has not accessed the database in a long time it can be Archived to remove it from the main list. Archiving a computer will not change the access level or status, it will only hide it from the main list. |




Filters
|
Filter |
Description |
|---|---|
|
Search computer name |
Find a computer by typing in the computer name. The name of a computer can be found from Windows > About your PC > Device name. |
|
Status |
This filter will be set to All statuses by default. Search by Pending, Pre-approved, Approved, or Withdrawn. |
|
Always allow |
Filter by computers that have Always allow: on or Always allow: off. The filter will be set to Always allow: any by default. |
|
Last login |
Filter computers by when the last logged on. Filter by Last login: any, Over 30 days ago, Over 60 days ago, Over 90 days ago, or Never connected. The default for this filter is Last login: any. |
Approve a new computer
When a new PC attempts to connect to the Bp Premier database, it will be in a Pending state. Once the user approves the PC from the utility, it will move to the Pre-approved state. When the PC attempts to connect to the Bp Premier database in the Pre-approved state, it will be granted access and updated to Approved.
NOTE To use the Database Password Access Manager, users must have the Setup/Configuration permission set to Add/Edit/Delete and be running a supported version of Bp Premier.
- Launch Bp Premier on the new computer. The computer will be moved to a Pending state.
- On a separate computer that has access to Bp Premier, go to Setup > Config > Database > Manage database password access.
- The Database Password Access Manager will launch.
- Locate the computer with a Pending status and click Approve. The new computer will be moved to a Pre-approved state.
- From the new computer, launch Bp Premier again. The new computer will be moved to an Approved state and can now access the Bp Premier database.

NOTE If there are no computers selected using the checkboxes, the highlighted computer will be approved. If there are any computer checkboxes selected, these will be approved.
Approve multiple new computers
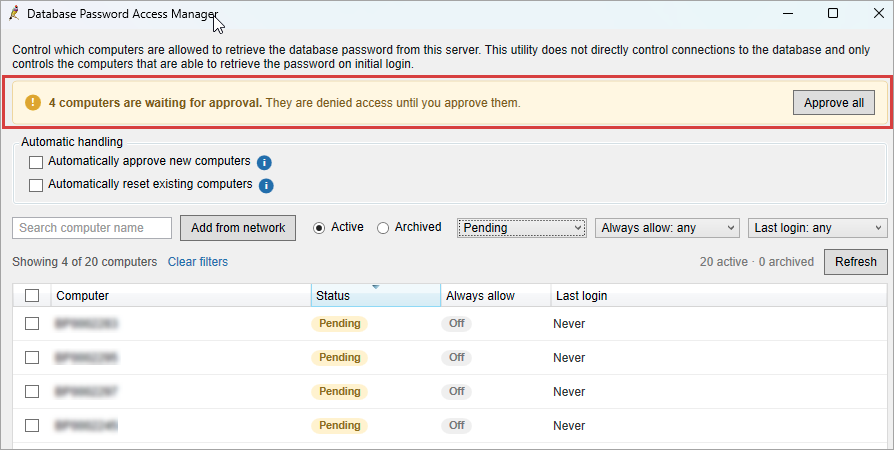
If there are multiple computers in the pending state, users can select the button at the top of the screen to Approve all.
Approving Virtual Machines
Computer names are recorded differently in the Database Password Access Manager depending on the circumstance. The computer name may be recorded as either the local client, or the virtual machine.
If you practice uses virtual machines, only the virtual machine requires approval. The local client that the virtual machine is launched from does not need to be approved in the Database Password Access Manager, though the computer name may still display in the list of computers. These local client computers can be safely archived or withdrawn.
Automatically approve new computers
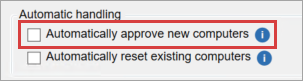
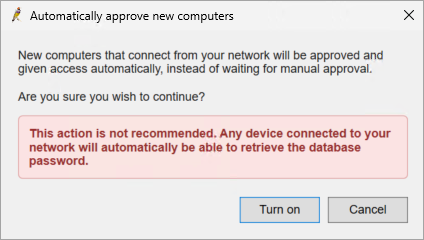
The setting to Automatically approve new computers will put all computers attempting to connect to the Bp Premier database in a Pre-approved state, bypassing the Pending state, without the need for a user to manually approve computers via the utility.
IMPORTANT This function is not enabled by default and is not recommended for security purposes, but the option is available for clinics to decide to use at their own risk.
To enable this setting:
- From the Bp Premier main screen, go to Setup > Config > Database > Manage database password access.
- Select Automatically approve new computers.
- Select Turn on from the Automatically approve new computers screen.
Add computers from the network
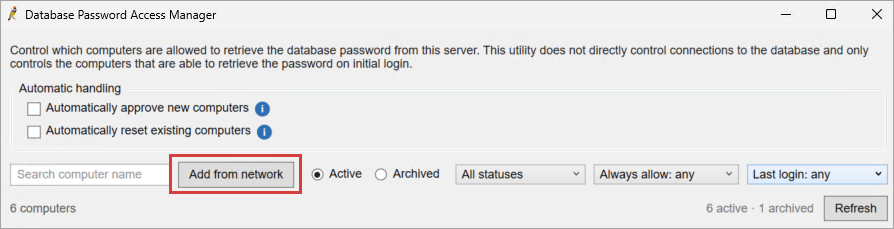
If a practice is setting up multiple new workstations, the Add from network function will allow users to select computers in the network and automatically update them to a Pre-approved state.
- From the Database Password Access Manager, click the Add from network button.
- In the Add computers from the network screen, select computers found in the domain to pre-approve or Select all new.
- Click Pre-approve selected.
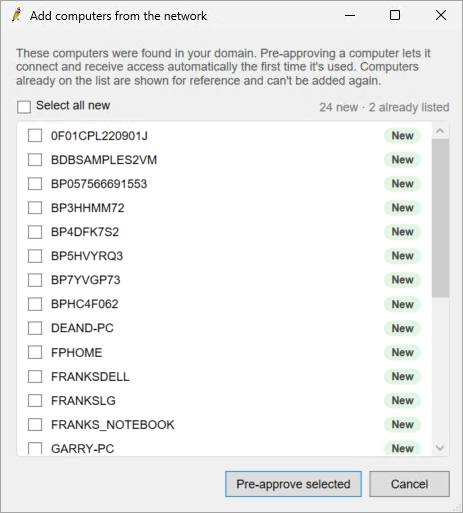
This will move all selected computers from the network to a Pre-approved status. When these computers launch Bp Premier for the first time, they will be able to connect to the database and move to an Approved state.
Reset computer access
There are some instances where a computer that was previously approved no longer has a valid security key and cannot connect to the database.
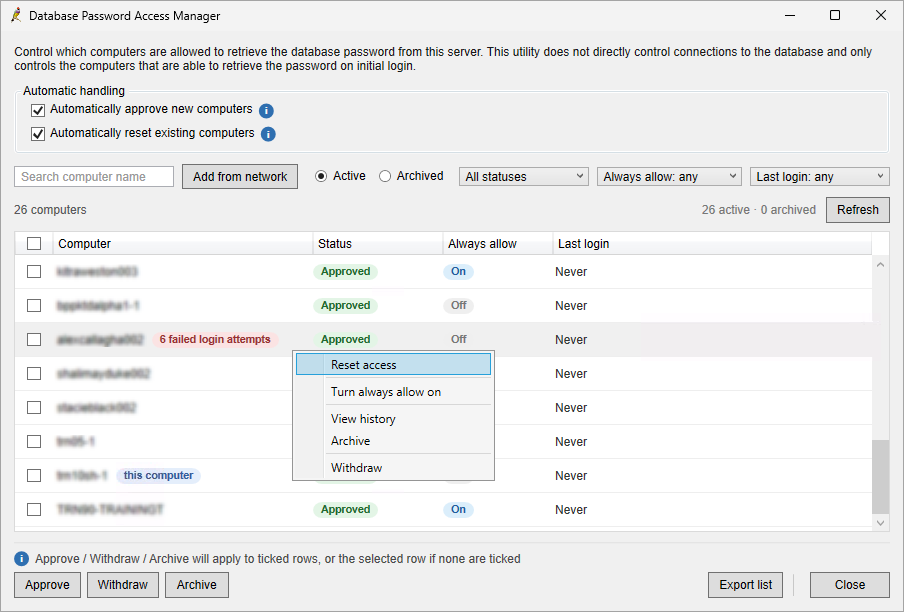
This can occur if the security key is deleted from the registry, or if the workstation is reformatted and given the same name as previous when Windows is reinstalled. The computer will display with an Approved status but will show the failed login attempts in the Database Password Access Manager.
The user will be prompted with a message on launching Bp Premier to inform them that their security key is no longer valid, and they will need their practice administrator or IT to reset access from the Database Password Access Manager.
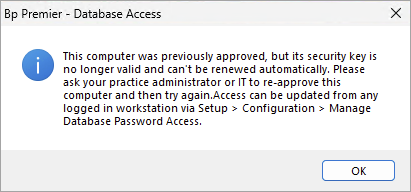
To reset access for a computer:
- From the Bp Premier main screen, go to Setup > Config > Database > Manage database password access.
- Locate the affected workstation with an Approved status and failed login attempts.
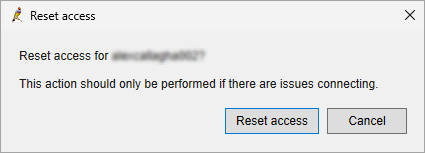
- Right-click on the computer and select Reset access.
- Confirm that you would like to reset access for this machine.
- The workstation will be moved to a Pre-approved state.
- Launch Bp Premier on the affected workstation. The Database Password Access Manager will see that the workstation has been pre-approved and will issue a security key. The workstation will be moved back to Approved and the workstation can now access the database.
Automatically reset existing computers
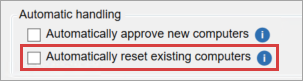
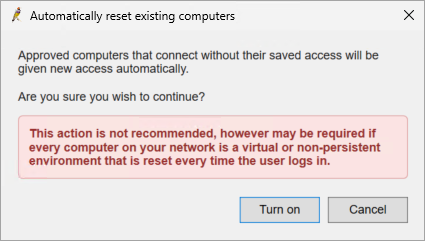
Under the Automatic handling heading there is an option to enable the ability to Automatically reset existing computers. This will automatically reset access to any computers that are approved but do not have a valid security key.
This action is not recommended but may be required if all computers in the network are virtual or a non-persistant environment such as Citrix, where a machine can be reset back to a previous snapshot every time it is closed and reopened.
When this setting is enabled, the Database Password Access Manager will always allow connection from the computer even if it does not have a security key.
IMPORTANT This function is not enabled by default and is not recommended for security purposes, but the option is available for clinics to decide to use at their own risk.
To enable this setting:
- From the Bp Premier main screen, go to Setup > Config > Database > Manage database password access.
- Select Automatically reset existing computers.
- Select Turn on from the Automatically reset existing computers screen.
Set an individual PC to Always allow
The option to automatically reset access to a computer that is approved but does not have a valid security key can also be set for individual computers.
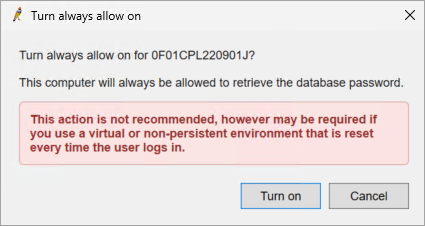
This action is not recommended but may be required if all computers in the network are virtual or a non-persistant environment such as Citrix, where a machine can be reset back to a previous snapshot every time it is closed and reopened.
IMPORTANT This function is not enabled by default and is not recommended for security purposes, but the option is available for clinics to decide to use at their own risk.
- From the Bp Premier main screen, go to Setup > Config > Database > Manage database password access.
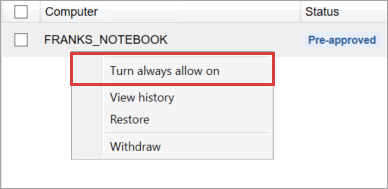
- Right-click on the computer and select Turn always allow on.
- Select Turn on from the Turn always allow on screen.
- The computer will display with an On badge in the Always allow column.

TIP To disable this setting, right-click on the computer and select Turn always allow off.
Archiving computers
If a computer has not accessed the database in a long time it can be Archived to remove it from the main list.
IMPORTANT Archiving a computer will not change the access level or status, it will only hide it from the main list. If a computer no longer needs access to the database, it is recommended to Withdraw the computer as well as archiving.
To archive a computer:
- From the Database Password Access Manager, select a computer to be archived in the Active screen.
- Right-click the selected record and click Archive.
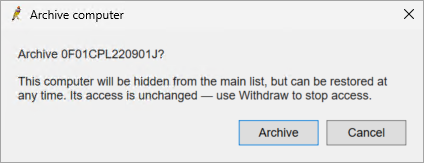
- A message will prompt the user “The selected computers will be hidden from the main list but can be restored at any time. The access is unchanged – use Withdraw to stop access.”
- Click Archive.
- Select the Archived radio button to view the list of archived computers.
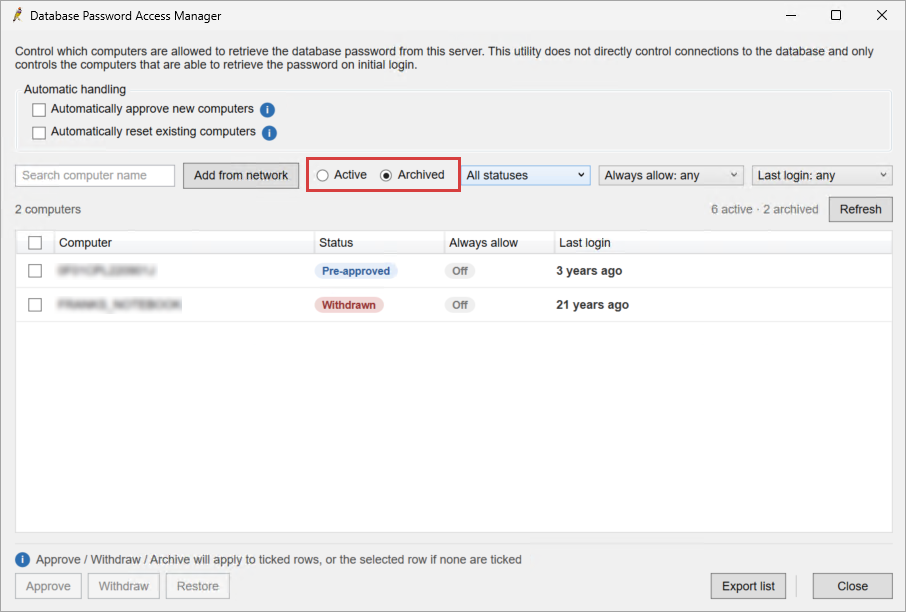
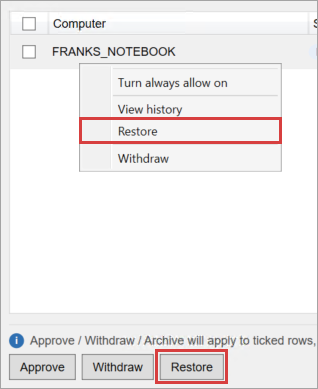
Restore an archived computer
Archived computers can be restored by right-clicking on a computer in the Archived list and selecting Restore.
Withdraw a computer
Withdrawing a computer from the Database Password Access Manager will not stop the workstation from connecting to the database if the computer has previously connected and been approved.
NOTE You cannot withdraw the computer that you are using the utility from.
To withdraw a computer:
- From the Bp Premier main screen, go to Setup > Config > Database > Manage database password access.
- Locate the computer to withdraw access to the utility from.
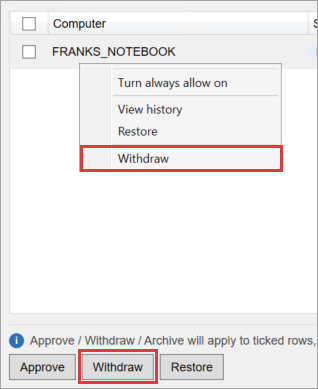
- Right-click on the highlighted record and select Withdraw or click the Withdraw button at the bottom of the screen.
Re-approve a withdrawn computer
- From the Bp Premier main screen, go to Setup > Config > Database > Manage database password access.
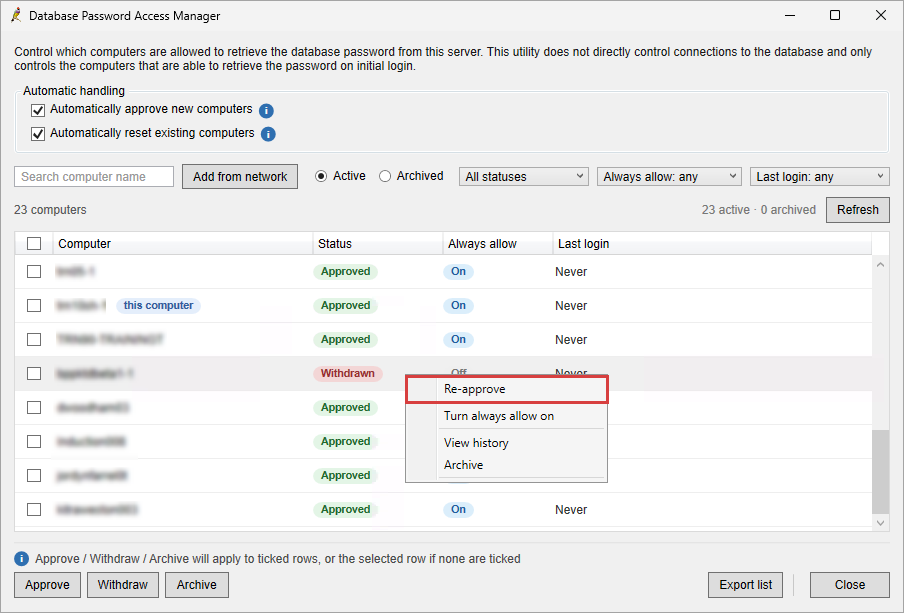
- Right-click on the Withdrawn computer and select Re-approve.
- The workstation will be moved to a Pre-approved state.
- Launch Bp Premier on the affected workstation. The Database Password Access Manager will see that the workstation has been pre-approved and will issue a security key. The workstation will be moved back to Approved and the workstation can now access the database.
View a computer's history
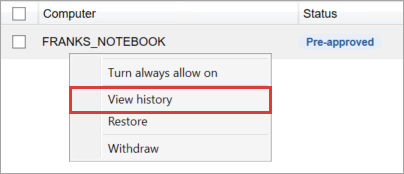
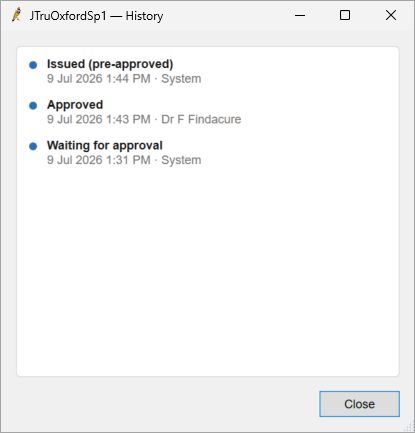
To view a history of the actions taken against a computer in the Database Password Manager:
- Right-click on a computer and select View history.
- The History screen will open. Click Close to return to the main screen of the Database Password Access Manager.
Export list of computers to a .csv file
- From the Database Password Access Manager, set the relevant filters for the data you wish to export.
- Click Export list.
- Select a location to save the .csv file to.
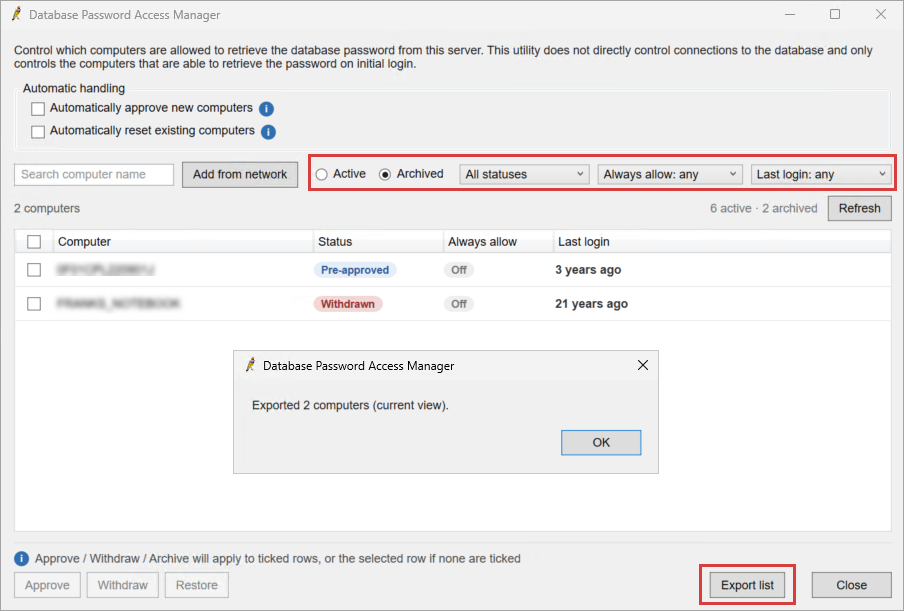
The file can now be opened in Microsoft excel and saved as an .xsl file
Database access login prompts
The following table shows the various prompts a user may encounter when attempting to log in to Bp Premier and the action to be taken.
|
Prompt |
Action to take |
|---|---|
|
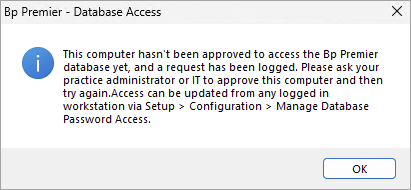
This computer hasn't been approved to access the Bp Premier database yet, and a request has been logged. Please ask your practice administrator or IT to approve this computer and then try again. Access can be updated from any logged in workstation via Setup > Configuration > Manage Database Password Access.
|
|
|
This computer was previously approved, but it's security key is no longer valid and can't be renewed automatically. Please ask your practice administrator or IT to re-approve this computer and then try again. Access can be updated from any logged in workstation via Setup > Configuration > Manage Database Password Access.
|
|
|
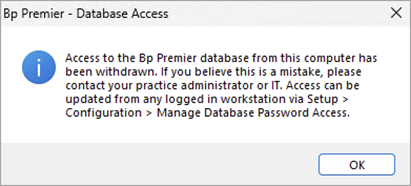
Access to the Bp Premier database from this computer has been withdrawn. If you believe this is a mistake, please contact your practice administrator or IT. Access can be updated from any logged in workstation via Setup > Configuration > Manage Database Password Access.
|
|
|
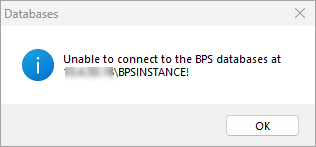
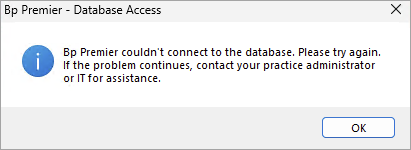
Bp Premier couldn't connect to the database. Please try again. If the problem continues, contact your practice administrator or IT for assistance.
|
See Troubleshooting Bp Premier Oxford SP1 Installation and follow the instructions to Run the Update Database utility and Restart the HALO Link Service. |
Database Connector Exit Codes
The following table contains errors and warnings that the user may experience on updating to Bp Premier Oxford SP1 and the action to take.
|
Exit Code |
Action to take |
|---|---|
|
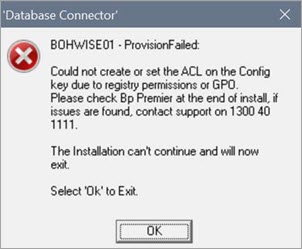
ProvisionFailed: Could not create or set the ACL on the Config key due to registry permissions or GPO. Please check Bp Premier at the end of install, if issues are found, contact support on 1300 40 1111. The installation can't continue and will now exit. Select 'Ok' to Exit.
|
The computer does not have sufficient registry or GPO permissions. Contact your IT Vendor for further assistance. Click OK to exit the installer. |
|
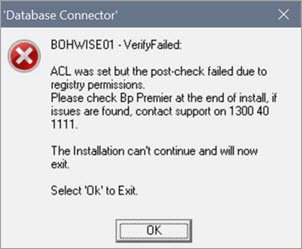
VerifyFailed: ACL was set but the post-check failed due to registry permissions. Please check Bp Premier at the end of install, if issues are found, contact support on 1300 40 1111. The installation can't continue and will now exit. Select 'Ok' to Exit.
|
The computer does not have sufficient registry permissions. Contact your IT Vendor for further assistance. Click OK to exit the installer. |
|
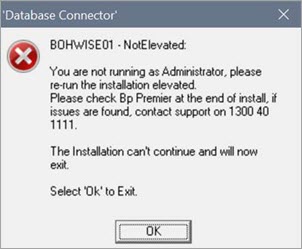
NotElevated: You are not running as Administrator, please re-run the installation elevated. Please check Bp Premier at the end of install, if issues are found, contact support on 1300 40 1111. The installation can't continue and will now exit. Select 'Ok' to Exit.
|
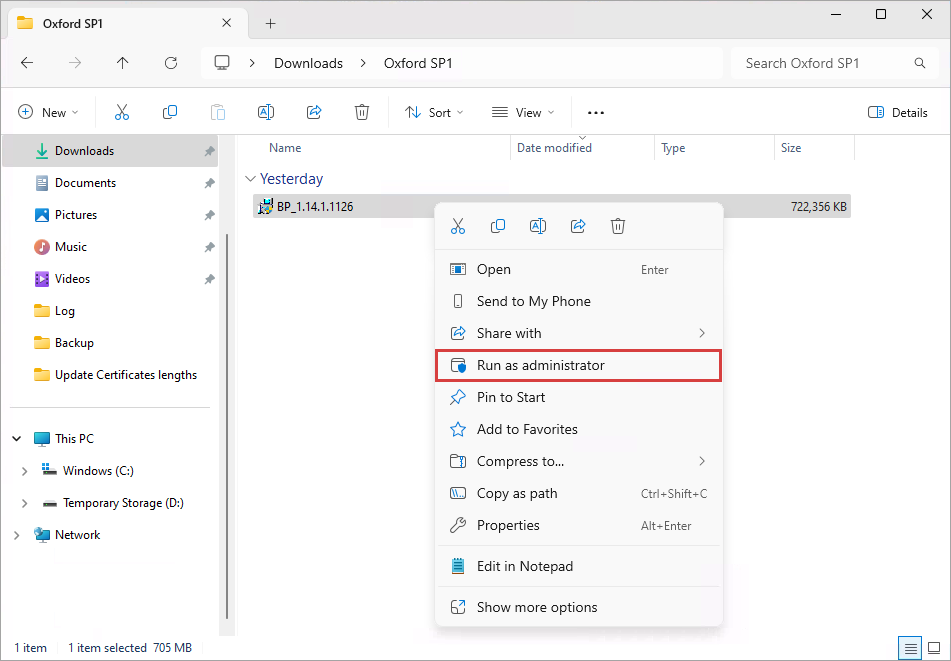
The installation file must be Run as administrator. Click OK to exit the installer and re-run as administrator.
|
|
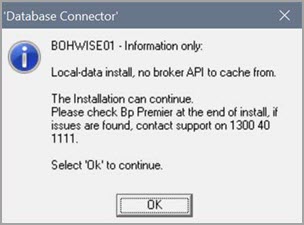
Information only: Local-data install, no broker API to cache from. The installation can continue. Please check Bp Premier at the end of install, if issues are found, contact support on 1300 40 1111. Select 'Ok' to continue.
|
Click OK to continue. |
|
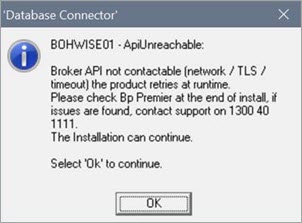
ApiUnreachable: Broker API not contactable (network / TLS / timeout) the product retries at runtime. Please check Bp Premier at the end of install, if issues are found, contact support on 1300 40 1111. The installation can continue. Select 'Ok' to continue.
|
Bp Premier cannot connect to the API and will reattempt when running the software for the first time after installation. Click OK to continue.
|
|
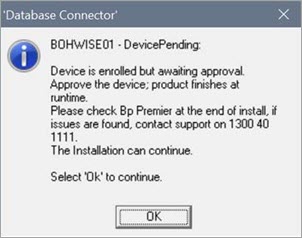
DevicePending: Device is enrolled but awaiting approval. Approve the device; product finishes at runtime. Please check Bp Premier at the end of install, if issues are found, contact support on 1300 40 1111. The installation can continue. Select 'Ok' to continue.
|
Approve the computer from the Database Password Access Manager. See Approve a new computer for further instructions. Click OK to continue. |
|
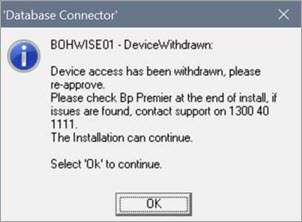
DeviceWithdrawn: Device access has been withdrawn, please re-approve. Please check Bp Premier at the end of install, if issues are found, contact support on 1300 40 1111. The installation can continue. Select 'Ok' to continue.
|
The computer has been withdrawn from the Database Password Access Manager. See Re-approve a withdrawn computer for further instructions. Click OK to continue. |
|
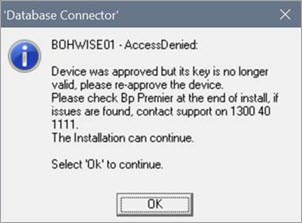
AccessDenied: Device was approved but its key is no longer valid, please re-approve the device. Please check Bp Premier at the end of install, if issues are found, contact support on 1300 40 1111. The installation can continue. Select 'Ok' to continue.
|
Reset the computer's access from the Database Password Access Manager. See Reset computer access for further instructions. Click OK to continue. |
|
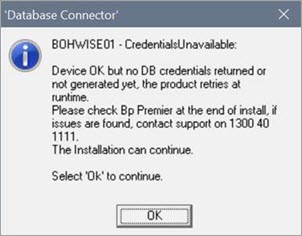
CredentialsUnavailable: Device OK but no DB credentials returned or not generated yet, the product retries at runtime. Please check Bp Premier at the end of install, if issues are found, contact support on 1300 40 1111. The installation can continue. Select 'Ok' to continue.
|
The computer has been approved but no database credentials were returned or generated. Bp Premier will reattempt to retrieve database credentials when running the software for the first time after installation. Click OK to continue. |
|
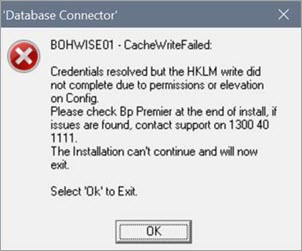
CacheWriteFailed: Credentials resolved but the HKLM write did not complete due to permissions or elevation on Config. Please check Bp Premier at the end of install, if issues are found, contact support on 1300 40 1111. The installation can't continue and will now exit. Select 'Ok' to Exit.
|
Contact your IT Vendor or Bp Support on 1300 40 1111 for further assistance. Click OK to exit the installer.
|
|
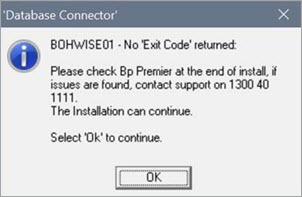
No 'Exit Code' returned: Please check Bp Premier at the end of install, if issues are found, contact support on 1300 40 1111. The Installation can continue. Select 'Ok' to continue.
|
Contact Bp Support on 1300 40 1111 if issues are found with Bp Premier after install. Click OK to continue. |
|
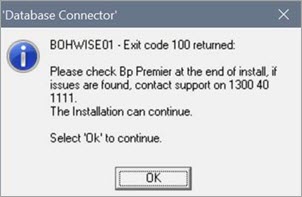
Exit code 100 returned: Please check Bp Premier at the end of install, if issues are found, contact support on 1300 40 1111. The Installation can continue. Select 'Ok' to continue.
|
Contact Bp Support on 1300 40 1111 if issues are found with Bp Premier after install. Click OK to continue. |
Last updated: 19 September 2026.



 AU
AU 