More information is available from Frequently asked questions about Bp Comms.
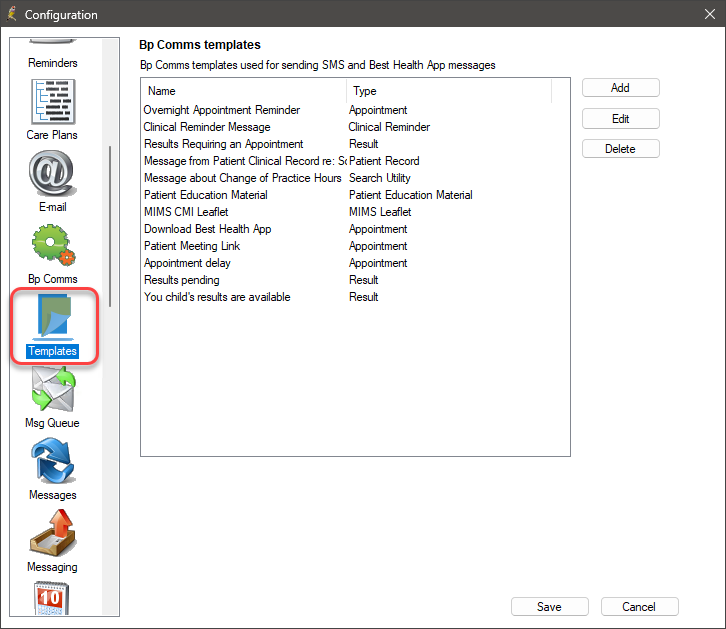
A Bp Comms message template is a combination of fixed text and dynamic fields in which data like patient names, doctor names, and appointment times are inserted from the database. Bp Premier supplies several standard templates that you can modify, or create your own.
In Bp Premier version Spectra, a new autofill option called <LocationPhone> has been added to Bp Comms templates in Setup > Configuration > Templates.
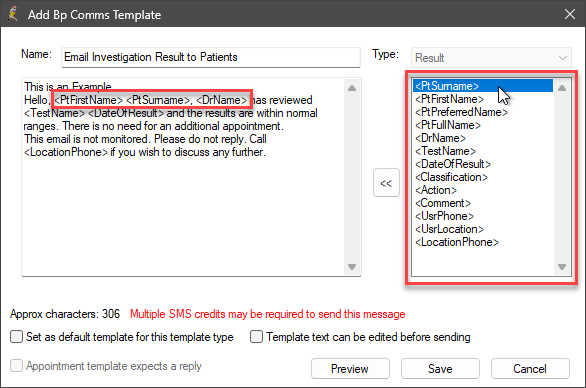
In Spectra SP1, the Result template type can be used when sending emails to patients from the Investigation Report screen in the Patient Record.
Create a Bp Comms template
NOTE Templates are not required for sending electronic prescriptions.
You can create as many message templates as you need.
- Select Setup > Configuration from the main Bp Premier screen. Select the Templates icon.
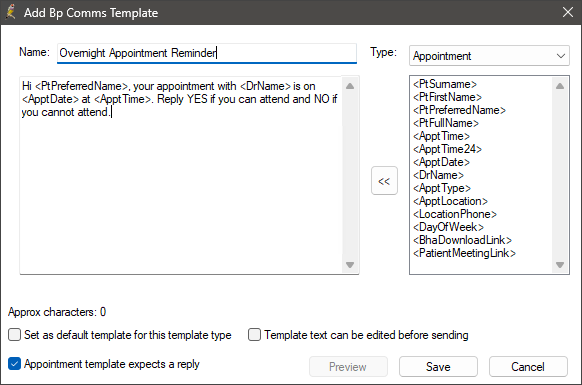
- Click Add on the right. The Add Bp Comms Template screen will appear.
- Enter a Name for the template and select the Type of template from the drop down. The template type determines the functions in Bp Premier from which the template can be selected.
- Type the template text into the text box. The text field has a 500-character limit.
- The template fields on the right hand side will be substituted with information when the reminder is sent. Double-click on a field to insert the field where the cursor is positioned in the template text.
- Select Set as default template for this template type to automatically select this template when a new message of this type is created. You can change the template before sending a message.
- Tick Template text can be edited before sending to allow a user to modify the template text before sending. If this option is not ticked, users will not be able to modify the message text from the template.
- If you are creating a new 'Appointment' template, tick Appointment template expects a reply if the patient is expected to reply and update the appointment book.
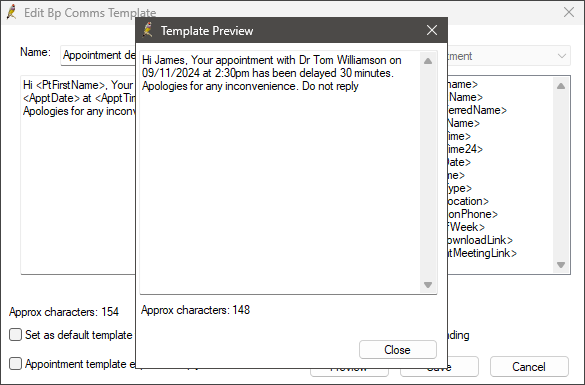
- Click Preview to view how the text will appear on a mobile device.
- If the message looks OK, click Close and Save to save the template.
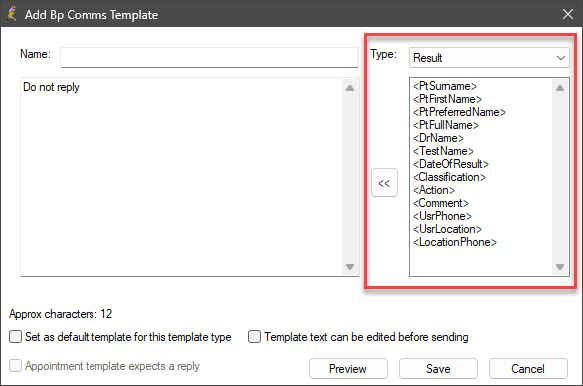
'Result' type templates are designed to be used when sending messages from the Inbox and Follow up Inbox screens. These templates contain autofill options for messages relating to patient investigation results.
In Spectra SP1, the 'Result' template type can be used when sending emails to patients from the Investigation Report screen in the patient record.

NOTE Your practice should carefully consider which templates are editable by users before sending. Templates should align with your practice's guidelines for patient-practice communications. If you allow editing, you cannot guarantee that the message will conform to those guidelines. You may wish to allow editing only for messages of type 'Patient record', for example, where tailored messages may be required.
Configure appointment attendance replies
You can specify which keywords in a patient reply to an appointment reminder will automatically update the appointment book. This functionality is relevant for SMS replies only; Best Health App message reply text is not configurable.
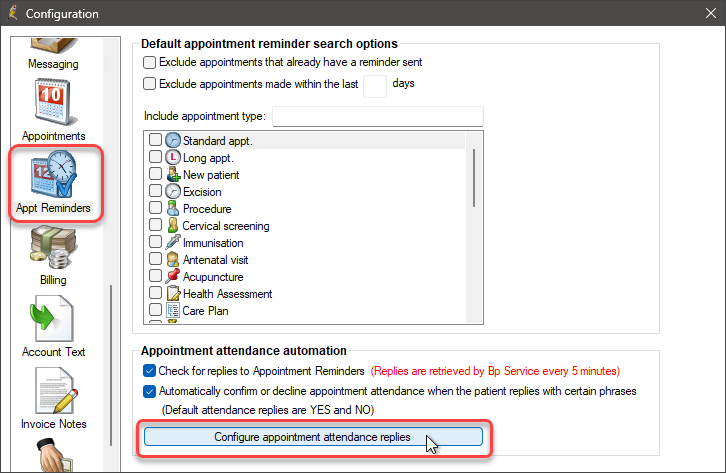
- From the main screen, select Setup > Configuration > Appt Reminders tab.
- Both of the check boxes under Appointment attendance automation must be ticked to enable appointment updates by SMS reply.
- Click Configure appointment attendance replies to open the Automatic Confirmation Options window.
- Tick Confirm or decline appointment when message begins with a keyword.
- Tick Confirm or decline appointment when message contains a keyword if you want a keyword to be accepted if it appears anywhere in the reply.
- Click Add next to the Confirm list of keywords. Type a new keyword and click OK to add the keyword to the list. Keywords are limited to 20 characters at most.
- Add as may Confirm and Decline keywords as you need.
- Click Ok to save your keywords and return to the Configuration window.
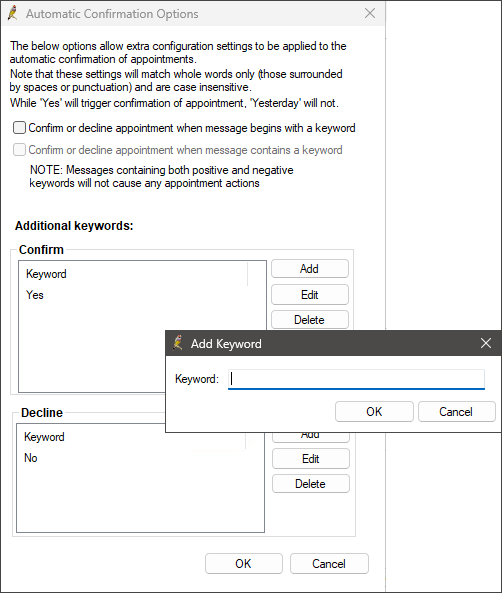
These two options don't apply to the default keywords 'Yes' and 'No'. These keywords will indicate a confirm or decline when they are the only words in the reply message, even if they start or are contained in the reply.
For example, a reply 'Yes I will be there' will not trigger an appointment confirmation, nor would 'Sorry no' trigger a declined attendance.
Keywords are only accepted as an exact match of whole words, even if you tick Confirm or decline appointment when message contains a keyword. For example, if you accept the keyword 'No', words like 'not' or 'nope' will not automatically update the appointment book. If a patient includes both Confirm and Decline keywords in a reply, the appointment will not be updated.
Last updated: 03 April 2025.