This article steps you through the workflow to submit a pathology request from the patient record, including setting up favourite test lists and custom test reasons.
Pathology investigation requests are made from the patient record.
Providers can also set up custom tests, custom test reasons, and a list of favourite tests. Pathology tests can be grouped and assigned to a single favourite.
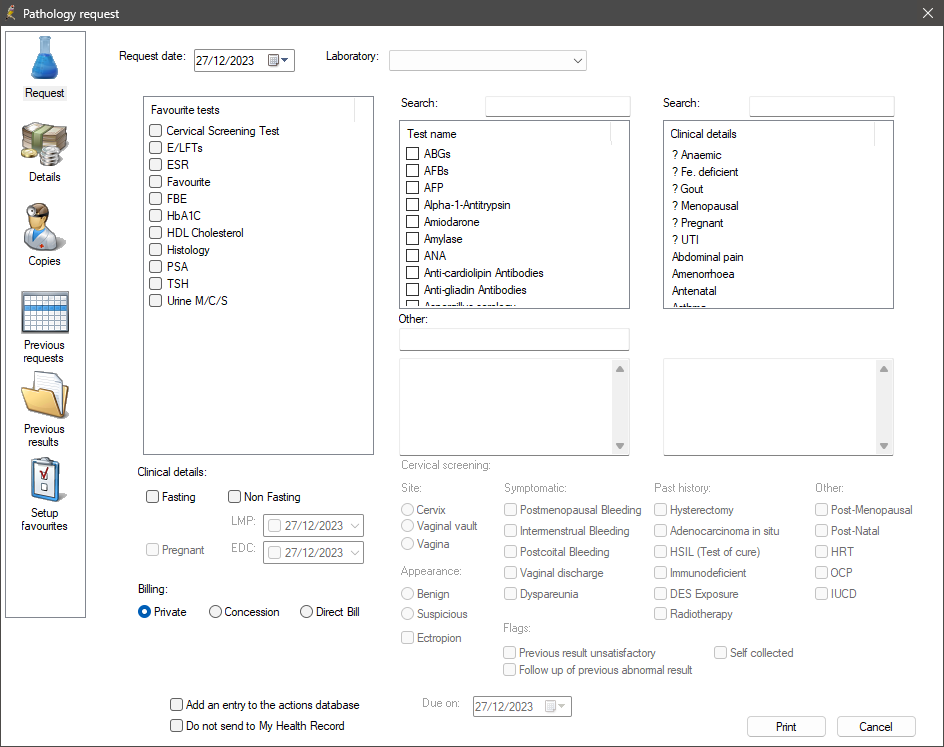
The workflow for submitting a request is the same. From the patient record, select Request > Pathology. The Pathology request screen will appear:
- Select the pathology lab.
- Select a favourite test or set of tests, or search for new tests to add.
- Add clinical details to the request.
- Indicate the billing and print the request.
Cervical screening tests have additional clinical details that must be indicated. See Cervical Screening for more information.
To set up pathology forms, see Set up pathology request forms.
The below video explains how to request a new or repeat a past pathology request, or go to step by step instructions.
- From the patient record, select Request > Pathology. The Pathology request screen will appear.
- Select the Laboratory to conduct the test.
- If the test you are requesting is in your Favourites tests list, select the test. Otherwise, enter text into the first Search field to search for tests in the Test name list.
- You can also enter a test as free text in the Other field.
- Search for conditions requiring the investigation in the Clinical details list. Double-click a condition to print on the form. Add as many conditions as required.
- Complete the Clinical details fields at the bottom of the screen.
- Change the Billing type from the default, if necessary.
- Tick Add an entry to the actions database to generate a staff Action for this request.
- If the request is urgent, select the Details tab, tick Urgent, and enter the date the report is required in the By field.
- Use the copy tab to add other recipients to the request. See the next panel for more information.
TIP If you have ordered a pathology test for this patient before and want to reorder the same test, select the Previous requests tab, select the test to copy, and click Use again. The Request fields will be automatically populated.
If you are satisfied the request is correct, click Print to print the pathology request form on the selected laboratory's format to hand to the patient.
If the pathology request is a cervical screen, complete the Cervical screening clinical details fields. See Cervical Screening for more information.
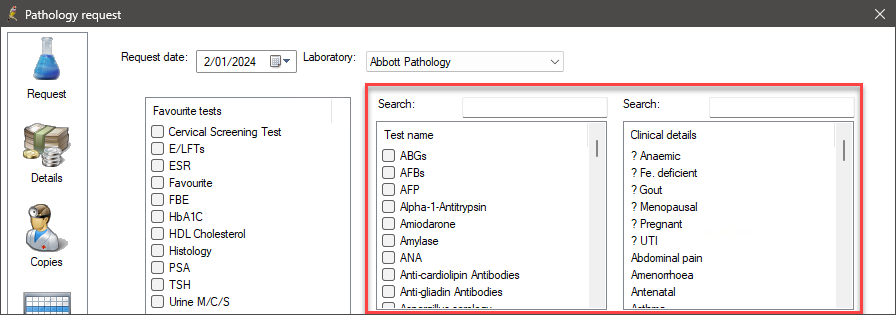
How do we populate the default lists in the Pathology Request window for the Test Name and Clinical Details sections?
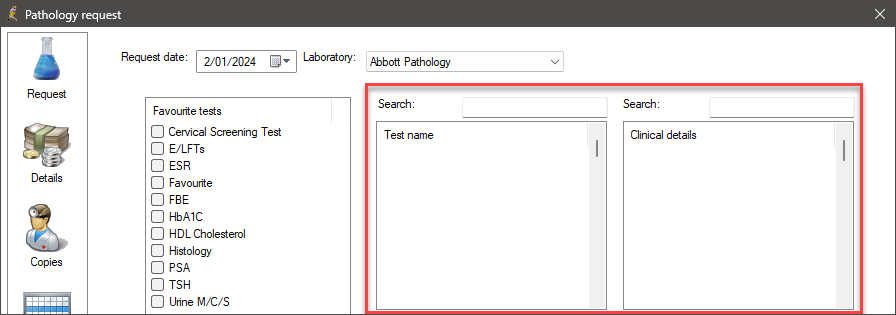
To include the default test names and clinical reasons in the pathology request window:
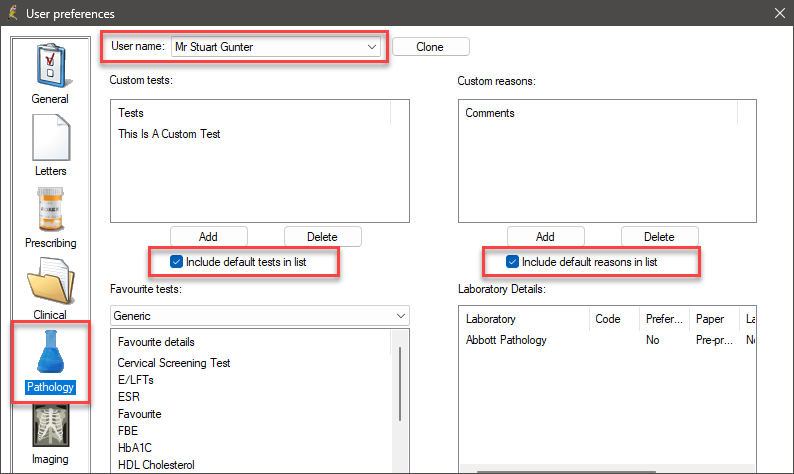
- Browse to Setup > Preferences, select the provider user name from the drop down menu.
- Select the Pathology tab.
- In the Custom Tests and Custom Reasons section, tick Include default tests in the list and click Save.
The below video explains how to copy in contacts and others.
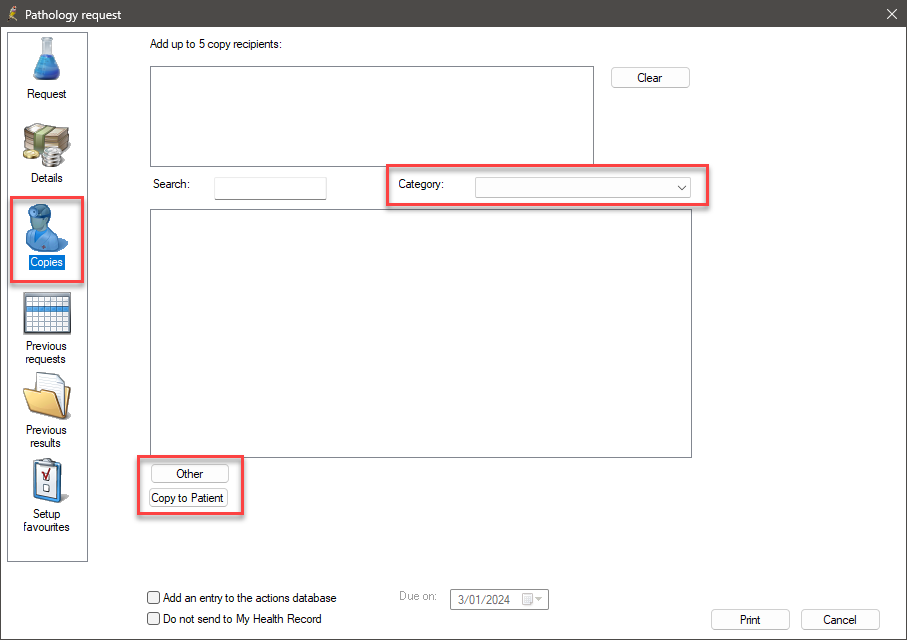
Copies of the results may be provided to the patient or other providers. Up to five additional recipients can be selected.
- Select the Copies tab.
- Select a category to display contacts and account holders in that category, and double-click an entry to add to the Send copies to list.
- Click Other to manually enter copied-in parties.
- Click Copy to patient to add the patient's address to the form.
- To remove recipients from the list, right click the recipient and select Remove.
- Return to the Request tab to complete the request.
The below video explains how to create custom test groups and test reasons, or go to step by step instructions.
If a test is not listed with the default pathology tests that ship with Bp Premier, you can create a custom test and custom reasons or conditions that will be printed on the request form.
Create a custom group of tests
You can also edit custom pathology tests for a provider from the main screen outside the clinical record. Select Setup > Preferences and select the Pathology tab.
- From the patient record, select Request > Pathology. The Pathology request screen will appear. Select the Setup favourites tab.
- Under the Custom tests list, click Add. The Custom test screen appears.
- Enter the name of the custom test and click Save.
The new custom test will be added to the list of Custom Tests and can be selected in the Request tab.
Create a custom reason
The following procedure describes how to create a custom pathology test reason, but the process is the same for imaging.
- From the patient record, select Request > Pathology. The Pathology request screen will appear. Select the Setup favourites tab.
- Under the Custom reasons list, click Add. The Add comment screen appears.
- Enter the name of the custom reason and click Save.
The new custom reason will be added to the list of Custom reasons and can be selected as a condition in the Clinical details list on the Request tab.
Create favourite tests
- From the patient record, select Request > Pathology. The Pathology request screen will appear. Select the Setup favourites tab.
- Under Favourite tests, click Add. The New favourite test screen will appear.
- Enter a name for the favourite test, or click Use test name to select a test as the favourite test name.
- Click Add to add the tests. You can add multiple tests if required.
- Click Save.
The new favourite test group will be added to the list of Favourite Tests and can be selected in the Request tab.
From the patient record:
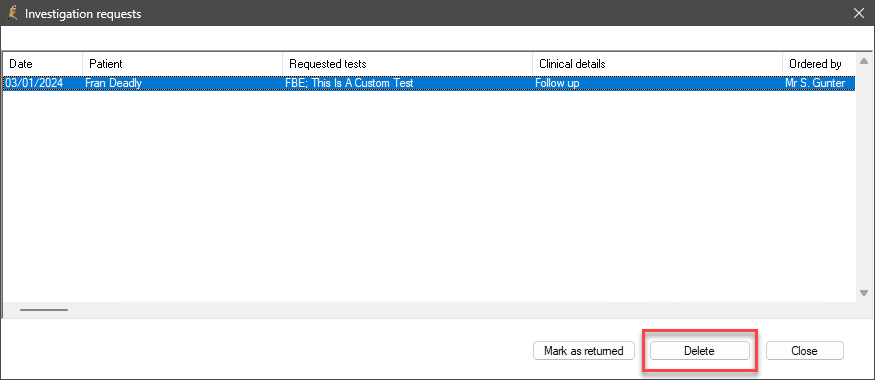
- Select Request > List. The Investigation requests screen will appear.
- Select the request you wish to delete and click Delete.
Or, from the Bp Premier main screen:
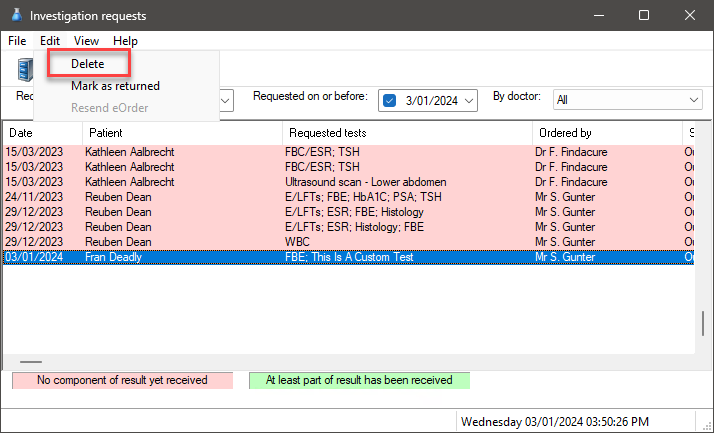
- Select View > Investigation requests. The Investigation requests screen will appear.
- Select the request you wish to delete and select Edit > Delete. An alert will appear.
- Click Yes on the alert.
For e-ordering requests, you will need to contact the e-ordering provider to delete the request. Deleting the e-ordering request from Bp Premier will not cancel the request to the provider.
The below video explains how to clone a user's pathology preferences.
To clone pathology or imaging preferences set up by another user:
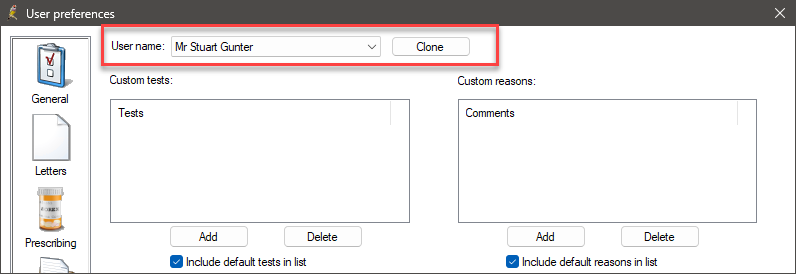
- From the Bp Premier home screen, select Setup > Preferences. The User preferences screen will appear.
- Select Pathology or Imaging from the icons on the left side of the screen. The pathology or imaging preferences will appear.
- Select the User name you want to clone preferences to. This user will have their preferences updated.
- Click Clone at the top of the page. The Select users screen will appear.
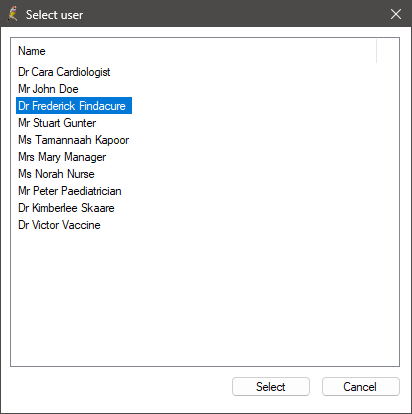
- Select the user whose pathology or imaging preferences you want to clone and click Select. An alert box will appear.
- Click Yes on the alert box.
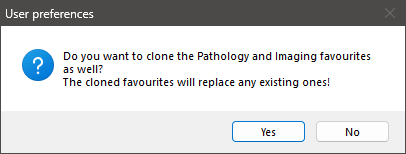
NOTE Cloning another user's pathology or imaging preferences will replace any existing pathology or imaging preferences.
What do I do next?
Last updated: 05 January 2024.