
This article describes how to set up FHIR (Fast Healthcare Interoperability Resource) connections in your practice. FHIR must be installed in order to enable some third-party integrations, such as NCSR.
Install FHIR
IMPORTANT FHIR only needs to be installed on the Bp Premier database server.
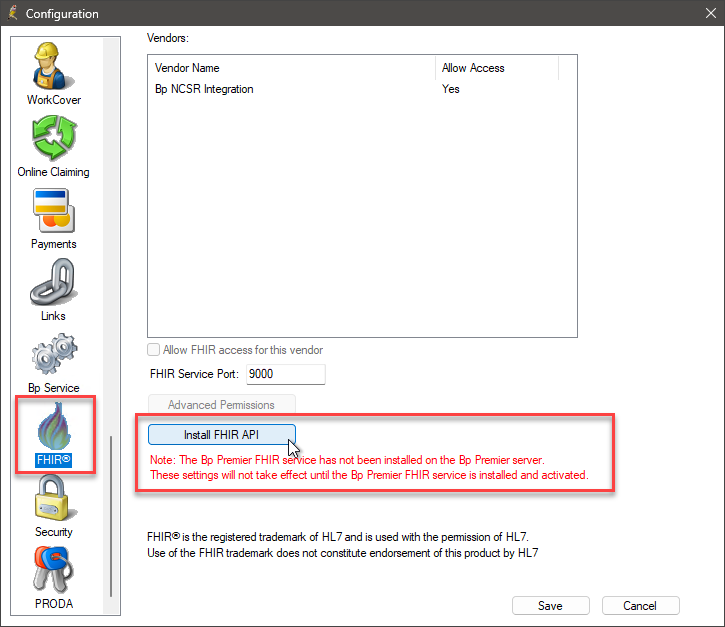
- From the Bp Premier home screen, select Setup > Configuration. The Configuration screen will appear.
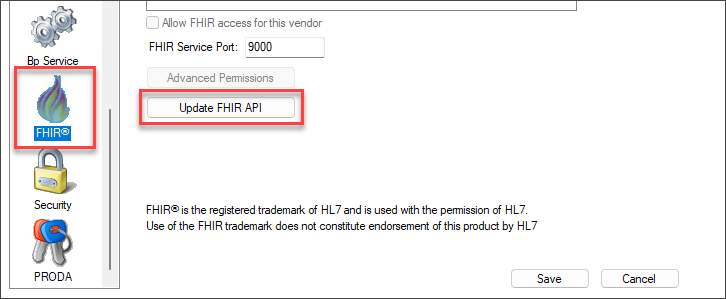
- Select FHIR from the icons on the left. A message will display on the screen if FHIR has not yet been installed on your Bp Premier server.
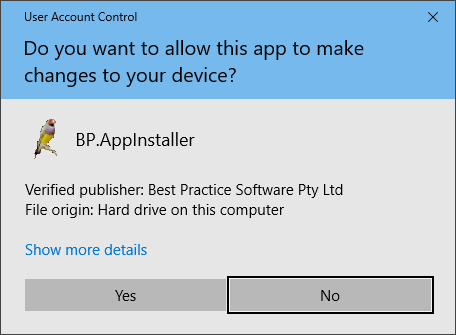
- Click Install FHIR API. The User Account Control screen may appear.
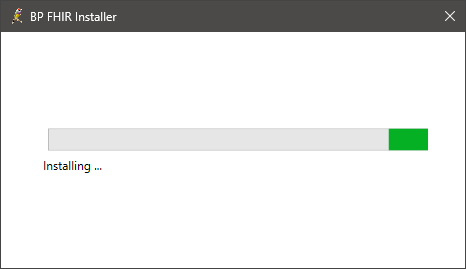
- Click Yes to begin the download. The BP FHIR Installer will open and the download will begin.
- Change the port in the FHIR Service Port: field if necessary.
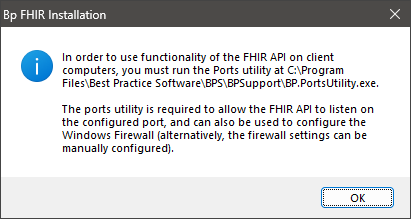
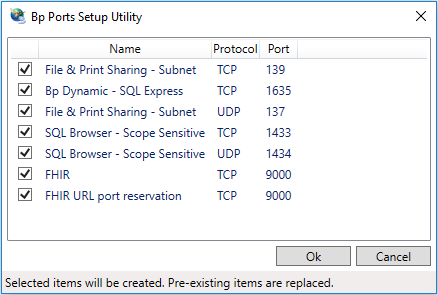
- Open the computer's file explorer and navigate to BP.PortsUtility.exe in C:\Program Files\Best Practice Software\BPS\BPSupport.
- Right click on BP.PortsUtility.exe and select Run as administrator. The Bp Ports Setup Utility will open.
- Click Ok.
The default port should only need to be changed if there is a conflict with an existing port in the practice network firewall. The FHIR Service Port will be set to 9000 by default.
A number of items will be listed in the Name column, including FHIR and FHIR URL port reservation.
The port listed in the Port column for the two FHIR options will be either the default port (9000) or the port that you entered into the FHIR Service Port: field in step 5.
FHIR is now set up on your server.
Update FHIR
FHIR will update automatically, however you can use the below steps to update FHIR manually if required.
- From the Bp Premier home screen, select Setup > Configuration. The Configuration screen will appear.
- Select FHIR from the icons on the left.
- Click Update FHIR API. The User Account Control screen will appear.
- Click Yes to begin the download. The BP FHIR Installer will open, and any FHIR updates will be downloaded.
- Click Save once the installer has closed.
Configure access for vendors
- From the Bp Premier home screen, select Setup > Configuration. The Configuration screen will appear.
- Select FHIR from the icons on the left.
- Select the vendor you want to set permissions for from the Vendors: list and tick Allow FHIR access for this vendor.
- Click Save.
NOTE There is no need to configure advanced permissions at this stage.
Information correct at time of publishing (30 January 2025).


 AU
AU 