Reports are usually downloaded from VIP Live Update or sent to your practice by Support as a .zip compressed file. Before you can import one or more report files into Bp VIP.net's Report Server, you must unzip the files and copy the .rdl files (the report files) to a known location, like the Windows desktop or a /reports folder.
To unzip a .zip file, right-click the file and select Extract all to extract to the same folder as the .zip file.
Reports must be imported on the server where you installed reporting services.
- Download and extract the report files from the Bp VIP.net Live Update or email.
- From Bp VIP.net, select Reports > Report Builder and click the hyperlink on the top of the screen.
- In the Report Manager page, select the designated folder to store the report, or create a new folder. You can import the report into the default root folder, but folders can be useful for organising your imported reports.
- From the toolbar, click Upload File on the right.
- Click Browse and find the report file you saved in step 1.
- Provide a Name for the report.
- Click OK to save.
- In Bp VIP.net, from the Report Builder, click the (Re)Load button from the row of buttons along the bottom. The uploaded reports can now be accessed and run from the Report Builder window.

The Report Manager web page will open in your default browser. You can also open the Report Manager web page directly by opening a browser and typing the address into the URL bar, for example:
https://<reportserverIPaddress>/reports:80

Troubleshooting
Check a report's data source
When you import a report, Report Manager will automatically try to detect the data source for a report. If Bp VIP.net or Report Manager alerts that it cannot run a report, check that the report is pointing to the correct data source.
- Open the Report Manager web page.
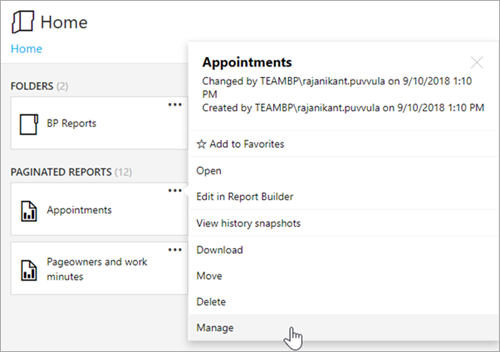
- Navigate to the report you imported and click the ellipsis ... in the top right (as in Appointments in the example below). Select Manage from the context menu.
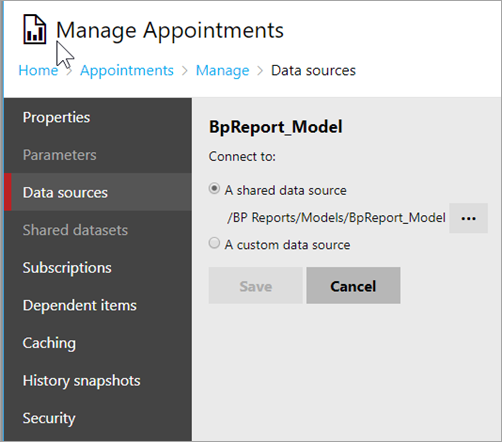
- Click Data Sources on the left hand side.
- In the example above, the report is linked to a shared data source with the path '/BP Reports/Models/BpReport_Model'.
- Click the ellipsis ... to change the data source for the report.


If the report cannot find the data source it was exported with, an exclamation mark will appear under the Connect to: list.
VipDataSource (for direct database connections) and BpReport_Model (for data source connections) are the standard names for respective data sources when Report Manager is first set up during installation. These names will never change, but the paths to these data sources may be different.
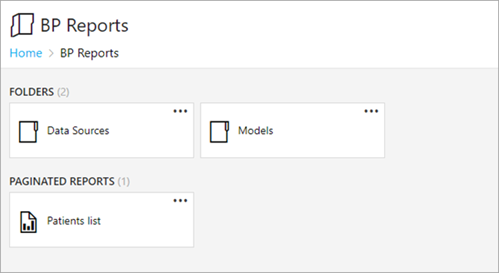
So that your practice and Bp VIP.net Support can easily locate report models and data sources, Best Practice Software recommend creating a 'root' folder in Report Manager called 'Bp Reports' with two folders underneath: Models and Data Sources, as shown in the example below. Imported reports can be placed directly into the Bp Reports folder, like the Patients list report.

Last modified: July 2020