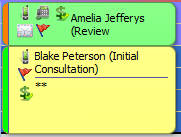
An Appointment Status can be set against an appointment to indicate a particular detail about the type of appointment. The status is displayed via the stripe on the left hand side of the appointment.
NOTE Online Booking and Online Cancellation need to be active if using Online Appointment Booking.
To add a new Status:
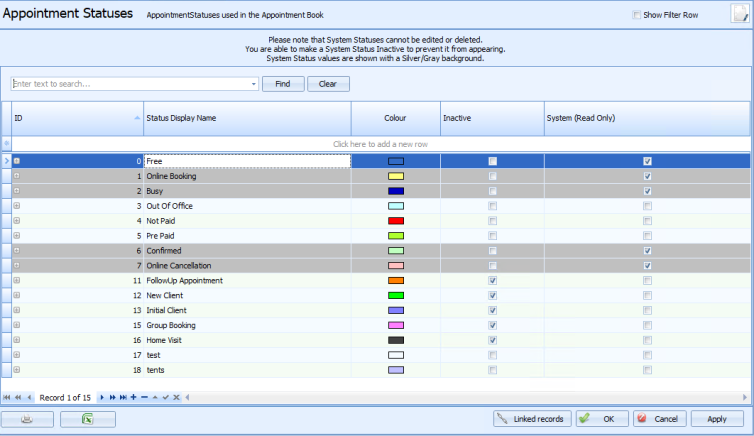
- Go to Data Maintenance > Appointment Statuses.
- Add a new status in the Click here to add a new row.
- Tab off the end of the row to add it to the list.
- Click Ok to save.
There are a number of statuses in this table already and the ones highlighted in grey can not be deleted. They can however be made inactive so that they are not seen in the drop down list in the Edit Appointment screen.


 AU
AU 