This article guides through the process of synchronising Bp Allied and your Google Calendar.
Before you start
Limitations with this function:
- Synchronising more than 10 Google Calanders with Bp Allied can result in performance issues. This is due to the limitations around the maximum number of appointment updates that can occur within 100 seconds.
- This is a one way synchronisation from Bp Allied to Google Calendar. Once setup and the initial export have been completed, any changes are pushed up to your Bp Allied Google Calendar.
- NO recurring meetings will sync across to Google Calendar, and therefore be available in iCal. This is due to complications with synchronised reoccurring meetings. When rescheduling one instance of a meeting in Bp Allied a duplicate record is created in Google Calender.
- Appointments made while a workstation is off-line will not sync to the Google Calendar. For a valid token to be created the appointment must be made while the workstation has Internet connection.
- If you have a Google App for Business account, e.g. with your own domain name, these do not work with the Google Calendar export function. They are set up differently to a Gmail account and we are unable to export to them.
- You will need a Gmail Account.
NOTE Best Practice Software does not recommend Google Sync as a primary method of letting practitioners know their appointment schedule.
Google Calendar for Bp Allied
- We strongly recommend that you create a New Calendar to show your Bp Allied Appointments. This will prevent any non-Bp Allied related information from being removed during a full refresh.
- The details on how to create a new google calendar are in this Google Support article .
- One Gmail account can be used with multiple practitioner calendars. A separate calendar needs to be created for each practitioner.
Setup in Bp Allied
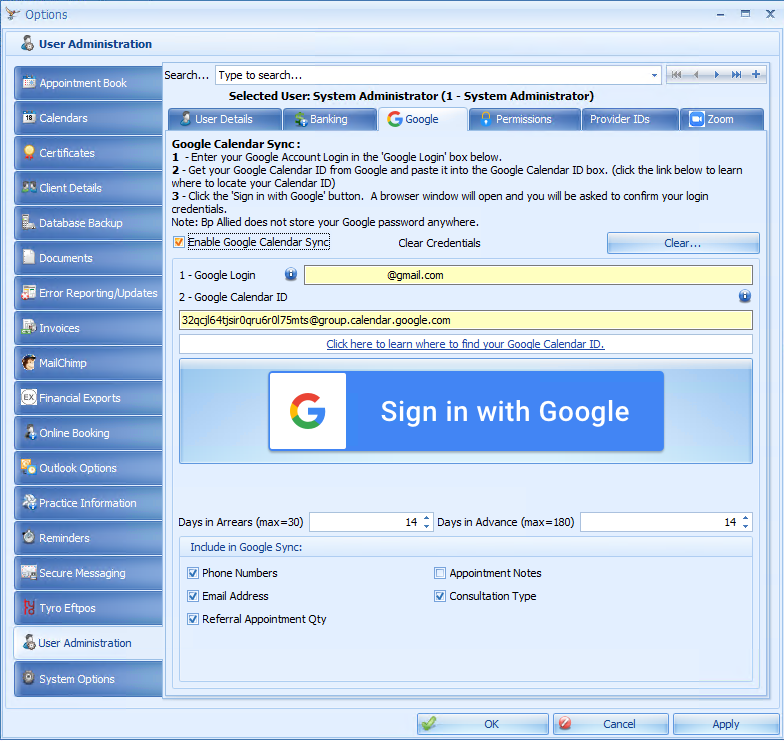
You can set up appointments, both Client and Casual, as well as non-recurring meetings to be synchronised. Changes to your Bp Allied calendar will be uploaded to your Google Calendar if the Google Calendar details are filled out in System > Options > User Administration > Google (see screenshot in step 4 below).
Cancelled appointments and recurring meetings are not displayed in your Google Calendar.
IMPORTANT You must be logged in as a Bp Allied user that matches the user of the exported calendar.
Set up Bp Allied
- Go to the System tab.
- Click on Options.
- Click on User Administration.
- Navigate to the Google tab for the User that you're setting up Google Sync for.
- Tick Enable Google Calender Sync.
- Enter your Google Login.
- Copy your Google Calender ID and paste into the Google Calender ID field. See Find your Google Calendar ID for more information.
- Click Sign in with Google. Follow the steps in the next section.
Set up Google Authentication
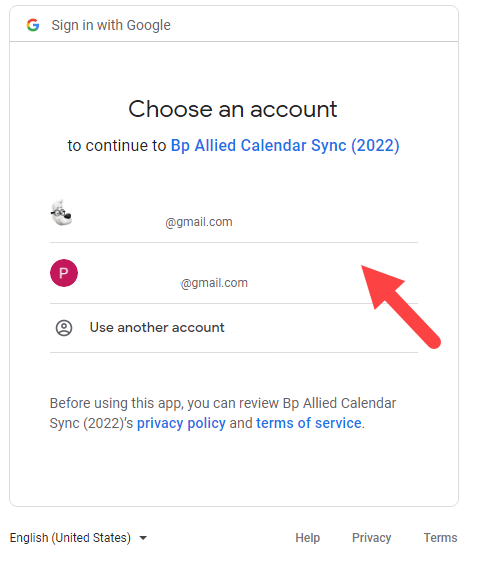
- A web browser will open a Google Web page and one of the following three things will occur:
- If you have more than one Google Account, you will be asked to choose one and log in if you're not already.
- If you only have one Google Account, you will be asked to log in.
- If you are logged in to your only Google account, you will not need to log in.
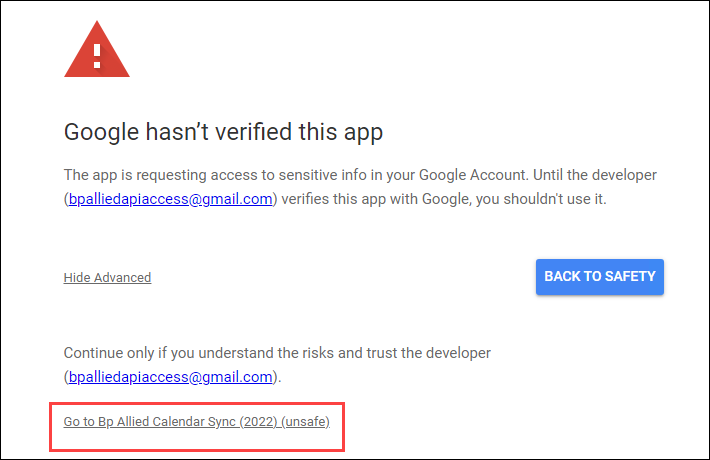
- Users may encounter a warning: Google hasn't verified this app. Select the Advanced link to expand the text.
- Select the link Go to Bp Allied Calender Sync (2022) (unsafe).
-
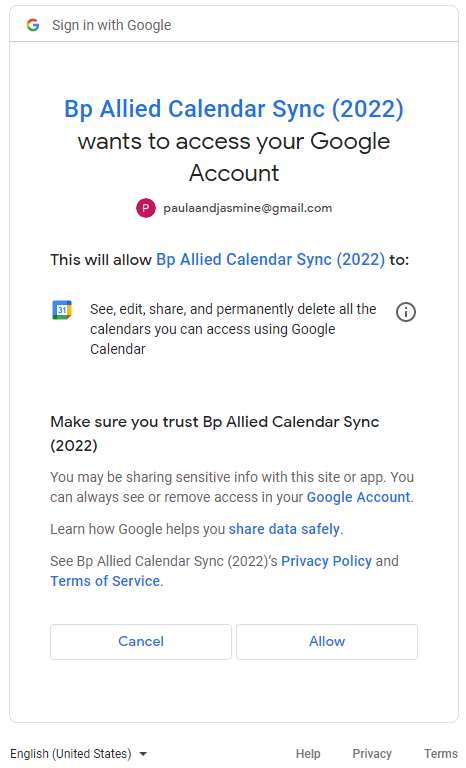
Select Allow to grant access to Bp Allied Calender Sync (2022) to your Google Account,
-
Close the browser window when complete.
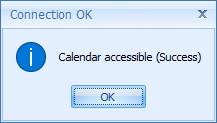
- Bp Allied will display a message Calender accessible (Success).
IMPORTANT The Bp Allied Calendar Sync (2022) link is safe to access and will not affect anything in your environment. Best Practice Software is currently seeking verification and validation with Google and the issue will be addressed shortly.
Finish the setup in Bp Allied.
Complete Bp Allied Setup
Go back to Bp Allied and finish setup after Google Synchonrisation is successful.
Google Calendar ID

- Find your Google Calendar ID if it is not already entered from using Google Sync.
- Paste in the Google Calendar ID.
Sync Period
![]()
Set your Days in Arrears and Days in Advance.
TIP The higher these values are set, the longer your calendar synchronisation will take.
Items to include

- Tick any of the options above to have this information exported to Google Calendar. Click Apply.
-
Update any additional practitioner google calendar settings as required. Click Ok.
- To export details to Google for a specific practitioner for the first time, navigate back to the Appointment Book screen and right click on the date and choose Upload to Google.
- Alternatively, export the calendar using the Export to Google/iCal button in the Appointment Book screen.
Last Updated: 15 December 2022