Sometimes it is not practical or appropriate to create an Invoice from the Appointment Book. In these cases, the Invoice can be created from the Invoices module.
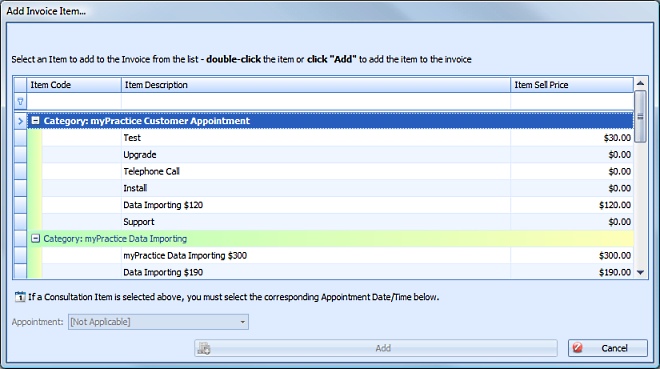
- From the Invoices module, click New Invoice. The Add Invoice Item list appears.
- Select a chargeable item from the drop-down list by one of: type an Item Code, type the first letters of the Item Description, or scroll to the item in the list.
- If the Item being added is a Consultation Type, the corresponding appointment date needs to be selected from the Appointment drop-down.
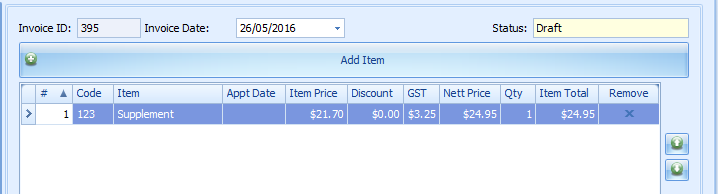
- Click Add. The Item selected will be added to the invoice.
- Edit the Item Price or enter any Discounts required.
- Adjust the Item Quantity if required.
- To add an additional Item or appointment click Add New Item and repeats the steps.
- Enter any notes to be printed on the Invoice in the Notes field.
- Enter any notes to be printed on the Invoice in the Notes field.
- Enter any notes relating to the invoice but not for printing in the Private Notes field.
- Ensure the Location and Practitioner are set correctly.
- Click on Click to Split Invoice with a 3rd Party if a Split Invoice is required.
- Click Save to save any changes.
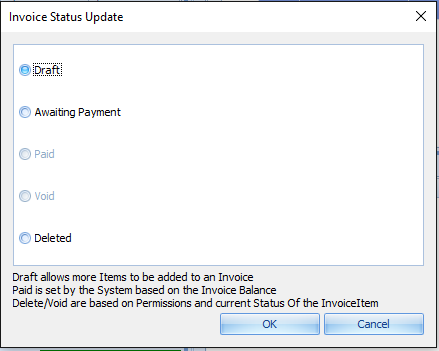
- If the Invoice is final, change the Status to Awating Payment. The Invoice will be set to read-only and the items invoiced can not be changed without changing the Status back to Draft.
- Click OK.
- Click Add Payment if appropriate.
TIP If the item has been incorrectly set to need an appointment date added, change this by unticking Is Consultation Type against the item in Products and Services.
TIP To be able to edit the Item Price or enter a Discount, the Allow Invoice Item Price Editing field needs to be ticked in System > Options >Invoices.

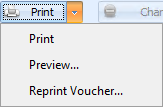
An Invoice can be printed, previewed via the Print button options or emailed from here. The Reprint Voucher button will only display for an Invoice that has had a Bulk Bill or DVA claim lodged.


 AU
AU 