Creating a manual Third Party Invoice is very similar to that of a manual Client Invoice. The difference being that when the Bill to Client is selected, Bp Allied knows that this client is a Third Party Biller and therefore requires the selection of an actual Client name in the first step.
There are also two special options for Third Party Biller invoices:
- Invoices can either be created for individual clients or multiple clients.
- A Client's identity can be hidden and the Bp Allied Client ID can be displayed in the invoice rather than the Client's name.
Both of these options can be set up in System > Options > Invoices.
Create a manual Third Party Invoice
- From the Invoices module, select the Bill to as the appropriate Third Party.
- Click New Invoice.
- The Add Invoice Item screen displays.
- Select the Client's name from the drop-down list.
- Select an Item from the list by either typing in an Item Code, the first letters of the description in the filter field or scrolling down the list.
- If the Item being added is a Consultation Type, the corresponding appointment date needs to be selected from the Appointment Field.
- Click Add.
- Edit the Item Price or enter any Discounts required.
- Adjust the Item Quantity if required.
- To add an Additional Item or Appointment click Add New Item.
- Repeat the steps above.
- Then complete the lower portion of the Invoice.
- Enter any notes relating to the invoice but not for printing in the Private Notes field.
- Ensure the Location and Practitioner are set correctly.
- Invoice Created By shows which user first created the invoice. This cannot be changed.
- Click Save to save the Invoice.
- If the Invoice is final, then change the Status to Awating Payment. This makes the Invoice read-only and the items invoiced can not be changed without changing the Status back to Draft. If it is left as Draft, then it can still be added to as required.
- Once the Third Party Biller has made a payment you will need to receive this into the system. See Creating a Payment for more information.
- An Invoice can be printed, previewed via the Print button options or emailed from here.
![]()
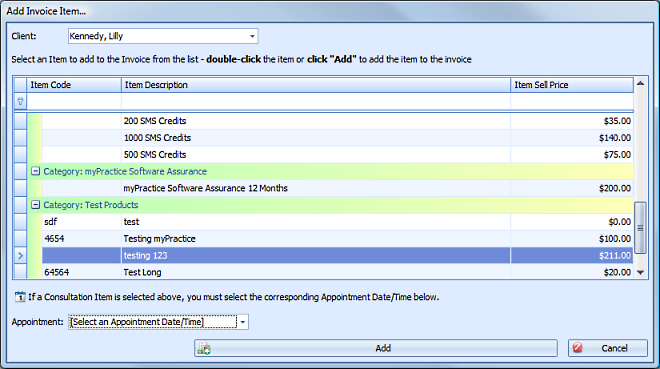
The Item selected will be automatically inserted into the invoice along with the relevant price information.
To be able to edit the Item Price or enter a Discount, the Allow Invoice Item Price Editing field needs to be ticked in System > Options > Invoices.

A Third Party Invoice shows multiple line items for a Client.
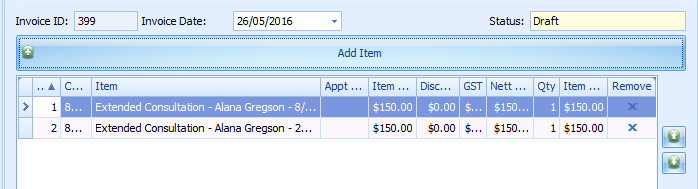
The picture above has been set-up to display the first line item with the Client's name. If you need to show the Client ID rather than the Client Name, set this as an option in System > Options > Invoices.
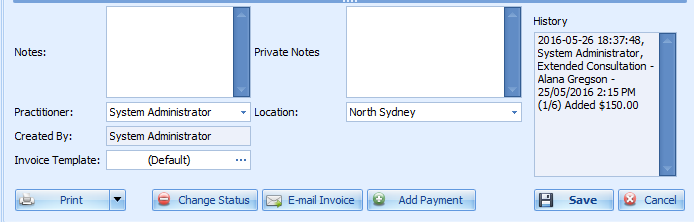
Enter any notes to be printed on the Invoice in the Notes field.

The linked to Client will show in the Clients listed in the Selected Invoice pane.
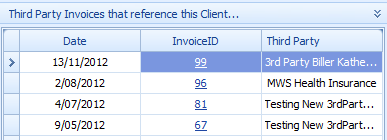
If you go to the Client's record, you will see a list of Third Party Invoices that reference this Client.


 AU
AU 