This guide assumes that the practice is already running version 7 of Bp Allied. If your practice is running a prior version, please contact Bp Allied Support.
On this page:
Considerations prior to upgrade
All computers must be running a minimum of Windows 10 or Windows Server 2012. Please review the system requirements here and contact Bp Allied Support for additional information.
All computers to be upgraded MUST be running the latest Windows Updates. Upgrades may fail if these are not up to date.
Administrative access is required for all computers to enable the upgrade to take place.
For more information, select Help > Help from within Bp Allied to open the Bp Allied Knowledge Base.
Information about end of support for older versions of Bp Allied can be found on the Bp Allied knowledge base here.
Pre-upgrade checklist
This is a check-list to ensure the following items have been considered and requested from Best Practice, if required.
|
Updated function |
Used by customer |
Additional information |
Complete |
|---|---|---|---|
|
All computers comply with new system requirements |
|
Run a minimum of Windows 10 or Windows Server 2012. |
|
|
Confirm computer set-up configuration with Bp Allied support (if unknown) This determines the upgrade instructions to use on the following pages. |
|
|
|
What happens during the upgrade?
As well as changes to the user interface, there is an update to the database configuration during this process. The upgrade process MUST comply with the notes below:
- The computer that is running as the “server” or “master” database must be upgraded first. Bp Allied cannot be used on any other computers during this process.
- All other computers will be upgraded after the “server” is completed.
- All computers must be upgraded to operate together. Computers cannot be on different master versions e.g. some on version 7 and some on version 7 SP2.
- You will need to allow sufficient time for ALL computers to be upgraded. Once started, all computers must be upgraded.
- Ensure that you have logins with Administrative access for all computers.
- Because all upgrades are conducted via the internet, having all computers in the office and accessible to the best internet available is advisable. Poor internet quality will affect how long the upgrade process takes.
The upgrade process includes taking a backup of your database. You can however take your own backup using the option in Options > Backup and store this backup in a known location.
How to upgrade
How you upgrade will depend on the type of Bp Allied installation you have and the version you are on. The install scenarios are:
- Fully Hosted
- Single Computer
- Single database shared by multiple computers (direct connection)
- One or more computers syncing to your own server.
Fully Hosted
You will be automatically upgraded by Bp Allied Development when V7 SP2 is released.
Single Computer
If you are running version 7 or above, you can upgrade yourself using the check for updates function.
On the day of release, follow the instructions in the Appendix: Using Check for Updates to Upgrade.
Approximate time for upgrade: 15 minutes
Single database shared by multiple computers
If you are running version 7 or above, you can upgrade your computers to version 7 SP2 without our help.
Please review the steps below on what needs to happen on the upgrade day:
- Allow sufficient time to perform the upgrades on all computers. Once started, all computers must be upgraded.
- Ensure that ALL information is saved. Close Bp Allied on all computers.
- From this point, Bp Allied cannot be used on any computer until after it has been upgraded.
- On the “server” or computer that is running the master database, follow the instructions in the Appendix: Using Check for Updates to Upgrade
- Once the server has been upgraded, open Bp Allied and confirm that the upgrade has worked as expected.
- Upgrade each of the other computers running Bp Allied Appendix: Using Check for Updates to Upgrade. These can be updated simultaneously or consecutively but can’t be used until they have been upgraded.
Approximate time for upgrade:
- Server: 1 hour
- Workstation: 10 - 15 minutes each
One or more computers syncing to your own server
If you are running version 7 or above, you can upgrade your computer to version 7 SP2 without our help using the check for updates function and upgrading the server first.
Please review the steps below on what needs to happen on the upgrade day:
- Allow sufficient time to perform the upgrades on all computers. Once started, all computers must be upgraded.
- Ensure that ALL information is saved and close Bp Allied on all computers.
- From this point, Bp Allied cannot be used on any computer until after it has been upgraded.
- On the “server” or computer that is running the master database, follow the instructions in the Appendix: Using Check for Updates to Upgrade
- Once the server has been upgraded, open Bp Allied and confirm that the upgrade has worked as expected.
- Upgrade each of the other computers running Bp Allied Appendix: Using Check for Updates to Upgrade. These can be updated simultaneously or consecutively but can’t be used until they have been upgraded.
Approximate time for upgrade:
- Server: 1 – 1 ½ hours
- Workstation: 15 mins – 1 hour each
Appendix: Using Check for Updates to Upgrade
This update MUST be run on the server (or master computer) first. All other computers running Bp Allied must run a Sync All (if appropriate) and be closed before this is run.
- Click on Check for Updates in the title bar.
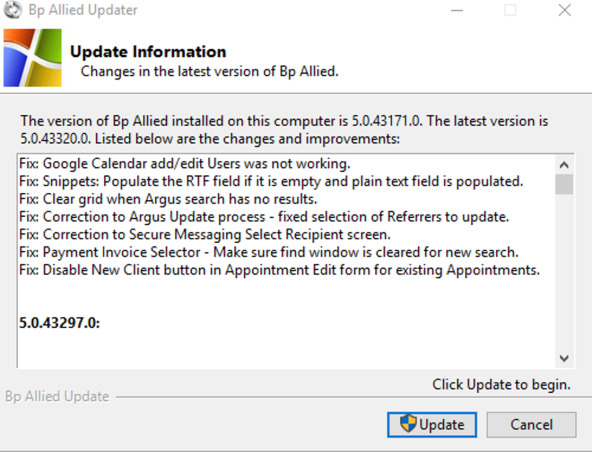
- Click Update.
- If the security on the computer asks if you want to make changes, click Yes. The download will start.
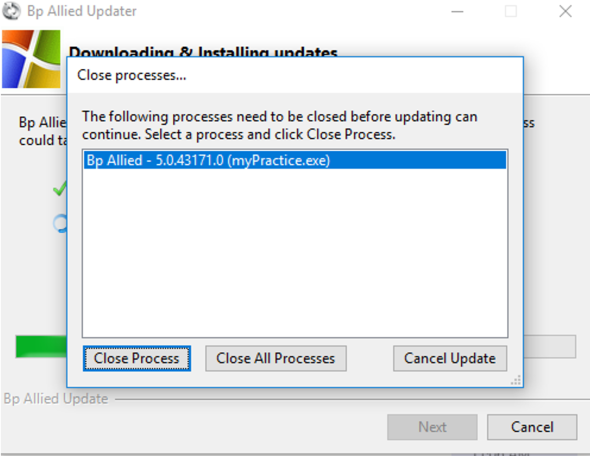
- Click Close Process. The upgrade should continue.
- Click Finish.

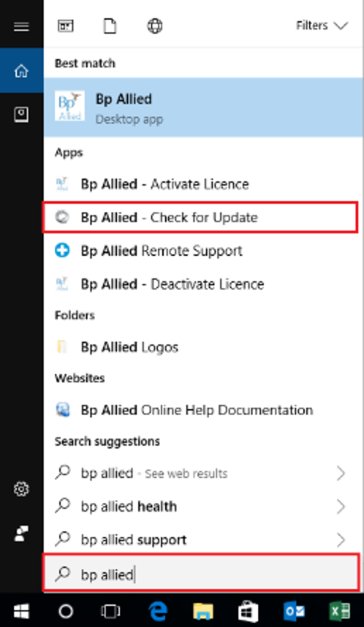
This can also be initiated by searching Bp Allied Check for Update in the windows search.

The Bp Allied Updater will display. The latest available update will display in the Update Information screen along with the details of the changes in the update. In this example it displays a V5 update. For V7 the version number is prefixed with a 7, e.g. 7.0.43344.0

If Bp Allied is open, the following prompt will display.

When the update is completed, the Update Successful screen will display.
Last Modified: 1 July 2022