myPractice has been rebranded Bp Allied, a product of Best Practice Software.
Support is available Monday to Friday, 9am to 5pm AEST Version 4.18 Published 5 December 2019
Email: alliedsupport@bpsoftware.net Click RemoteSupport from within myPractice for assistance Phone: 1300 40 1111 (in Australia) or 0800 40 1111 (in New Zealand)
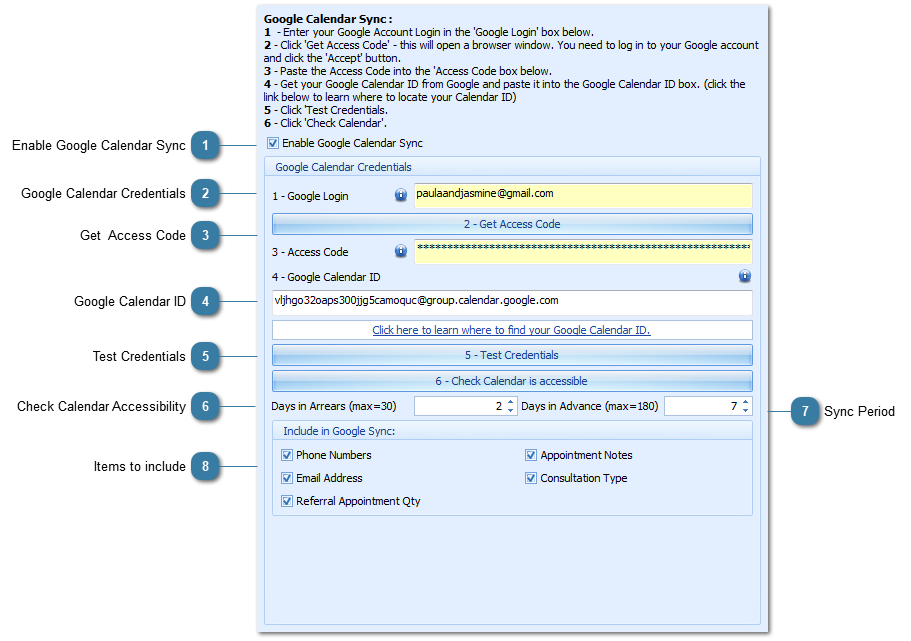
Setting up your Google Calendar Sync Options
The instructions below are for setting up Google Calendar sync in versions 4.5.0.1 onwards.
You must be logged into myPractice as a System Administrator to be able to setup Google Calendar for users other than yourself.
The Google calendar account used MUST be a Gmail account. Other Google account types, such as Adwords or Google Applications for Domains, do not work with this export
If you had Google Calendar sync working prior to version 4.5.0.1, go to Step #3 below and follow from there to update your settings
In ALL versions- You must be logged in as the User that is having the calendar exported.
Go to the System tab
Click on Options
Click on User Administration
Navigate to the Google Calendar tab for the Practitioner that you're setting up Google Sync for
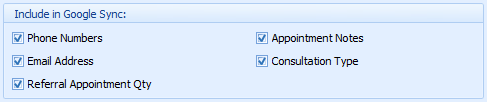
Tick any of the options above to have this information exported to Google Calendar.
Click Apply
Update any additional practitioner google calendar settings as required
Click Ok
To export details to Google for a specific practitioner for the first time, navigate back to the Appointment Book Screen and right click on the date and choose Upload to Google
OR
Export the Calendar using the Export to Google/iCal button in the Appointment Book Screen.