MailChimp is a webservice that allows you to easily design and email newsletters to your clients. For many of our clients this service is likely to be free.
Below are the instructions and settings to setup Bp Allied to export your Clients to MailChimp for you to be able to email them newsletters or other marketing information. By setting up your MailChimp sync in Bp Allied you can manage your Client newsletter list at the same time as you carry out your daily tasks. Go to the
MailChimp website to find out more about their services.
To export Clients to MailChimp they need the following to be setup in their Client Details information:
-
the
Mailing List tickbox ticked
-
-
The fields exported are: Client ID, Name and Email Address.
 Please note that MailChimp only allows ONE copy of an email address in a List, so if you have multiple clients using one email address only one of them will be imported into MailChimp.
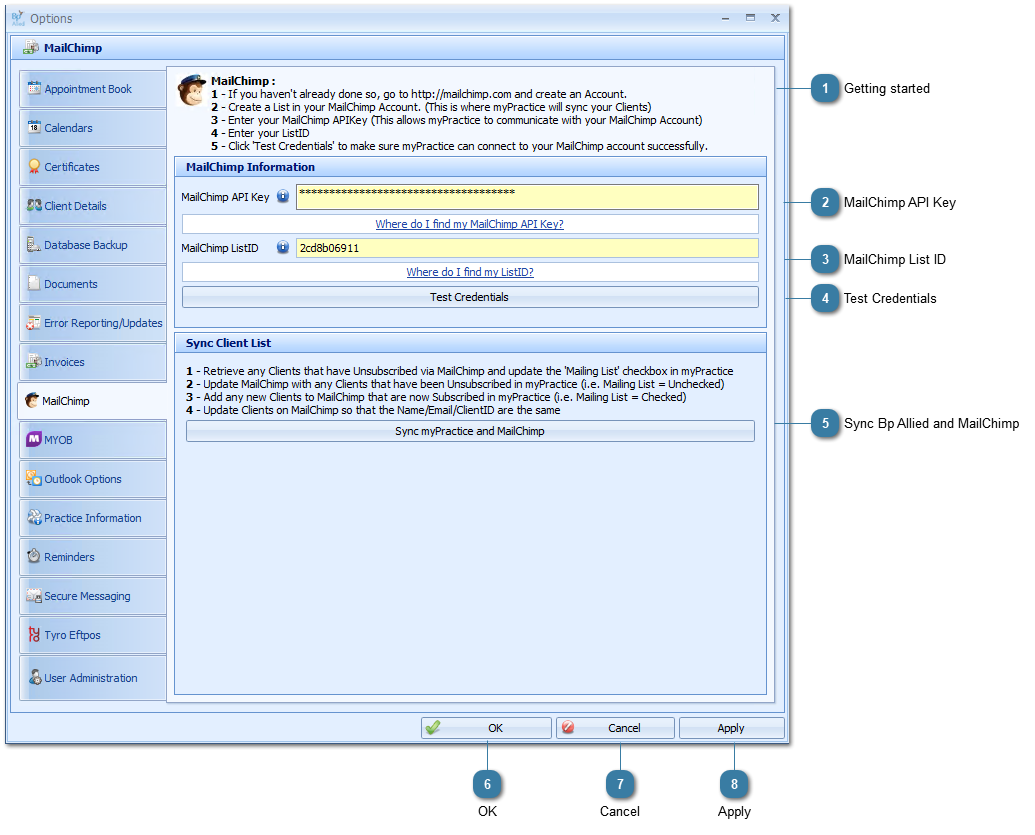
 Getting startedThe instructions above detail what you need to do to get started with MailChimp.
|
|
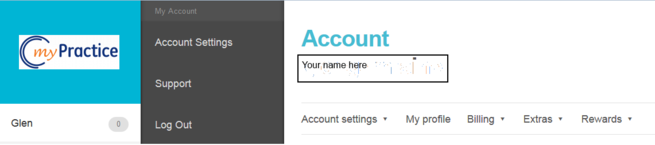
 MailChimp API KeyAn API key is an encrypted key that allows Bp Allied full access to your MailChimp account (without you actually logging on). Bp Allied uses this key to sync Client mailing List information with MailChimp.
To find your API Key
1 - Log into MailChimp
2 - Click on your name on the left hand side
3 - the My Account menu will appear (in grey)
4 - Click Account Settings
5 - Click Extras
6 - Click API Keys
7 - Click Create A key
8 - Copy the key into the Bp Allied field MailChimp API Key
To log out of MailChimp
Click on you name on the left hand side
Click Log Out on the My Account Menu
|
|
 MailChimp List IDThe ListID is the encrypted name of your mailing list e.g. 2a39609a
You will need to create a List in MailChimp first. Copy the ListID into the MailChimp ListID field in mypractice |
|
 Test CredentialsClick Test Credentials to check that the API key and ListID details are correct. (You must do this so the API key and List ID values will save)
If it is, then the Test Succeededmessage will display
If not, then a Connection Failed error will display
Click OK
Then, remove and re-enter both your API and ListID keys.
|
|
 Sync Bp Allied and MailChimpClick the Sync Bp Allied and MailChimp button to update the Mailing list both in Bp Allied and in MailChimp.
 Run this prior to sending out each mailing list so that MailChimp has the most up-to-date information. |
|
 OKClick OK to save the changes and close the options window open.
|
|
 CancelClick Cancel to cancel the changes and close the options window open.
|
|
 ApplyClick Apply to save the changes and keep the options window open.
|
|