You are accessing documentation for Bp Allied version 6. This is not the latest version of Bp Allied.
Support for this product will cease on 1 February 2021
 
 
×
Menu

Appointment Right Click Menu


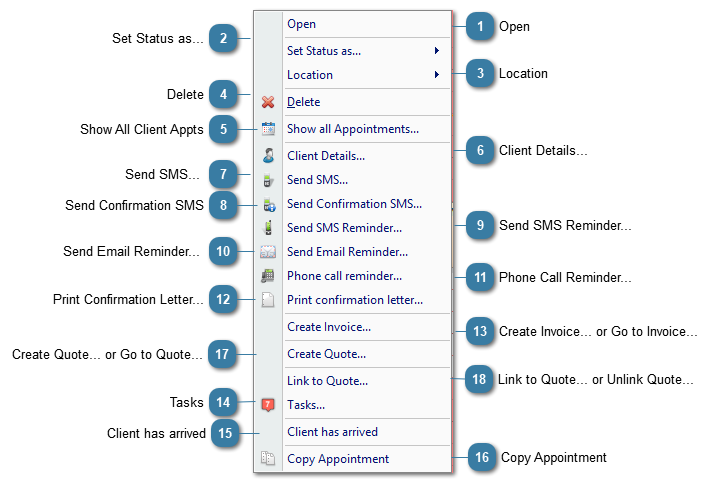
This menu is displayed when you right click a Client Appointment.  Please note options will display in the menu according to what has been selected within the Appointment Edit screen, for example, if you do not select an SMS Reminder is required, this option will not be shown in this menu.
Appointment Right Click Menu
1

Open

1. Open
Opens an appointment to enable it to be edited.
2

Set Status as...

2. Set Status as...
 
Enables the Status of an appointment to be changed without opening the appointment.
This changes the appointment highlight displayed on the left side of the appointment.


The default status is set in the Options > Appointment Book. By default it is set to Busy.
 
The available Status's available in Bp Allied.
3

Location

3. Location
 
Enable the Location of an appointment to be changed without opening the appointment.
  • This is only applicable where a practice has more than one location setup in Bp Allied.
4

Delete

4. Delete
 
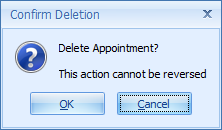
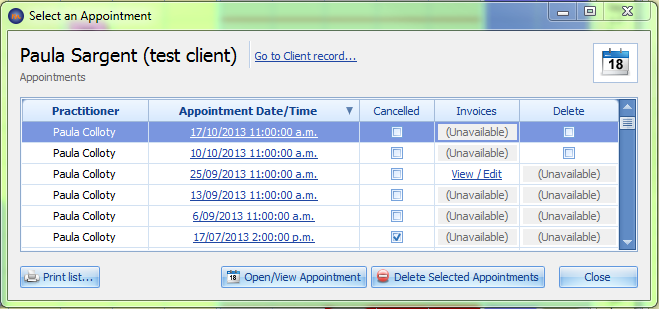
Deletes the selected appointment. Once an appointment is deleted it can not be retrieved hence there is a warning message (below) that displays to confirm the deletion.
 
5

Show All Client Appts

5. Show All Client Appts
This option displays all Appointments that a client has had or has booked in the future. From here the following actions can be taken:
  • Open Client Details by clicking the Go to Client record link
  • Go to the Appointment in the Calendar by clicking the Appointment Date/Time Link or selecting a line and Clicking Open/View Appointments
  • Go to the Invoice by clicking on the Invoices View/Edit link
  • Print the Appointment List
  • Deleting selected future appointments by ticking the Delete tick box and clicking Delete Selected Appointments
 
 
See how to use this to manage referrals.
6

Client Details...

6. Client Details...
 
Opens the Client Details form for viewing or editing without opening the appointment.
7

Send SMS...

7. Send SMS...
 
Used to send an adhoc SMS to the selected Client.
8

Send Confirmation SMS

8. Send Confirmation SMS
Click to send a confirmation SMS at the time of booking an appointment. This is independent of an SMS reminder.
 
Set up the SMS Confirmation Template in Data Maintenance > Reminder Templates
9

Send SMS Reminder...

9. Send SMS Reminder...
 
Used to send an appointment Reminder via SMS using the templates already setup.
 
Once a reminder has been sent then the option in the menu greys out.
10

Send Email Reminder...

10. Send Email Reminder...
 
Used to send an appointment Reminder via Email using the templates already setup.
 
Once a reminder has been sent then the option in the menu greys out.
11

Phone Call Reminder...

11. Phone Call Reminder...
Click to acknowledge the phone call reminder has been made.
12

Print Confirmation Letter...

12. Print Confirmation Letter...
Click to acknowledge the confirmation letter has been printed.
 
Once a Confirmation Letter has been printed and the menu option clicked then the option greys out.
13

Create Invoice... or Go to Invoice...

13. Create Invoice... or Go to Invoice...
Enables the creation of an Invoice for this appointment without opening the appointment.
OR
If the Invoice has been created the menu option changes and clicking here opens the relevant invoice.
14

Tasks

14. Tasks
Tasks are used to send reminders to Practitioners and other users of Bp Allied of things that need to be done for a specific Client.
15

Client has arrived

15. Client has arrived     
Used to annotate the Appointment displayed within the Appointment Book with an icon denoting that the client has arrived.
This also displays in a Tick box within the Appointment.
 
When the Client has arrived open is clicked the relevant practitioner is notified via a pop-up message.
16

Copy Appointment

16. Copy Appointment
This menu option copies the selected appointment.
17

Create Quote... or Go to Quote...

17. Create Quote... or Go to Quote...
Enables the creation of a quote attached to the current Invoice
OR
If the quote has already been attached to the appointment, the menu option changes and clicking here opens the relevant quote.
18

Link to Quote... or Unlink Quote...

18. Link to Quote... or Unlink Quote...
Enables the attachment of a quote to the current appointment
OR
If the quote has already been attached to the appointment, the menu option changes and clicking here removes the appointment from the quote. It changes the Appt Date in the quote to N/A.
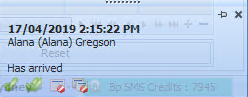
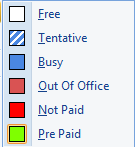