This article explains how to set up your practice's private fees and schedules in Bp Omni.
Before you begin
Before you set up fees and schedules, ensure you have set up your GST information in the Practice & locations screen.
See Set Up Your Practice for more information.
Create a new private schedule
You may wish to add further non-ACC fees and schedules, such as co-payment fees, private fees, and after hours or emergency fees.
- Select your profile icon in the top-right corner of the screen and select Settings.
- From the options to the left, click Config > Fees & schedules.
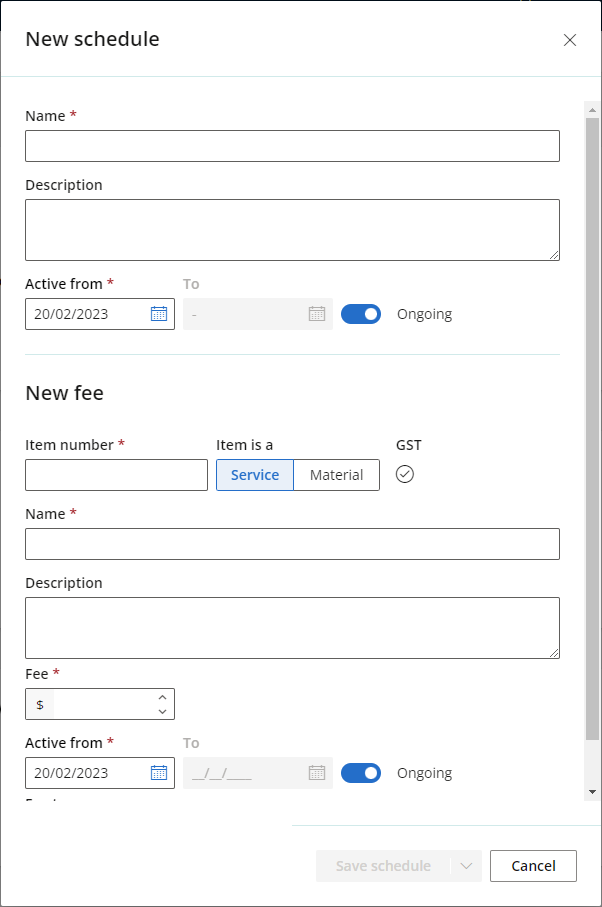
- Click New schedule in the top-right. The New schedule screen will appear.
- Enter a Name and Description for the schedule and indicate when the schedule will be Active from.
- If the schedule is not ongoing, toggle Ongoing to off, and add a date for the schedule to end.
- Enter an Item number for the fee, and indicate whether the fee is for a Service or a Material.
- Enter a Name, Description and Fee amount, and indicate when the fee will be active from.
- If the fee is not ongoing, toggle Ongoing to off, and add a date for the fee to end.
- Select a fee type from:
- Flat rate
- Per unit
- Km
- Hourly.
If the fee type is per unit, km, or hourly, when the fee is billed an amount will need to be entered during invoicing.
- Click Save schedule.


You can add the first fee to the schedule while creating the schedule.
Add new fees to a schedule
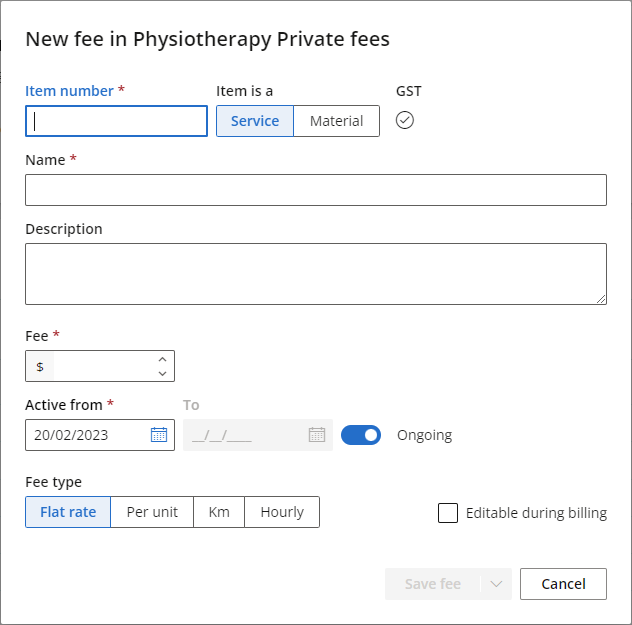
- Once you have created a schedule, add further fees to it by clicking New fee. The New fee screen will appear.
- Enter an Item number for the fee, and indicate whether the fee is for a Service or a Material.
- enter a Name, Description and Fee amount, and indicate when the fee will be active from.
- If the fee is not ongoing, toggle Ongoing to off, and add a date for the fee to end.
- Select a fee type from:
- Flat rate
- Per unit
- Km
- Hourly.
- Tick Editable during billing if you want staff to be able to edit the fee amount in the invoice screen.
- Click Save fee.

If the fee type is per unit, km, or hourly, when the fee is billed an amount will need to be entered during invoicing.
Edit fees and schedules
Edit an exiting schedule
- From the Fees & schedules screen click View & edit fees in the top-right corner of the schedule card.
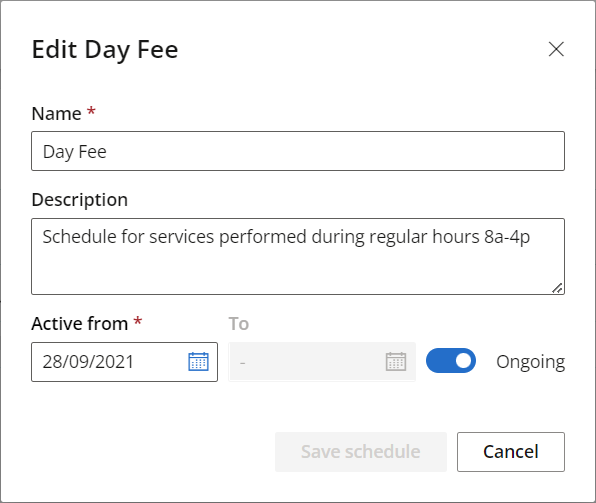
- Click Edit schedule.
- Make any required edits and click Save schedule.

Edit an existing fee
- From the Fees & schedules screen click View & edit fees in the top-right corner of the schedule card.
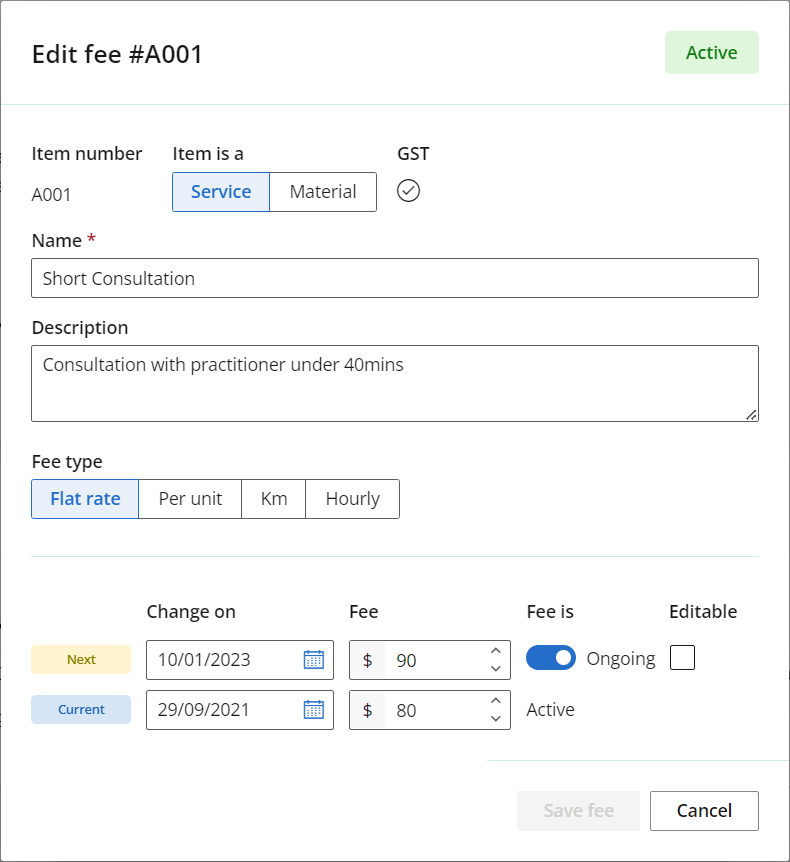
- Click the fee item number in the Fees section, then click Edit.
- Enter the date that you want the fee to change in the Change on field, in the Next row, and enter the new fee in the Fee field.
- Tick Editable if you want staff to be able to edit the fee amount in the invoice screen.
- Click Save fee.
When editing an existing fee, you can enter information about when the fee amount will change.

Any changes to the fee amount will appear under History.
Last updated 24 January 2024