
This article explains how to create tasks and reminders in the clinical record, and how to action tasks via either the clinical record or the clinical reminders screen.
Enhancements to Clinical Reminders
Clinical Reminders have been enhanced to provide practices with greater flexibility and practice-wide visibility of reminders.
- New configuration options in Settings allow reminders to be hidden by default and excluded for patients who already have appointments booked within a defined number of weeks.
- Reminders can continue to be created and managed directly in the patient's clinical record, ensuring they remain part of day-to-day workflows.
- A new menu option, To Do > Clinical Reminders, provides a central practice-wide view where providers and administration staff can monitor reminders and send them to patients via SMS.
- A new menu option, To Do > Follow-up Reminders, provides visibility of reminders that have been sent, along with replies to SMS reminders and other contact attempts.
Clinical Notifications is a term that includes both Clinical reminders and Clinical tasks.
A Clinical Task is an action that you assign to yourself during a consult that must be completed by a future date. An example of a task could be to review the patient's medical history.
A Clinical Reminder is a reminder for the patient, created by the clinic. An example of a clinical reminder would be a clinical review, assessment, a BP check or a care plan.
In this article:
Set up Clinical Reminders
IMPORTANT To manage Clinical Reminders in Bp Omni, users must have security permissions for Practice information set to Administrator. See Configure Business Roles and Security Permissions for more information.
- To create and manage clinical reminders in Bp Omni, click on your profile icon located in the top-right corner of the screen, then select Settings.
- Select Practice & locations from the menu options on the left.
- Scroll down to the Communications card > Clinical Reminders.
- To allow providers to record free-text reminders and internal comments, tick Allow free-text reminders.
- To Hide by default clinical reminders for patients with upcoming appointments, tick the checkbox and adjust the timeline to suit your clinic.

When enabled, the No next appt filter will be available in To Do > Follow-up reminders and can be turned on or off.

Add a new Clinical Reminder reason
- To add a new Clinical Reminder reason, click on your profile icon located in the top-right corner of the screen, then select Settings.
- Select Practice & locations from the menu options on the left.
- Scroll down to the Communications card > Clinical Reminders.
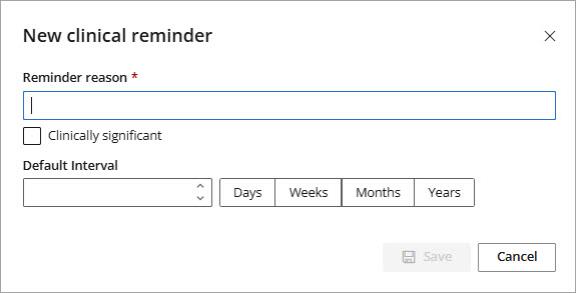
- Click + Add Another. The New Clinical Reminders modal will appear.
- Enter a descriptive Reminder Reason name.
- If applicable, tick Clinically significant to indicate that this reminder reason is clinically significant.
- Set a Default Interval time period in days, weeks, months, or years.
- Click Save.

Edit a Clinical Reminder reason
- Click on your profile icon located in the top-right corner of the screen, then select Settings.
- Select Practice & locations from the menu options on the left.
- Scroll down to the Communications card > Clinical Reminders.
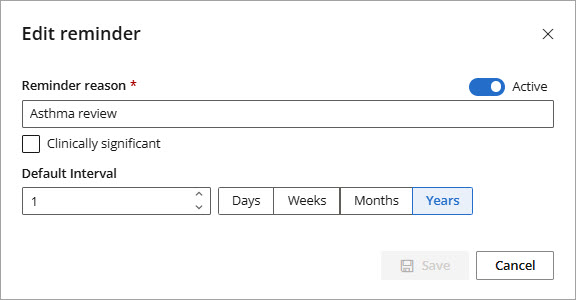
- Select the reminder Reason from the list. The Edit Reminder modal will appear.
- Edit the reason, clinical significance or interval.
- Click Save.
Add a Clinical Reminder
Clinical Reminders can be created from the Clinical Record and from To Do > Clinical Reminders.
Add a clinical reminder from the patient record
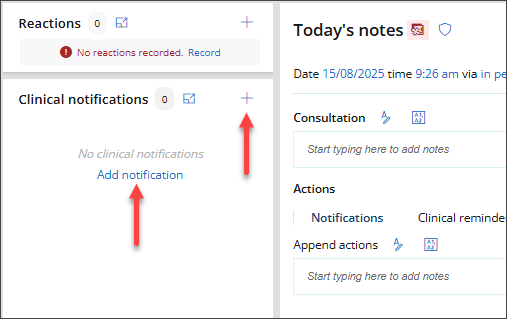
- From the left-hand Clinical Notifications panel, click the + plus icon or Add notification.
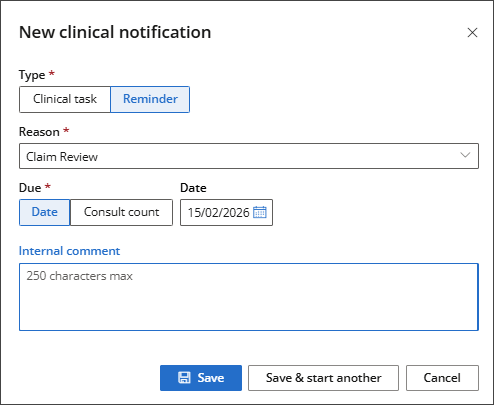
- The New Clinical notification modal will appear. Set the Type to Reminder.
- Select a Reason from the available list or free text to create a new reason.
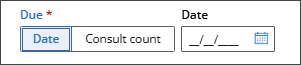
- Specify when the reminder is Due.
- Enter a Date: For existing reminder reasons, the due date is set to the interval specified when the reminder reason was created. This can be adjusted as needed.
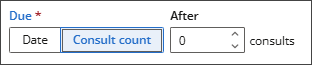
- Consult Count: Set the reminder due date to be after a specified number of consults.
- If relevant, record an Internal comment. This field has a maximum of 250 characters.
- Click Save or Save & start another.
TIP A new reminder Reason can only be recorded if Allow free-text reminders has been enabled.
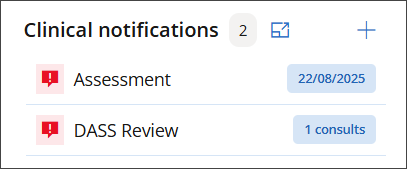
The Clinical Reminder will appear in the Clinical Notifications panel and in the Patient Summary > Clinical Notifications section of the Patient Record. Clinical Reminders can be easily recognised by an  exclamation icon.
Add a clinical reminder from To Do > Clinical Reminders
The Clinical Reminders screen provides a practice-wide view of Current, Due, or Outstanding clinical reminders that have not yet been sent to a patient.
IMPORTANT To access To-Do > Clinical Reminders in Bp Omni, users must have Security permissions for Clinical and Practice Workflows set to Contributor level or higher. See Configure Business Roles and Security Permissions for more information.
- From the top bar, select To Do > Clinical Reminders. The Clinical Reminders screen will appear.
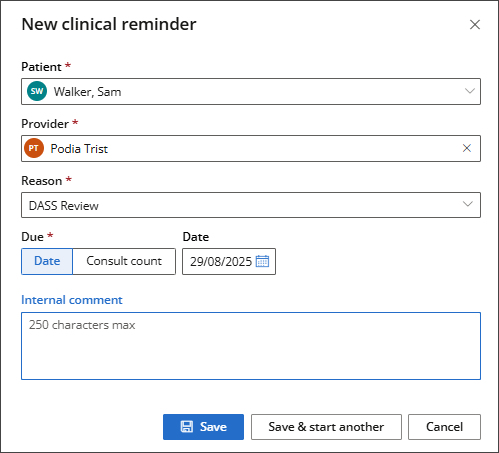
- Click + Add a Reminder. The New Clinical Reminder modal will appear.
- Search for the Patient.
- Select a Provider from the available list.
- Select a Reason from the available list or free text to create a new reason.
- Specify when the reminder is Due.
- Enter a Date: For existing reminder reasons, the due date is set to the interval specified when the reminder reason was created. This can be adjusted as needed.
- Consult Count: Set the reminder due date to be after a specified number of consults.
- If relevant, record an Internal comment. This field has a maximum of 250 characters.
- Click Save or Save & start another.

TIP A new reminder Reason can only be recorded if Allow free-text reminders has been enabled.
Add a Clinical Task
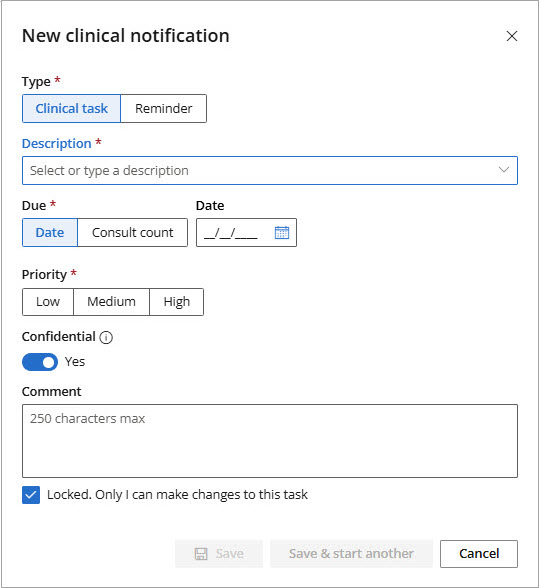
- From the left-hand Clinical Notifications panel, click the + plus icon or Add notification.
- The New Clinical notification modal will appear. Set the Type to Clinical task.
- Select a Description from the available list or free text to create a new description.
- Specify when the task is Due.
- Enter a Date: The due date will be set to the default interval time, based on the selected Task type. This can be adjusted as needed.
- Consult Count: Set the task due date to be after a specified number of consults.
- Set a Priority for the task.
- If applicable, toggle the Confidential switch to Yes.
- If relevant, record a Comment. This field has a maximum of 250 characters.
- To prevent others from making changes to the task, tick Locked.
- Click Save or Save & start another.
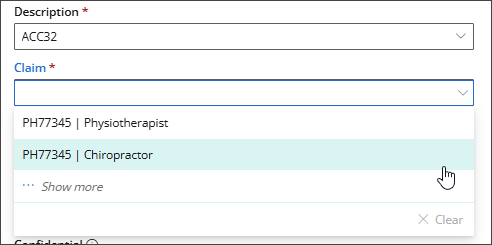
If ACC32, Claim Review or Outcome Measure Report is selected from the Description field, a Claim menu will be displayed, and a Claim must be selected.
If multiple provider types are involved in treating the claim, each provider type will be displayed in the list next to the claim number.
The task will be displayed in the Clinical notifications panel located on the left side of the clinical record.
Action Clinical reminders and tasks
Action clinical reminders and tasks from the patient record
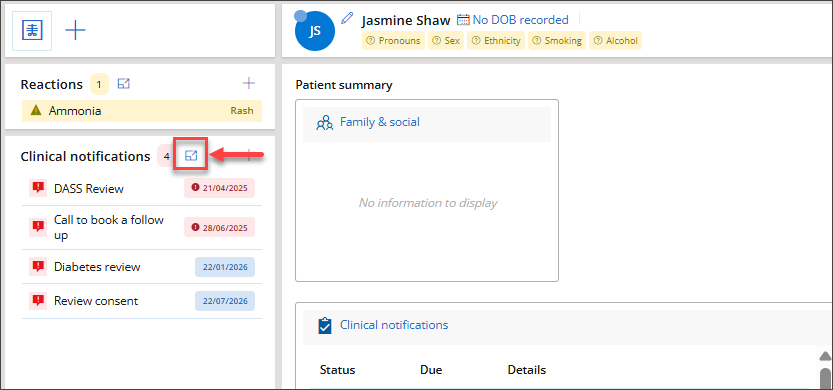
- Open the clinical record and go to the Clinical Notification panel on the left-hand side.
- Click the Maximise screen icon to open the Clinical Notifications screen.
- The Clinical Notification screen displays upcoming and overdue clinical Reminders and Tasks.
- Select a Reminder or Task from the list and select an Action from the options available:
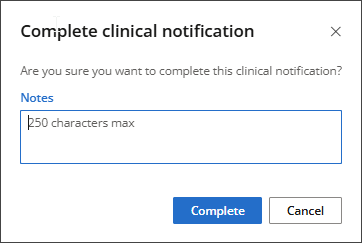
- Mark as Completed: The Complete Clinical Notification modal displays, prompting confirmation. If applicable, record a Note and click Complete. The Reminder/Task is removed from the list.
- Edit: The Edit Clinical Notification modal displays. Make any necessary changes and click Save.
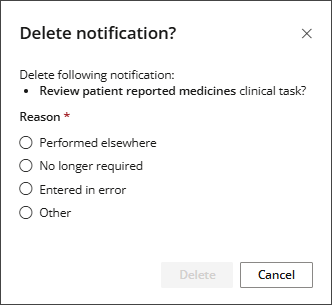
- Delete: The Delete Notification? modal displays. Select a Reason (Performed elsewhere, No longer required, Entered in error, or Other) and click Delete. The Reminder/Task is removed from the list.
Use the Filters at the top of the screen to refine the list. Filter by Type (Reminder or Task), Status, Priority, or due Date, or limit the view to only Tasks , Reminders, or Overdue.


Action clinical tasks from To Do
- From the top bar, select To Do > Clinical Tasks. The Clinical Tasks screen will appear.
- Select a Task from the list and select an Action from the options available:
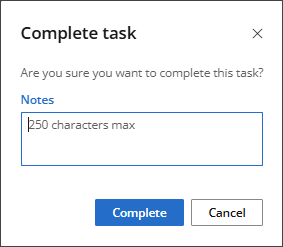
- Completed: The Complete Tasks modal displays, prompting confirmation. If applicable, record a Note and click Complete. The Task is removed from the list.
- Edit: The Edit Clinical Task modal displays. Make any necessary changes and click Save.
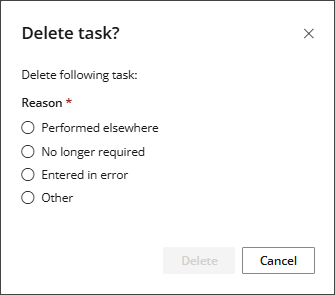
- Delete: The Delete Task? modal displays. Select a Reason (Performed elsewhere, No longer required, Entered in error, or Other) and click Delete. The Task is removed from the list.
- To view all Clinical Tasks marked as Completed, start by clicking Clear on the Status filter to remove all existing filters, and then tick Completed.
The Clinical Tasks screen will, by default, show all upcoming and overdue tasks.
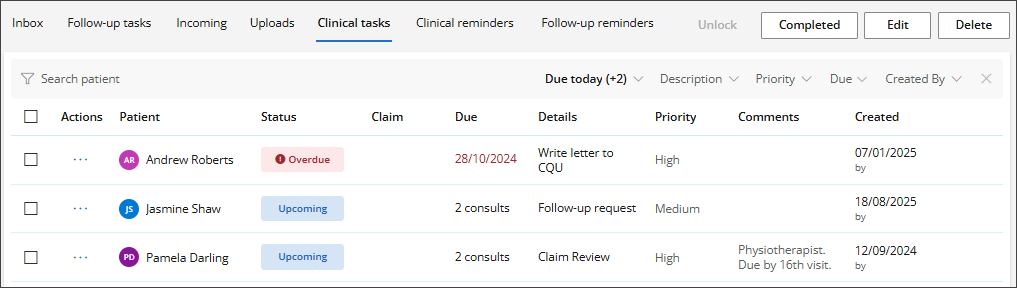
TIP Use the Filters at the top of the screen to refine the list. Search for the patient by name, or filter by Status, Description, Priority, Due date or Created by.
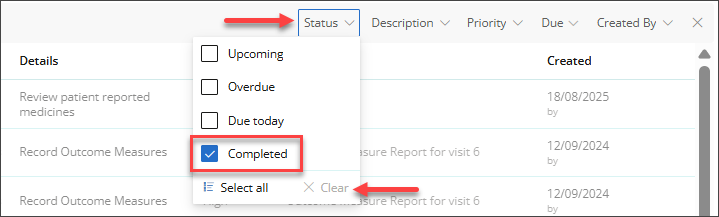
The list will be updated, displaying only the Clinical Tasks that are marked as Completed.
Manage Clinical reminders
In Bp Omni, Clinical Reminders that have not been sent to a patient will appear in the To Do > Clinical Reminders screen.
The Follow-up reminders screen displays reminders that have been sent to a patient, along with any replies received to those reminders.
IMPORTANT To access To-Do > Clinical Reminders and To-Do > Follow-up Reminders in Bp Omni, users must have Security permissions for Clinical and Practice Workflows set to Contributor level or higher. See Configure Business Roles and Security Permissions for more information.
Send clinical reminders
In Bp Omni, Clinical Reminders that have not been sent to a patient will appear in the To Do > Clinical Reminders screen.
- From the top bar, select To Do > Clinical Reminders. The Clinical Reminders screen will appear.
- Select the reminders you want to send and then click Send.
- Reminders will be sent to the patient. Sent reminders will appear in the Follow-up reminders screen.
The Clinical Reminders screen will, by default, display all clinical reminders for patients who do not have any upcoming appointments scheduled.
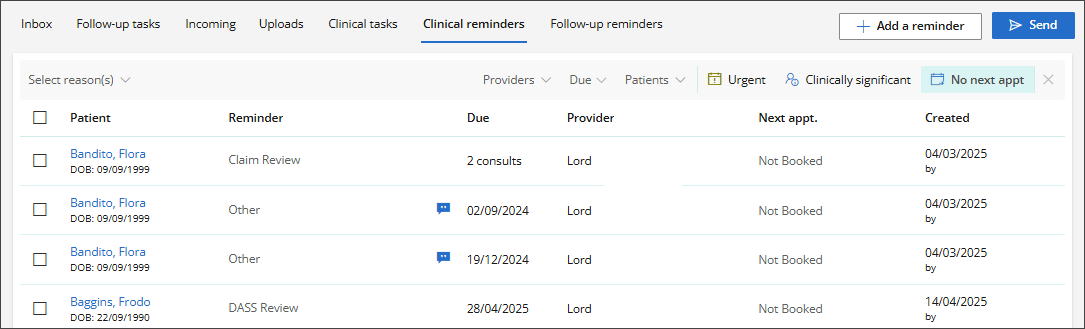
TIP Use the Filters at the top of the screen to refine the list. Search by Reason, or apply filters by Provider, Due date, Patient name, or limit the view to only Urgent, Clinically significant, or No Next Appt.
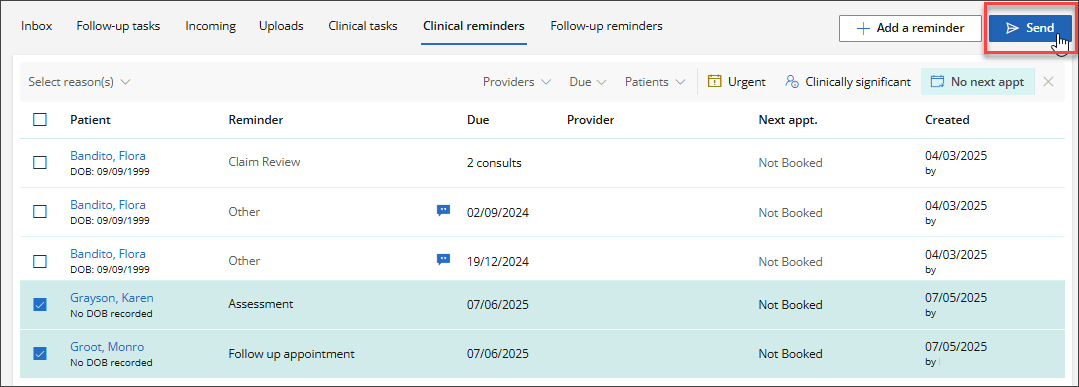
If the patient has consented to receive SMS for Clinical Reminders, the Clinical Reminders screen displays a Send button.
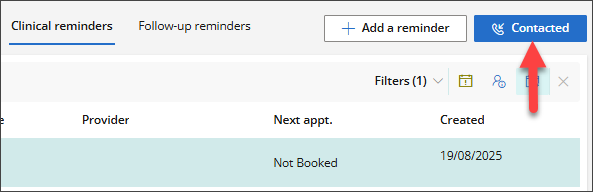
If there is no mobile phone number recorded in the patient demographics or if the patient has Opted out of Electronic communications, a Contacted button is displayed.
Check clinical reminder replies
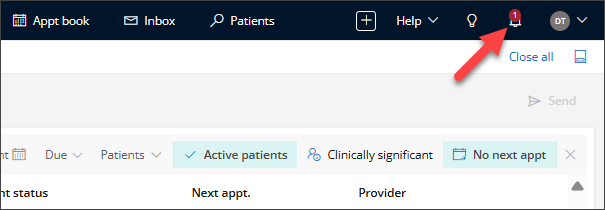
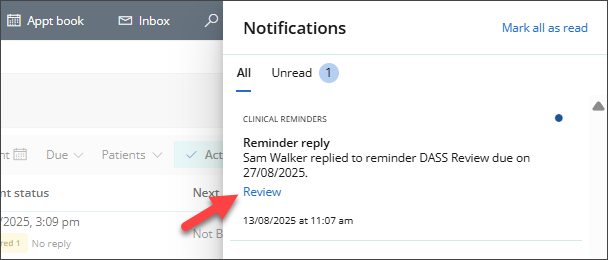
Patients can respond to Clinical Reminders sent via SMS. When a reply is received, a notification appears in System Notifications.
Click Review to view the contents of the reply.
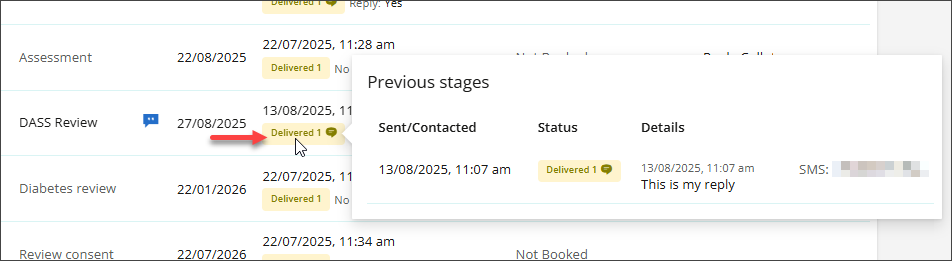
The Follow-up Reminders screen will appear. Locate the patient SMS reply you wish to view and hover over the Delivered badge.
A tooltip displays all contact attempts, including the date and time the reminder was sent, the Status, and the Details of the patient's reply.
Follow-up reminders
The Follow-up reminders screen displays the reminders sent to a patient, and replies received to those reminders.
Clinical Reminders will remain visible on this screen until they are marked as Completed, Declined, No Response, or No Longer Required.
- From the top bar, select To Do > Follow-up Reminders. The Follow-up Reminders screen will appear.
- The Current Status column will display the date and time of the most recent contact attempt.
- To resend a Clinical Reminder, select the reminder from the list and click Send. The Current Status will be updated to reflect the most recent contact attempt.
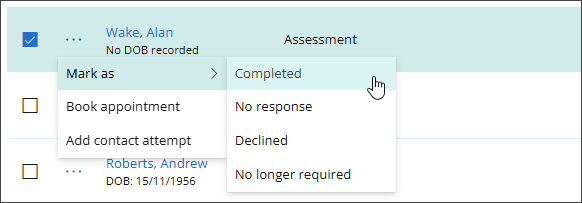
- To action a clinical reminder, click the ellipsis and select the action:
- Mark As: Select Completed, No response, Declined or No longer required. The status of the reminder will be updated.
- Book Appointment: The New appointment modal will appear, Complete the booking process as per normal.
- Resend: For clinical reminders sent as SMS, click Resend. The clinical reminder will be sent and the Current Status will be updated.
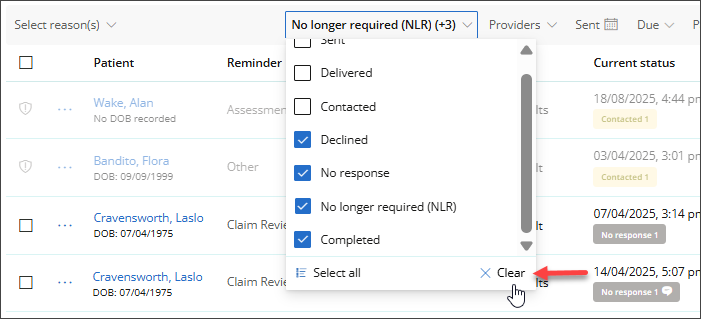
- To view all Reminders marked as Completed, Declined, No Response or No Longer Required, click Clear on the Status filter to remove all existing filters, and then tick the Status you want to view.
The Follow-up Reminders screen will, by default, display all Clinical Reminders for Active patients who do not have any appointments scheduled with the Status of Sent, Delivered, and Contacted.
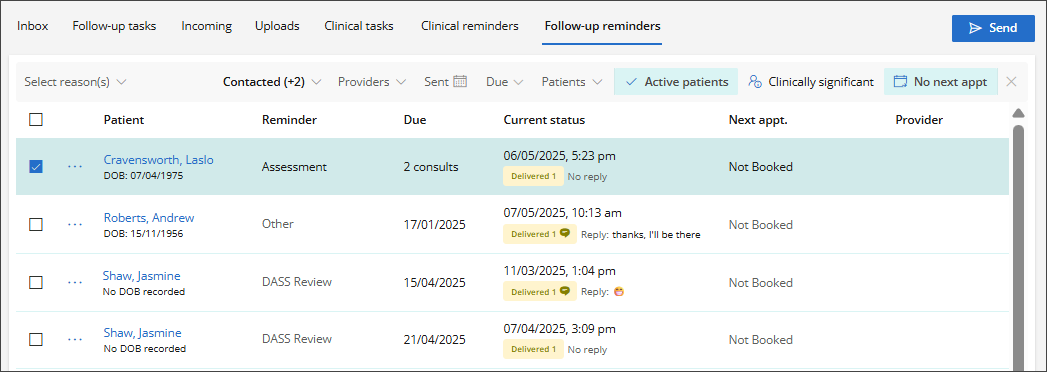
TIP Use the Filters at the top of the screen to refine the list. Search by Reason, or filter by Status, Provider name, Sent date, Due date, Patient name, or limit the display to only Active Patients, Clinically significant reminders, and those with No Next Appt.
To view SMS Replies to Clinical Reminders, hover over the Delivered badge.
The tool tip for Previous Stages will be shown. All contact attempts will be displayed, including the Date and time the Clinical Reminder was sent, the Status, the Details column will show the patient's reply to the reminder, and the Contact Method.
Last updated: 20 August 2025.


 AU
AU 