Upon starting a consult, the clinical record will open.
For more information on beginning a consult, see View the clinical record, start a consult, or record an update encounter.
This article explains how to navigate the clinical record and complete tasks such as adding reactions, tasks or notices, using clinical tools and more.
NOTE To change your clinical settings, click your profile icon in the top-right corner and select Profile > Clinical settings.
Edit Patient or Client details
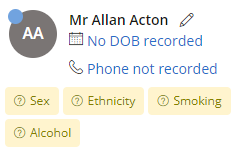
Select the pencil icon next to the Patient or Client's name in the top left corner to edit the patient's demographic details.
Clicking the Patient or Client's date of birth or phone number (or alternately No DOB recorded or Phone not recorded ) will also allow you to edit the patient's demographic details.
If limited or no demographic or family and social information has been added for the Patient or Client, yellow tags will appear under the patients or client's name indicating that the information has not yet been added. Click the tag to enter the information.
Add reactions
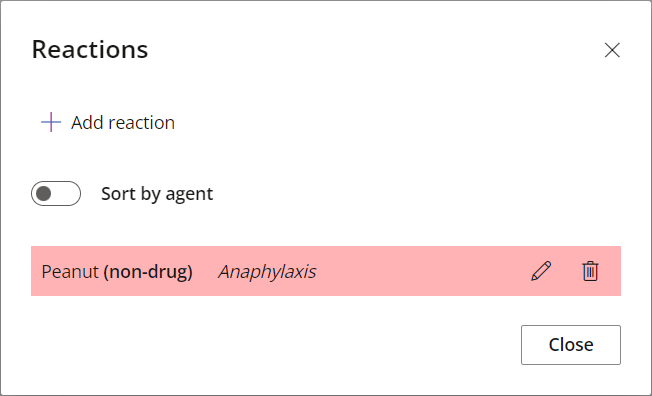
Add any reactions the Patient or Client has. An example of a reaction could be an allergy to peanuts.
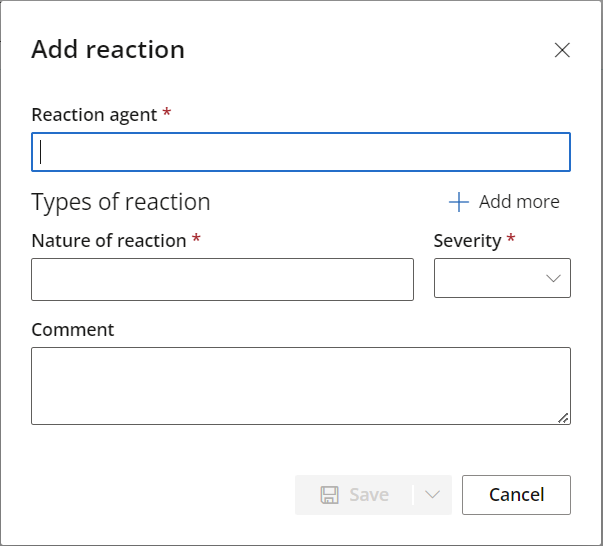
- Click the + (plus) icon next to Reaction. The Add reaction screen will appear.
- Begin typing a Reaction agent into the first field. A list of options will appear for you to choose from.
- Select the Nature of Reaction and the Severity. Click + Add more to add further reactions.
- Add a Comment if required and click Save.
NOTE Drug brands are not included in the list. For example, paracetamol is included in the list, but Panadol is not.
The reaction will be listed under Reactions on the left hand side of the screen.

Click the number next to Reactions to edit or delete existing reactions.
Add Clinical tasks
A task is an action that you can assign to yourself during a consult that must be completed by a future date. An example of a task could be to review the patient's medical history.
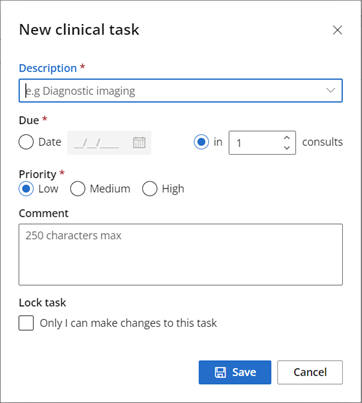
- Click the + (plus) icon next to Tasks. The New clinical task screen will appear.
- Select a task description from the list of options provided or type the description into the Description field.
- Indicate when the task is Due: either on a particular date, or after a certain number of consults.
- Indicate the task's Priority.
- Add a Comment if required
- Tick Lock task if you do not want others to be able to make changes to the task.
- Click Save. The task will be listed under Tasks on the left hand side of the screen.

The task will also be listed in the Clinical tasks screen. To view the Clinical tasks screen, either click the number next to Tasks, or from the home screen, click To do > Clinical tasks.
See Clinical Reminders, Tasks and Notifications for more information.
Add notices
Notices are information about the Patient or Client that assist clinical or administrative staff.
An example of a clinical notice could be that the Patient or Client has recently been discharged from hospital.
An example of an administrative notice could be that the Patient or Client always needs a long appointment.
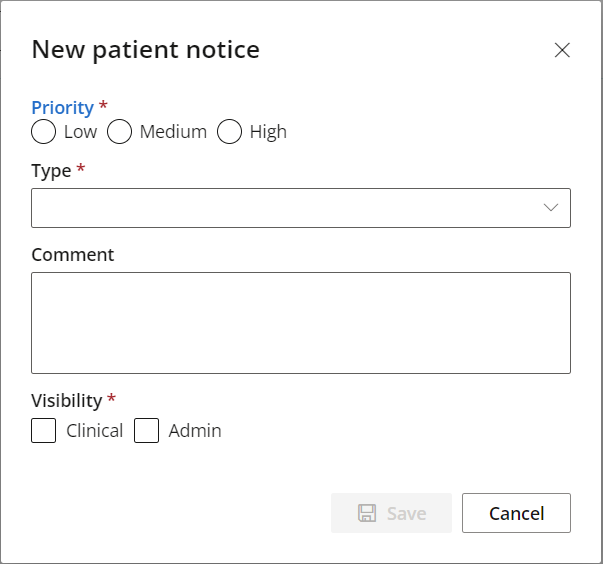
- Click the + (plus) icon next to Notices. The New patient notice or New client notice screen will appear.
- Indicate the notice Priority.
- Select the notice type from the list provided, or enter the notice type into the Type field.
- Add a Comment if required.
- Indicate whether the notice should be visible to Clinical or Admin, or both.
- Click Save. The notice will be listed under Notices on the left hand side of the screen.

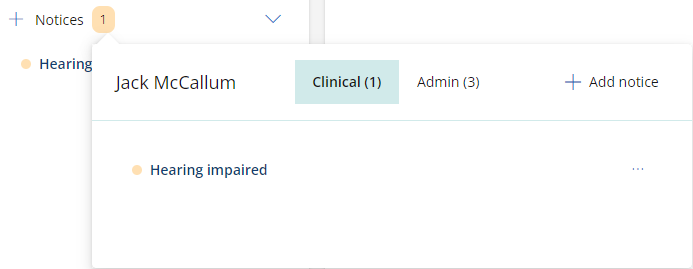
Click the number next to Notices to view both clinical and admin notices for the Patient or Client.
Notices can also be added for a Patient or Client when creating an appointment, or via the patient's demographic information screen.
Today's notes
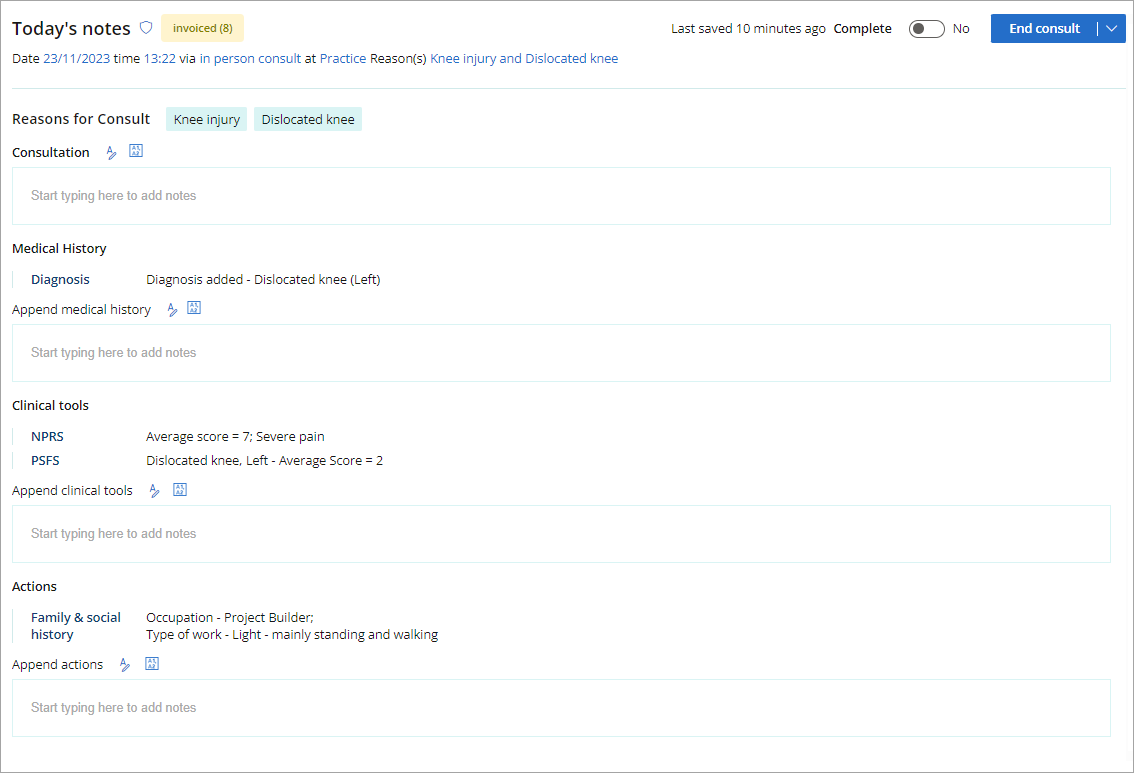
Today's notes is the default section that the clinical record opens to. Type any notes from the consultation to Today's notes.
Actions performed in the clinical record, for example, adding family and social history information, will be automatically recorded in Today's notes.
You can also use Today's notes to record a reason for consult, consultation method (in person, video or phone), and consultation location.
Today's notes can be backdated using the time and date settings, but cannot be forward-dated.
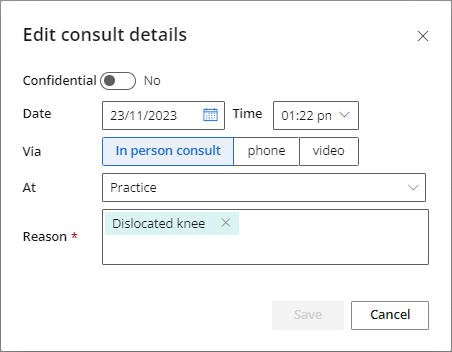
Edit consult details
Change the consult details by clicking on any of the options in the header to bring up the Edit screen.
View notes from previous consults by clicking the Past consults icon in the patient tree, and clicking the consult that you wish to view notes for.
Docked tabs
Docked tabs sit along the bottom edge of the clinical record. Tabs that appear in the dock are for sections of the clinical record that are currently open. Click on a tab to quickly navigate to a section of the clinical record.
The selected tab will display in blue.

Patient or client summary
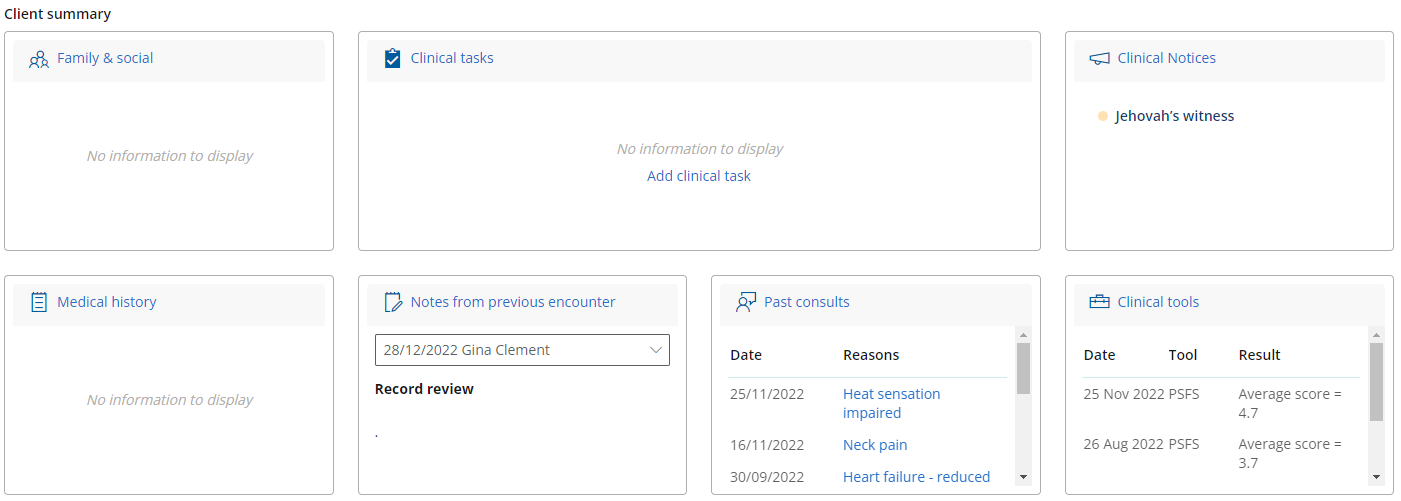
The Patient or Client summary provides an overview of the Patient or Client's clinical information. The Patient or client summary enables you to quickly familiarise yourself with a Patient or Client.
You can change which sections appear in the Patient or Client summary and in what order via clinical settings.
Quick access bar
Located in the top leftmost corner of the Clinical record, the Quick access bar allows users to create custom shortcuts.
-
Click the plus button to add or edit quick access bar shortcuts.
-
Select an option from the Available links and set an icon to represent the shortcut.
-
Click Save to see your new shortcut in the Clinical record.

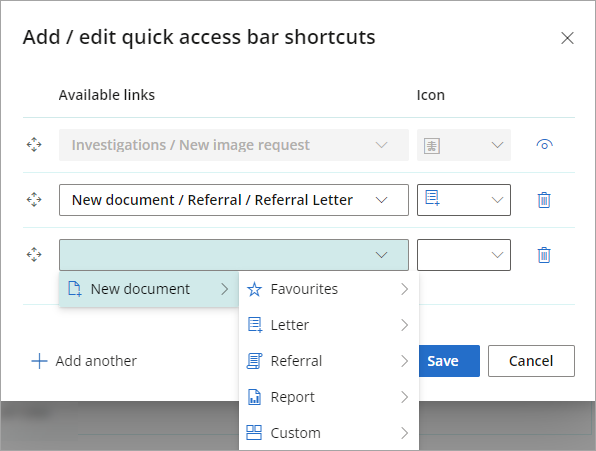
TIP The default shortcut for Investigations / New image request can be hidden by clicking the eye icon next to the icon selection.
The quick access bar has space to display up to five shortcuts on screen. Additional shortcuts are added as overflow and can be accessed from the ellipses button.

Bp Omni will warn the user when deleting a template linked to a Quick access bar shortcut.
If the user continues with deletion of the template, the icon in the Quick access bar will update with a red background indicating that the shortcut must be reconfigured.

Hover over the icon for a tooltip of the required update.
Last updated: 02 August 2024.