This article explains how to navigate the patient or client tree, manage conditions, clinical history and use clinical tools.
NOTE To change your clinical settings, click your profile icon in the top-right corner and select Profile > Clinical settings.
The Patient or Client tree
The Patient or Client tree is the section on the right hand side of the screen in the clinical record. The branch that displays by default can be specified in Clinical settings.
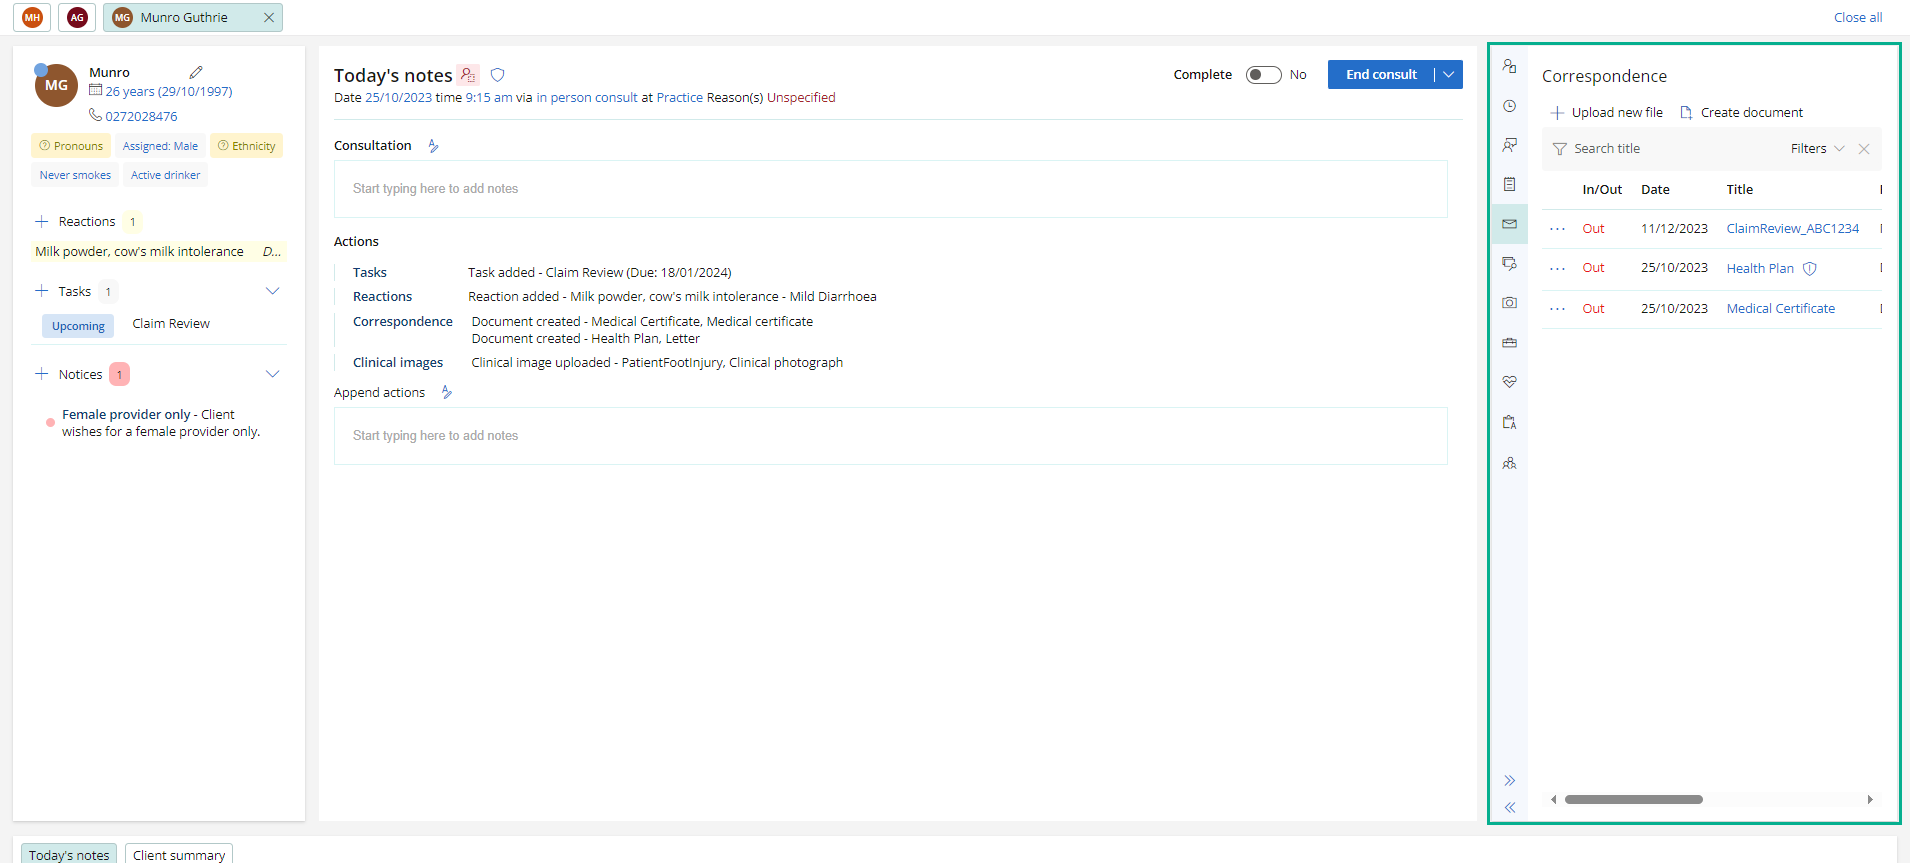
- Use the options available in the Patient or Client tree to add and view information about patients or clients.
- Use the arrow icons at the bottom of the Patient or Client tree to minimise or expand it
Conditions
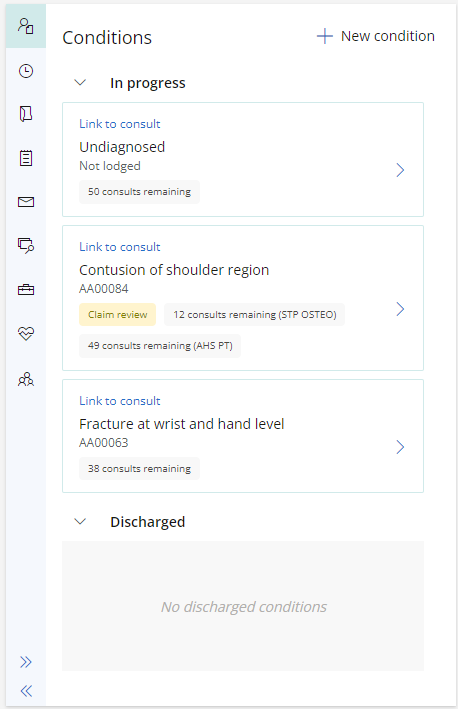
The conditions section shows any in progress or discharged conditions for the patient.
If you started the consult from an appointment and there is no linked condition, a new condition can be created.
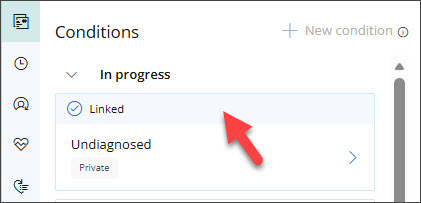
Click on a condition to manage and view more information.
- Claim condition types will display with the number of consults remaining for each provider type linked to the condition.
- A discharge badge is available for each applicable provider type linked to the condition, if more than one.
Add a new Diagnosis to a Condition in the Clinical Record
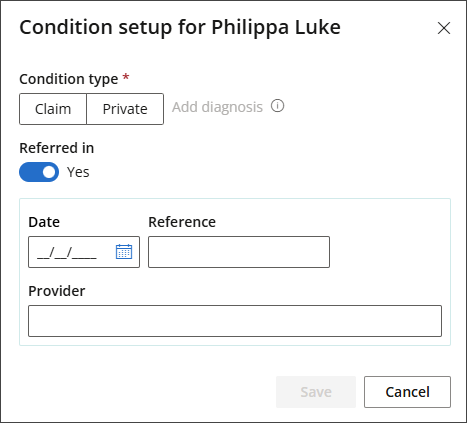
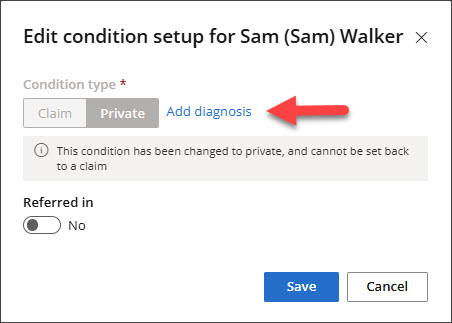
An Add diagnosis link is available in the Condition Setup modal when recording a condition from Clinical Record > Conditions > + New Condition.
- To record a new Diagnosis, go to Conditions in the Patient/Client tree and select + New Condition.
- Click Add diagnosis.
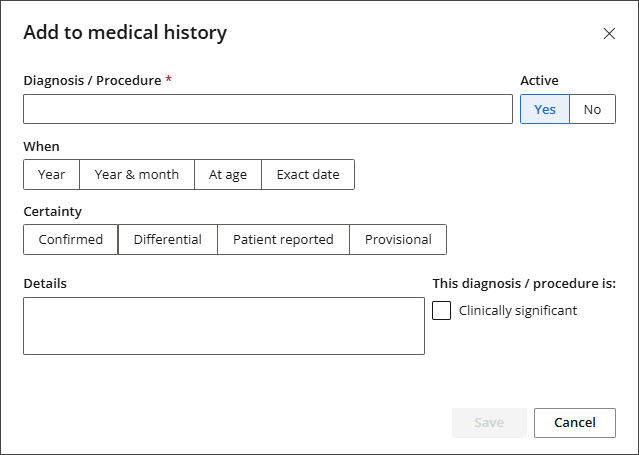
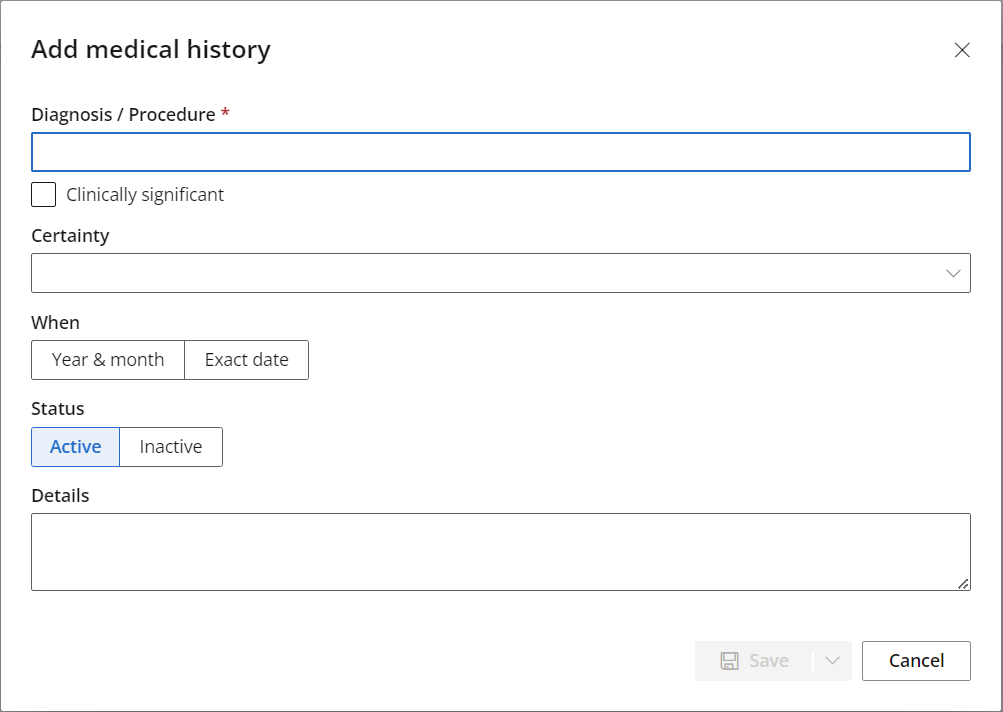
- The Add to Medical History modal will appear.
- Enter a Diagnosis/Procedure and complete any additional fields as required.
- Click Save.
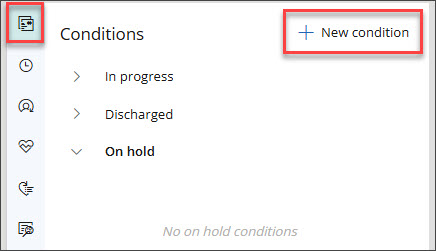
The Condition Setup modal will appear.
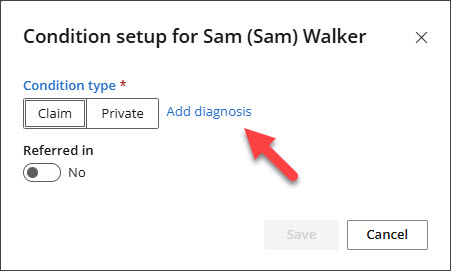
Once the Diagnosis is saved, the diagnosis information will flow through to the following areas in Bp Omni:
- Included in the Conditions section of the Patient/Client tree.
- Included in the Medical History section of the Patient/Client tree.
- If Clinically Significant and Confidential flags were selected in the Add Medical History modal, this will also be included.
- ACC45 primary diagnosis card if a new claim is created.
- Displayed in the Appointment sidebar under Current Conditions.
- Encounter reason for visit, if selected in the Add to Medical History screen.
The Add diagnosis link is disabled if Referred in is set to Yes, as diagnosis information will be sourced from ACC.
Add a new Diagnosis to an Existing Condition in the Clinical Record
A new Diagnosis can only be added to an Existing Condition if the Condition has been Linked to the current consult and no Diagnosis has previously been recorded.
If the Claim has not yet been submitted, any required changes must be made from ACC45.
- To add a Diagnosis to an Existing Condition, open the Patient/Client tree, go to Conditions, locate the Linked Condition, and select it to open.
- Click the pencil icon.
- Click Add diagnosis.
- Enter a Diagnosis/Procedure and complete any additional fields as required.
- Click Save.
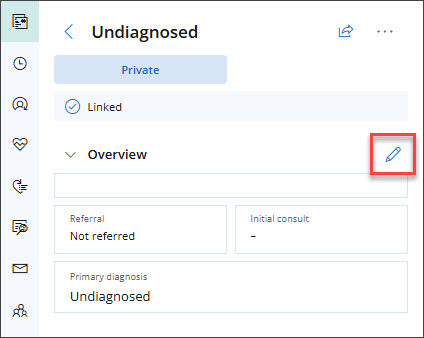
The Edit condition setup modal will appear.
The Add to Medical History modal will appear.

The timeline is a list of the Patient or Client's significant clinical events.
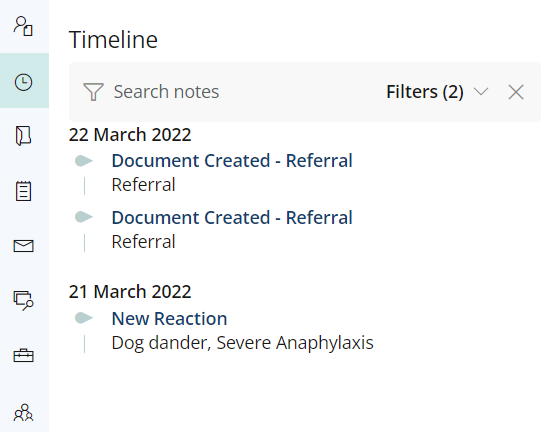
Some examples of significant clinical events include:
- Document created.
- Document.
- Reaction added.
Click on the event in the timeline to view further information about it.
A list of all the consults the patient has attended at the practice in chronological order. When the clinical record is opened in view-only mode, a Record update can be started from here.
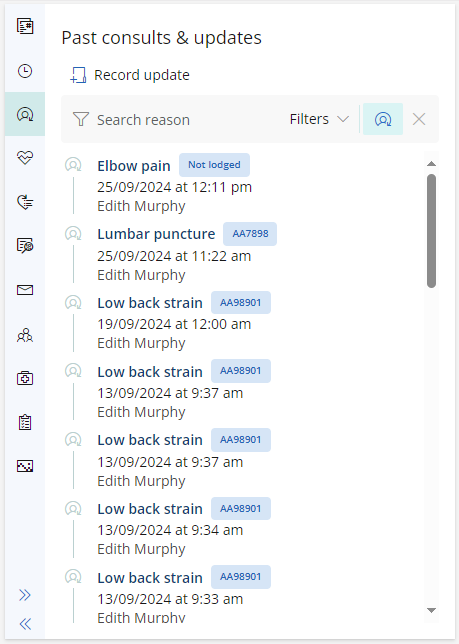
Click on a consult to view more information about it. You will have the option to append notes to the consult, or print the consultation notes.

Add diagnoses or procedures that the Patient or Client has had in the past. Bp Omni uses SNOMED codes for diagnoses and procedures.
- Click + Add Medical Hx. The Add medical history screen will appear.
- Begin typing the name of the Diagnosis or Procedure. A list will appear to select the diagnosis or procedure from.
- Indicate of the diagnosis or procedure is the Reason for consult, and if the diagnosis or procedure is Clinically significant.
- Indicate the Certainty of the diagnosis or procedure.
- enter the date When the diagnosis or procedure occurred.
- Indicate whether you want the diagnosis or procedure to be Active or Inactive.
- Add any further Details required and click Save.
Alternately, click No significant history to record that the patient has had no significant diagnoses or procedures in the past.
The correspondence section lists all incoming and outgoing correspondence relating to the patient.
Click the Title of the correspondence to view it.
To create a new letter, click Create document.
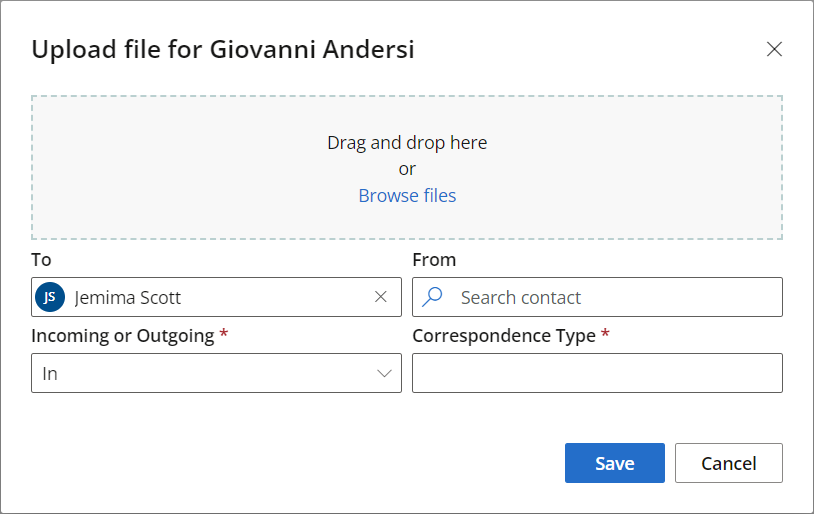
To upload a new file:
- Click + Upload new file. The Upload file screen will appear.
-
Drag and drop the file you wish to upload onto the upload file screen, or browse to the file and click Open.
- Select the provider that the correspondence is addressed To.
- Select who the correspondence is From.
- Indicate whether the correspondence is Incoming or Outgoing.
- Select the Correspondence Type.
- Click Save.
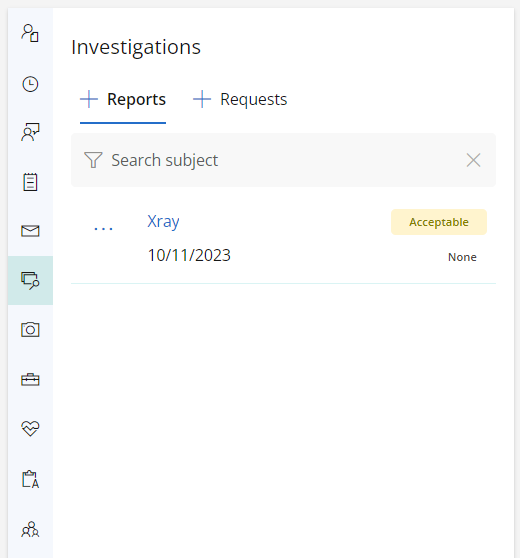
The investigations section contains a list of all investigations returned to the practice regarding the patient.
Click the + (plus) icon next to Reports to upload an investigation.
See Manage Results in the Inbox or Clinical Record
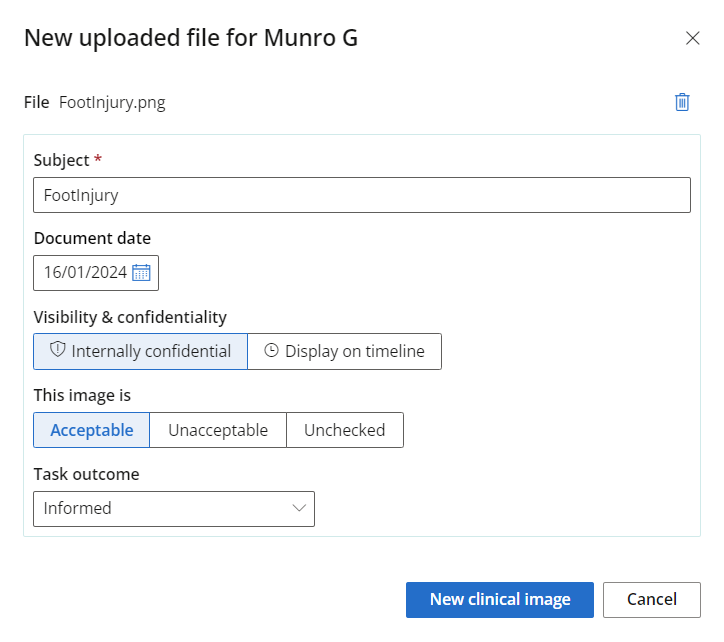
Clinical images can be uploaded to file or store clinical photographs in the system. When uploading a clinical image, you are presented with the following options:
- Make the image confidential
- Declare whether or not the image is acceptable
- Move the image to correspondence or investigations
- Print the image
- Create a task outcome for the image.
A number of clinical tools are available in Bp Omni to assist with diagnosing and measuring severity of various patient conditions.

The clinical tools available in Bp Omni are as follows:
- Disability of the Arm, Shoulder and Hand Score (DASH11)
- Depression, Anxiety Stress Scale (DASS-21)
- Edinburgh Postnatal Depression Scale (EPDS)
- Global Rating of Change Scale (GRCS)
- K10
- Numeric pain rating scale (NPRS)
- Örebro Musculoskeletal Pain Screen Questionnaire
- Patient Specific Function Scale (PSFS)
- RAND-36
See Bp Omni Clinical Tools for more information.
This section contains fillable history and examination forms that will help assess the client's history and record data such as pulse, blood pressure, temperature, reflexes and body parameters.
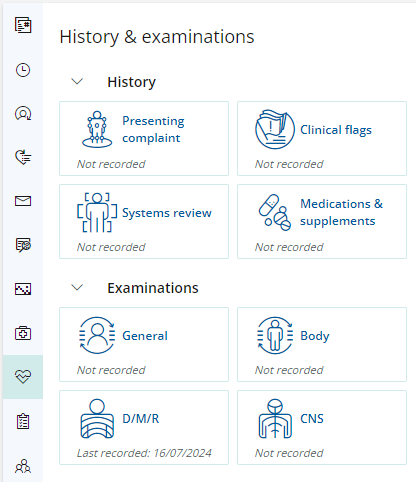
History
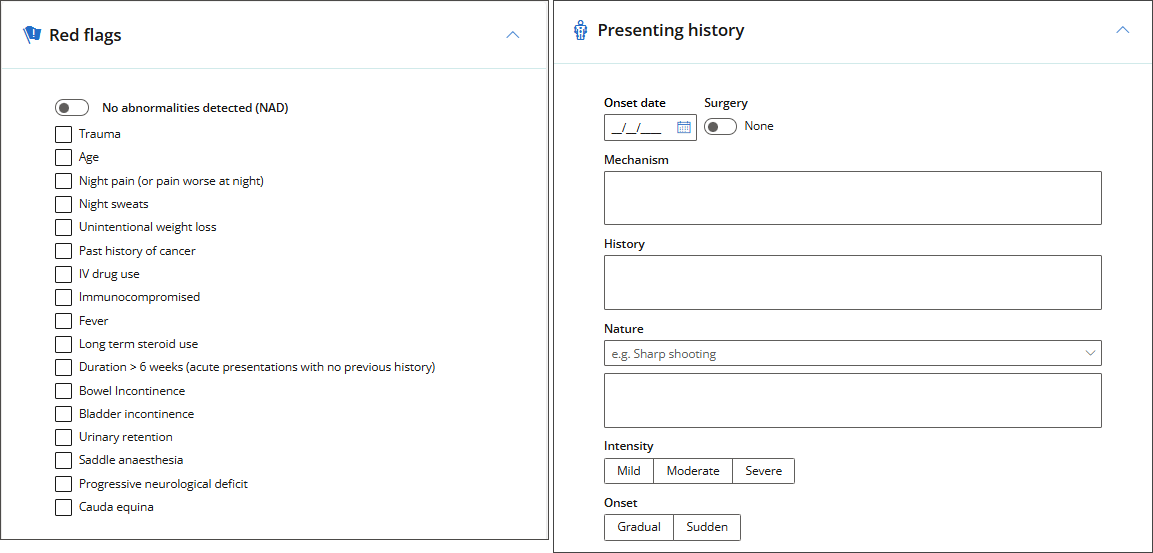
- Use Presenting complaint to capture the details of the issue that the patient presents with. Outline the problem details such as mechanism of injury, history of the injured area, and nature of the injury as shown in the below-right picture. Structured notes will be generated in Today's notes form this information.
- Use Clinical flags to record red and yellow flags that are relevant for the patient at the time, or select No abnormalities detected. Structured notes will be generated from these selections.
- Use the Systems review form to record general patient medical history. Values entered for Systems review will display under the Subjective header of Today's notes.
- Use the Medications & supplements form to record current patient medications and supplements.
Examinations
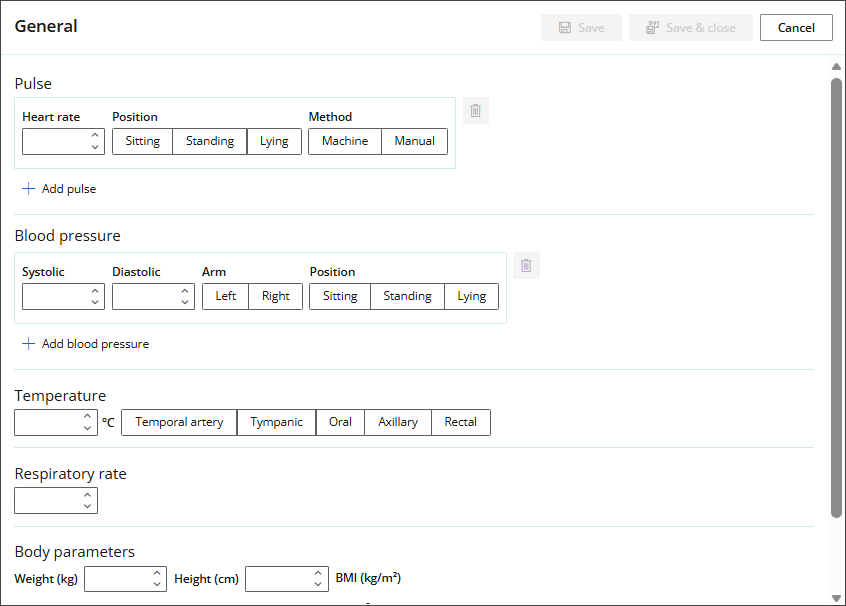
Use the General examination to record pulse, blood pressure, respiratory rate and body parameters.
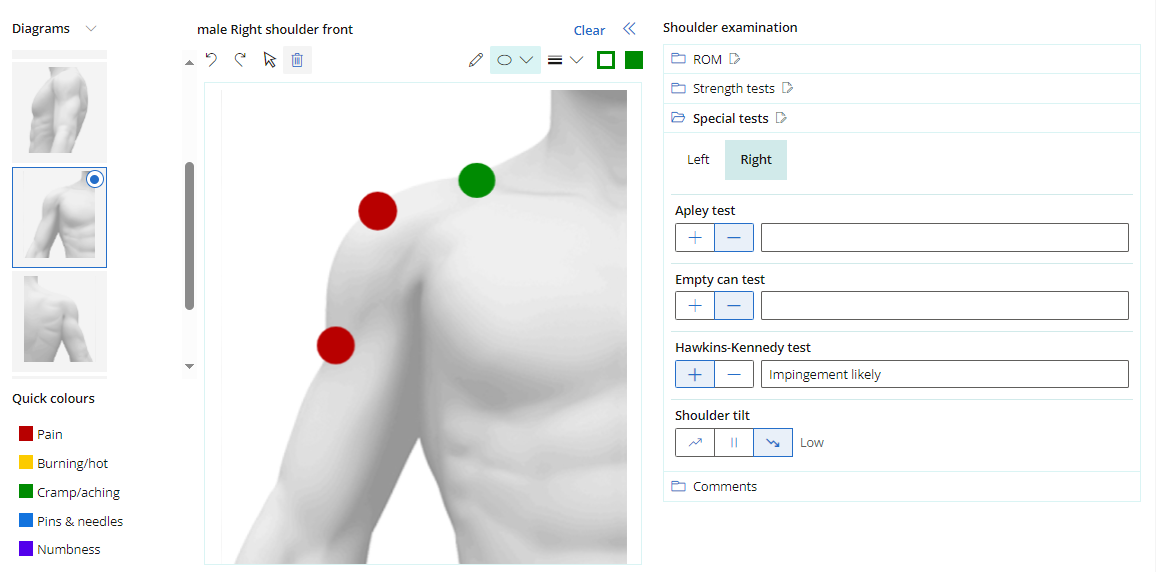
Use the Body examination section to provide structured data for range of motion (ROM) and a series of other tests, with automatic generation of structured notes.
Most selected diagrams other then 'Body' and 'Abdomen' will contain the following tests:
- Range of motion (ROM)
- Spine contains Active and Passive for each area.
- All other areas contain Active and Passive movement options for both left and right.
- Special tests
- Strength tests
- Comments
TIP Range of Motion (ROM) fields allow negative values; for example, reduced knee extension can be recorded as -20°. The default value remains 0.
'Abdomen' and 'Body' will contain comments only, allowing you to record Observation, light and deep Palpation, and Auscultation.

Structured notes are generated for each body examination recorded.
D/M/R
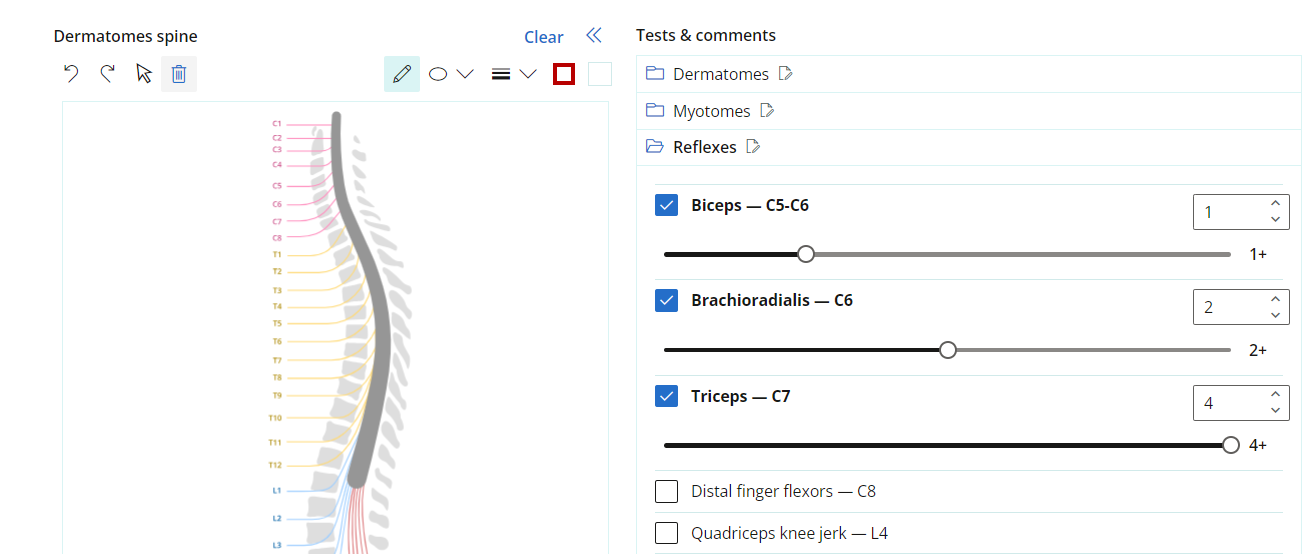
Dermatomes
These tests cover both light touch and pinprick tests, and are used to test areas of suspected impaired sensation. These tests are broken down into four categories:
- Trigeminal
- Cervical
- Thoracic
- Lumbosacral
For each section in Dermatomes, you can select one or more nerves that have been tested and record the result in bulk. Select the side of the nerve, or select the entire nerve to assume both sides.

There are four estimation options, this allows you to record nerves that have the same result and estimation at the same time. If a nerve or the side of a nerve has a different estimation, record this as a separate entry. The separate entry will only allow you to select a nerve or side of a nerve that has not already been estimated.

The same process can be done for Cervical, Thoracic, and Lumbosacral.
Myotomes
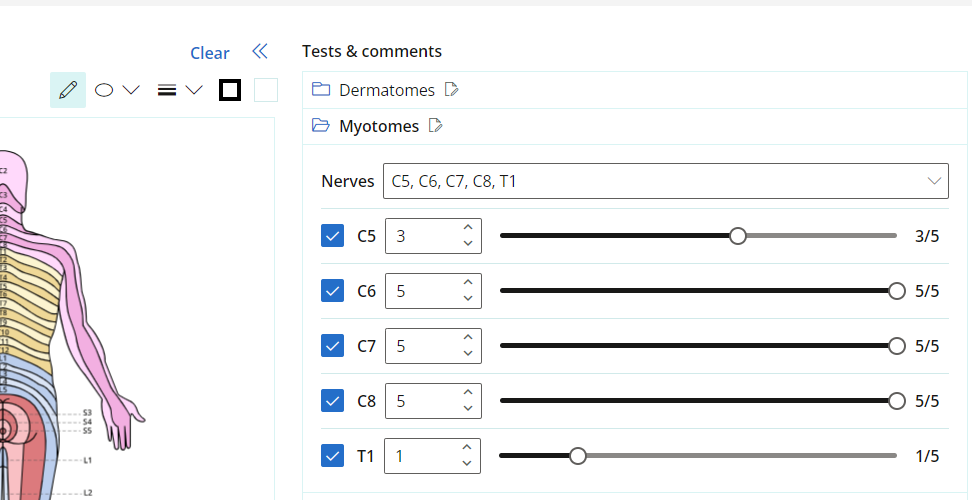
Select the Myotomes that have been tested from the dropdown and use the slider or the number picker to select the result out of five.
Reflexes
Select the reflexes that have been tested and record the result using the slider or the number picker out of five.
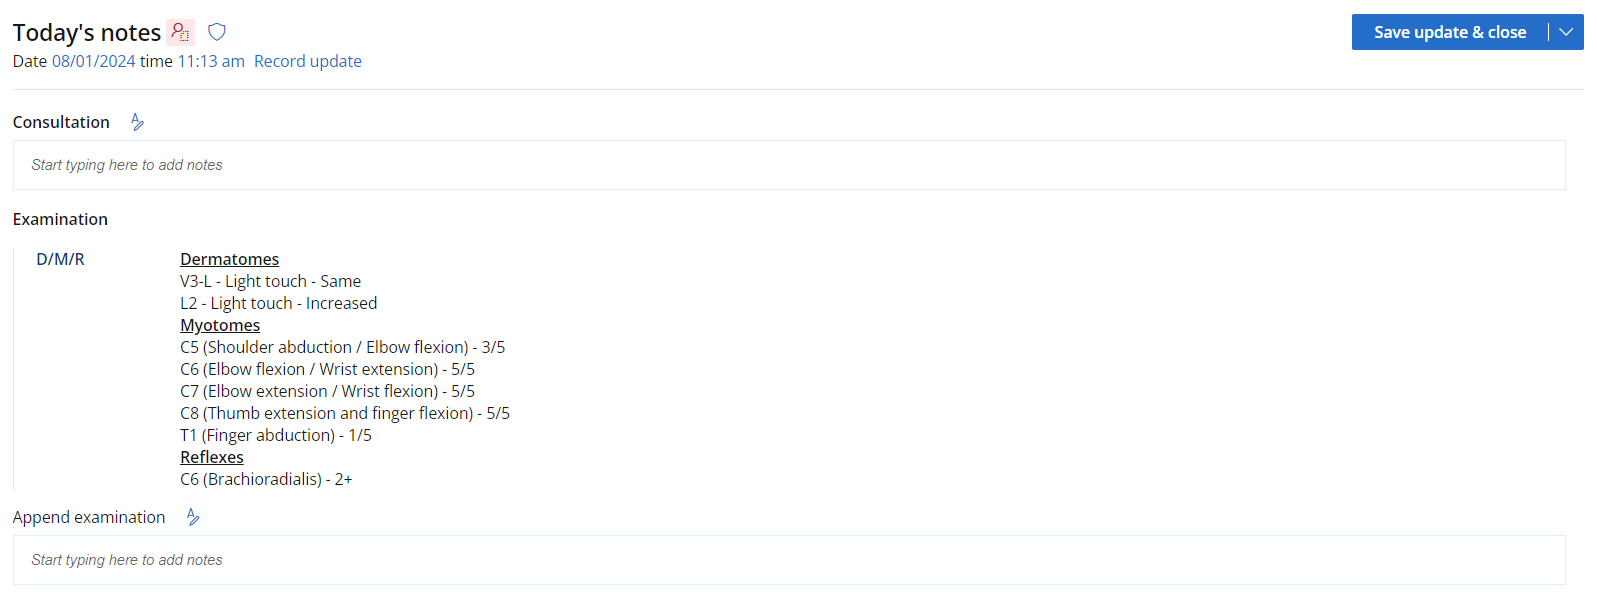
Once the examination is saved, notes are generated based on what has been recorded in D/M/R.
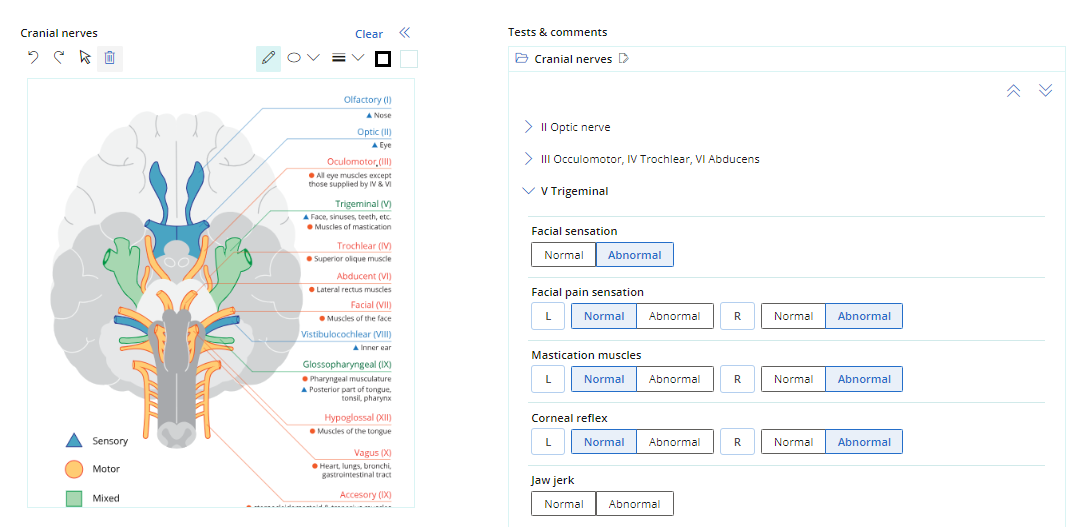
Cranial Nerves examination
The Cranial nerves section provides the ability to record results of testing the cranial nerves. Relevant tests are available for each nerve or group of nerves.
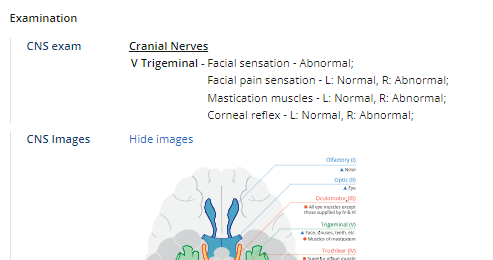
Structured notes will then be generated based on completion of the form.
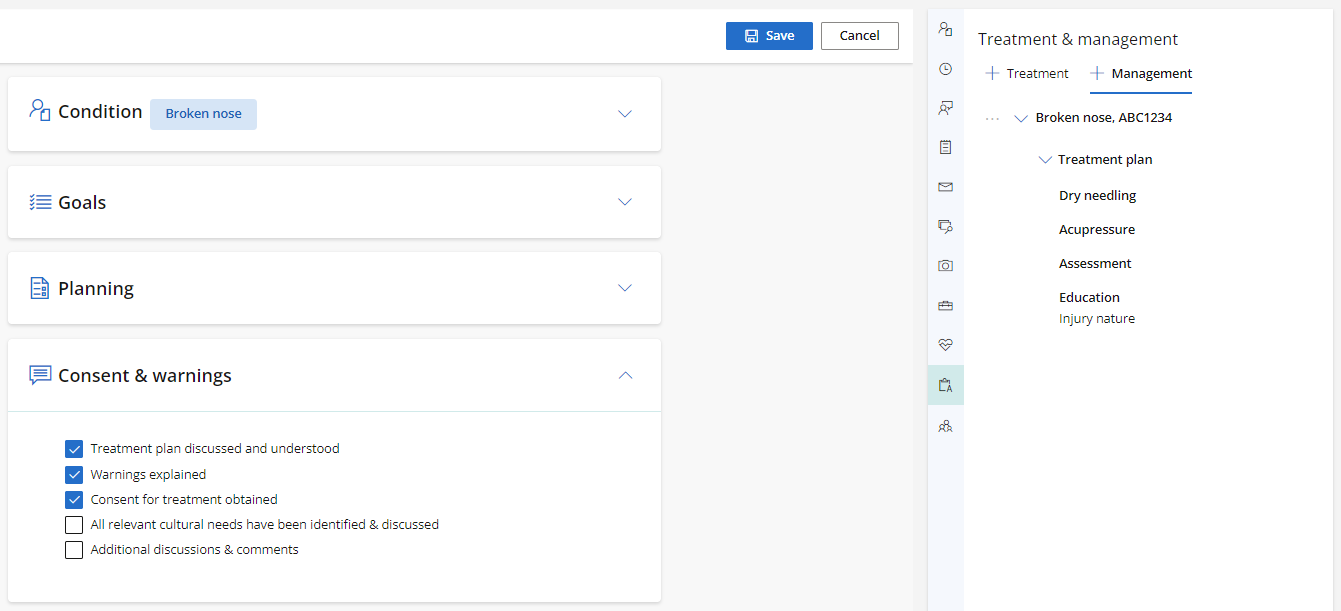
Use the Management & Plan section of the Patient tree to record treatment information and create a management plan for a patient.
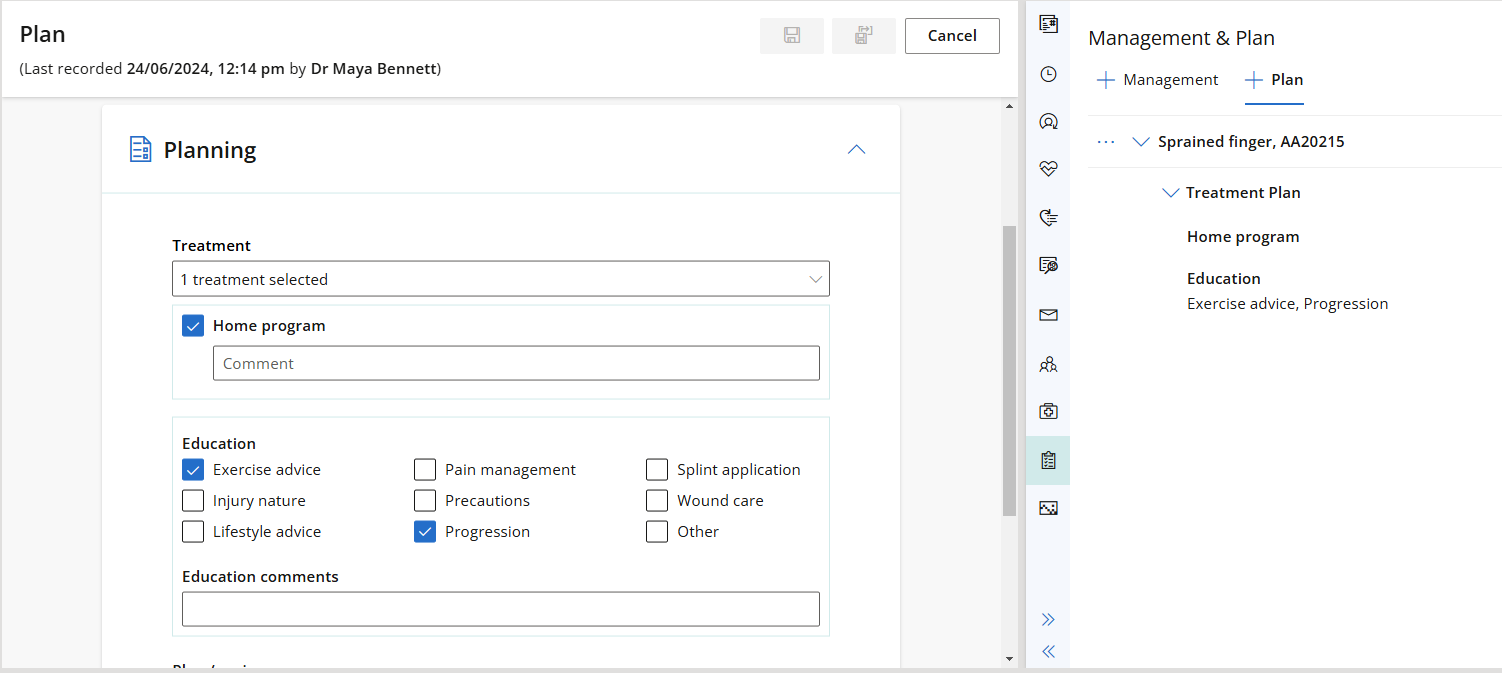
The Plan workflow allows you to create a treatment plan for the patient, outlining the management of their condition. The condition selected from this form will the linked to the consult upon saving the form.
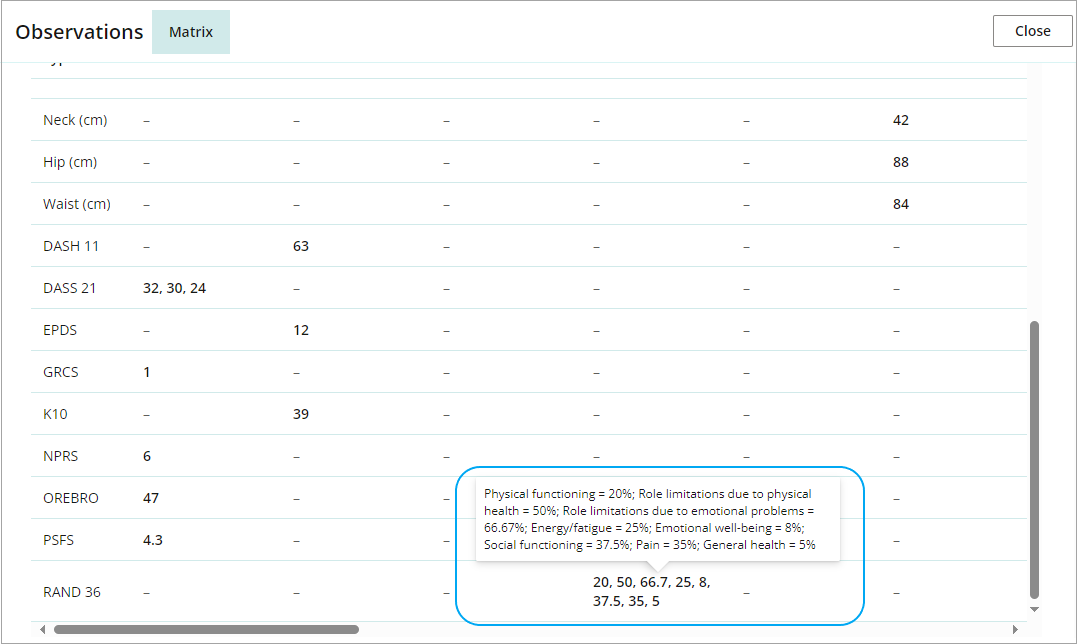
Observations provide a view of measurable clinical data that allows for quick comparison and progression analysis. Observation measurement data in Bp Omni is captured via:
- General Examination
- Clinical Tools
All observation records can be viewed by date or by examination. Select the relevant arrow icon to expand the observation.
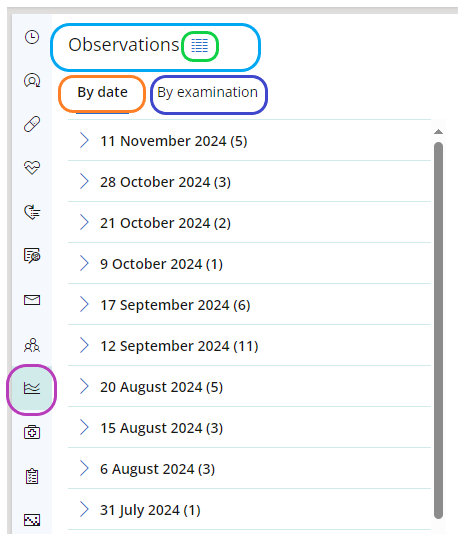
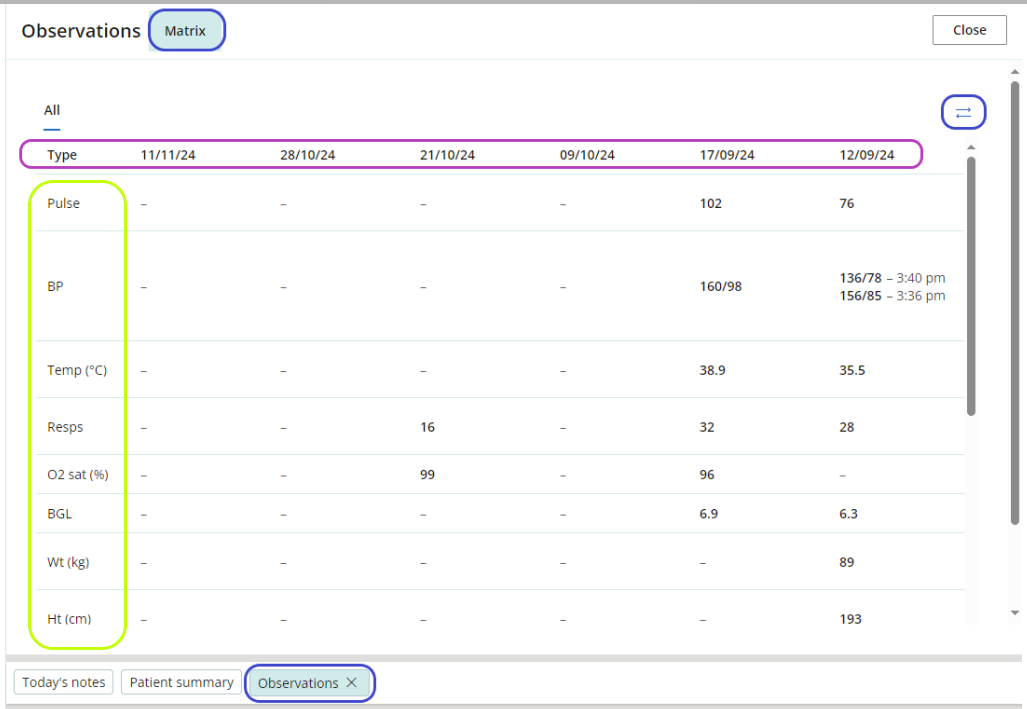
Once an Observation is opened, the icon to the right of the heading loads a matrix of all observations in the main content panel of the clinical record and displays as a docked tab.
Measurements display in the left most column sorted in the following order:
- Vital signs
- Body measurements
- Clinical tools
Most recently recorded observations will display first and the left most column can be switched to the right most column using the two arrows icon.
Hover over Clinical tool measurements to reveal more detailed information about the display
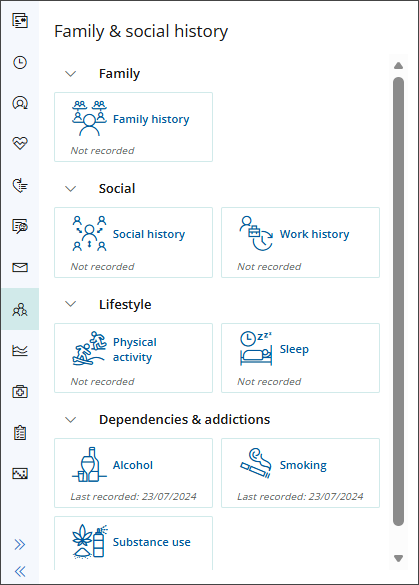
Use the family and social history section to record information about the patient.
The family and social history section contains eight categories.
Family history
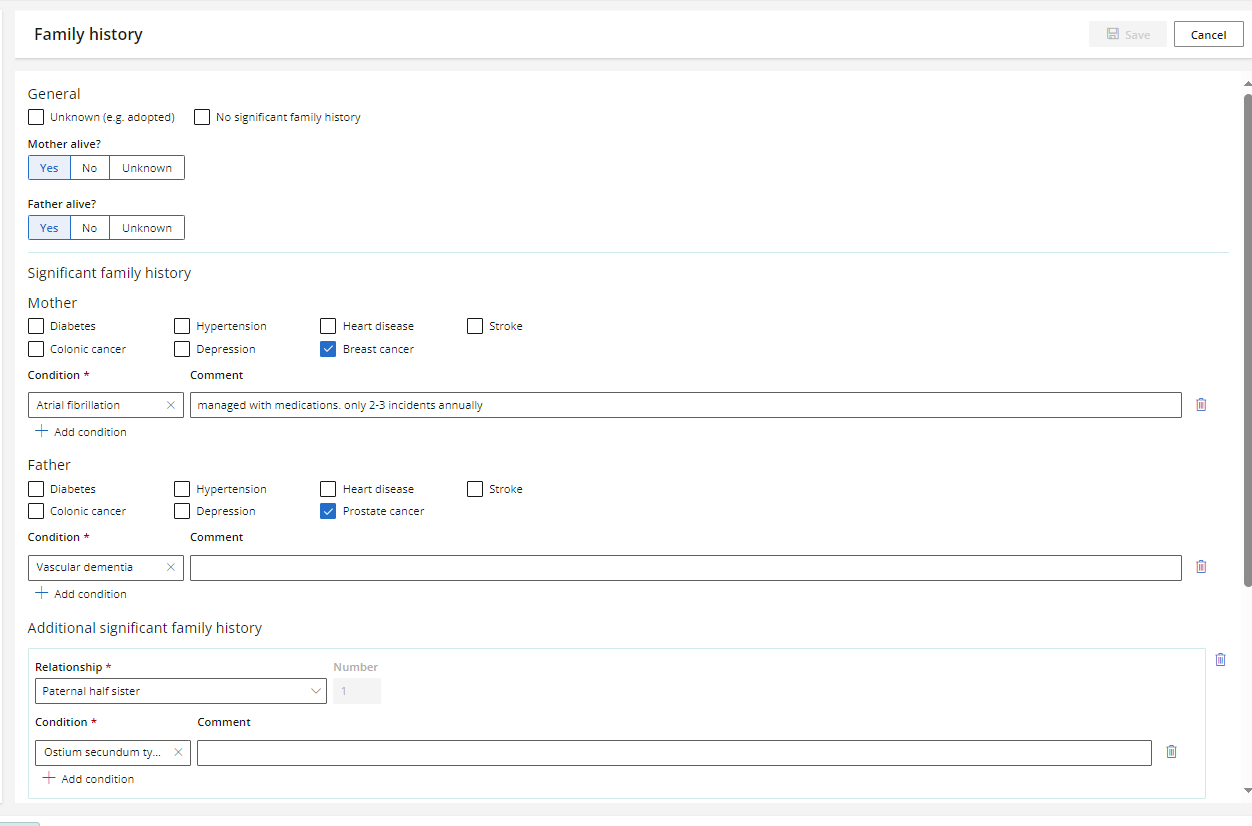
The information provided here will generate structured notes once the form has been saved. If the No significant family history or Unknown check boxes have been selected, the additional information fields will be hidden.
Additional significant family history can be added below the Mother and Father fields.
Social history
Use the social history section to record Patient or Client information on:
- relationship status
- sexuality
- pregnancy
- breastfeeding
- if they are an elite athlete
- living arrangements
- care arrangements
- legal arrangements.
Work history
Use the work history section to record Patient or Client information on:
- occupation
- type of work

Physical activity
Use the physical activity history to record Patient or Client information on:
- occupation
- type of work
Diet
Record the Patient or Client's diet history.
Sleep
Use the sleep history to record Patient or Client information on:
- general sleep
- sleep habits
- sleep environment
- thoughts or worries at night
- daytime functioning
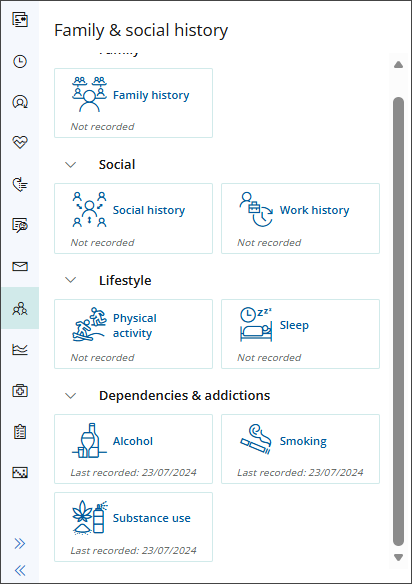
Alcohol
Record the Patient or Client's alcohol use, including current state.
Smoking
Record the Patient or Client's use of tobacco, e-cigarettes or vaping including current state.
Substance use
Record any history of substance abuse the patients may have including current state of usage.
Last updated: 29 January 2026.