
This article explains how to create and use online forms in Bp Omni.
In this article:
What are online forms?
Online forms are forms that are sent to patients electronically from Bp Omni via a link in an email, SMS or by QR code. The patient then clicks the link to open the form and fill it out.
Once the patient completes the form, the information that the patient has entered is sent back to Bp Omni.
Using online forms means that patients do not need to fill in a paper-based form with their details when attending the clinic. Online forms save time for receptionists, who are no longer required to manually input information from paper-based forms, as this is data entry is now done automatically by the system.
The online forms currently available in Bp Omni are:
- The DASH 11, DASS 21, EPDS, K10, NPRS, RAND 36 and OREBRO Clinical forms
- New Patient Form
- Personal details
- ACC45 claim details
- Personal + ACC45 details
- Custom forms, created from Admin > Manage templates & forms > Online forms.
Send online forms in Bp Omni
Send Clinical forms
Clinical forms can be sent directly to the patients device or presented as a QR code for the patient to scan. Once completed by the patient, these forms will return to Omni as a PDF in the Correspondence folder and as clinical data. Clinical forms cannot be edited.
Clinical forms can be sent to the patient in a multitude of ways depending on where you are in the system:
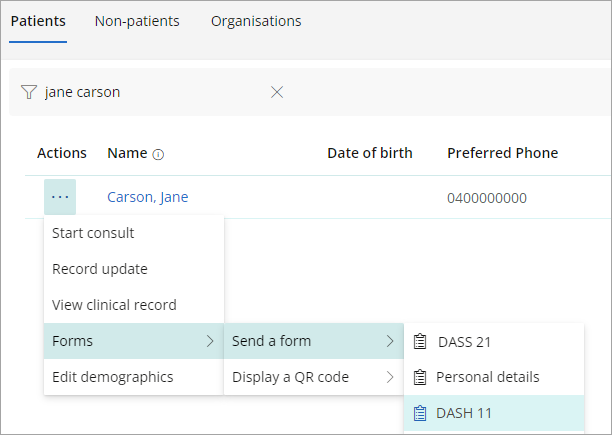
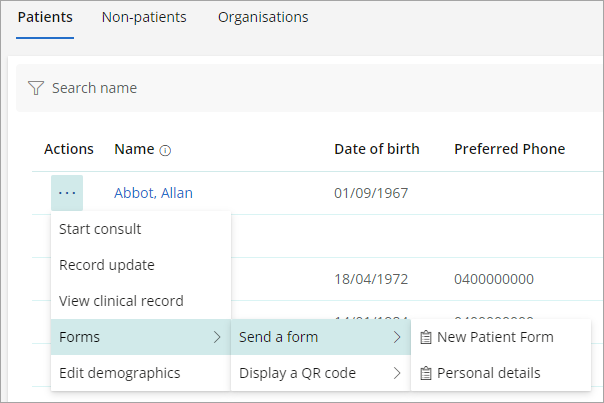
- From the Address Book > Patients > Actions button.
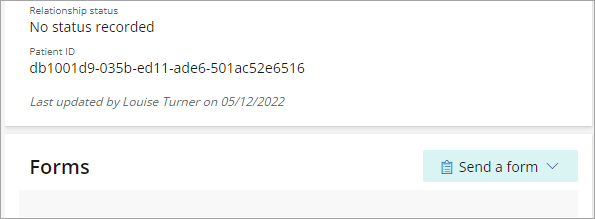
- From Send a form when viewing patient demographics.
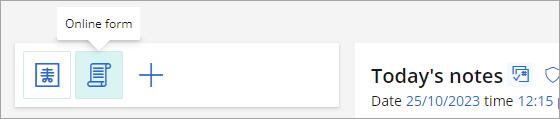
- From the Quick Access bar in the clinical record if the appropriate shortcut is set up
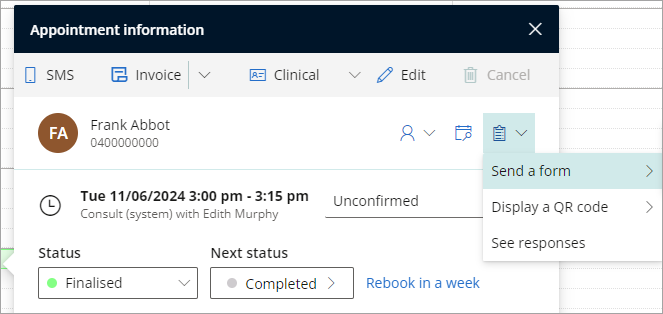
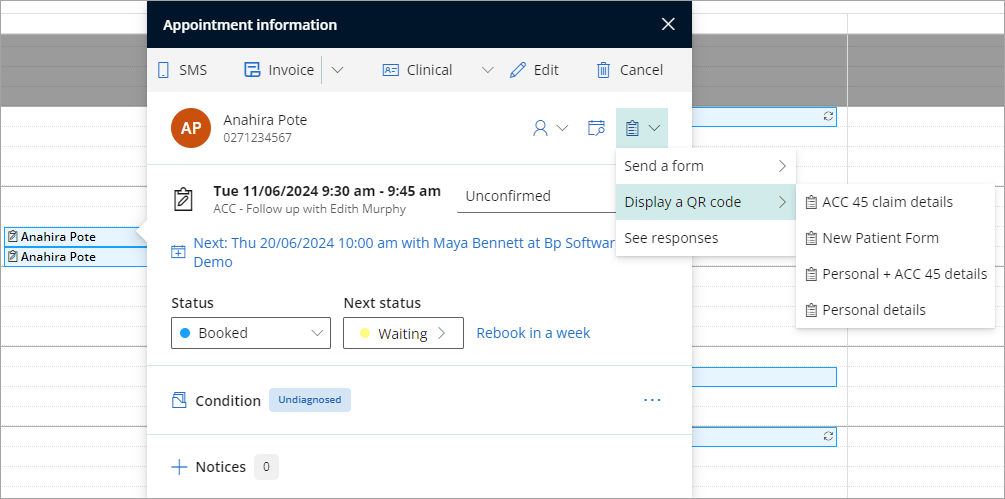
- By left-clicking the patient or client's appointment in the appointment book and selecting the Forms icon > Send a form.
A record update encounter will be created once the form is completed.
Send the New Patient or Personal details form
You can send the New Patient or Personal details form from:
- The New appointment screen
- By left-clicking the patient or client's appointment in the appointment book and selecting the Forms icon > Send a form.
- By right-clicking the patient or client's appointment in the appointment book and selecting Forms > Send a form
- From the Forms section in the patient or client's demographic information
- By clicking the ellipsis ... next to the patient or client's name in the Patients screen, and selecting Send a form
- When editing patient demographics and adding a new email address or mobile phone number.


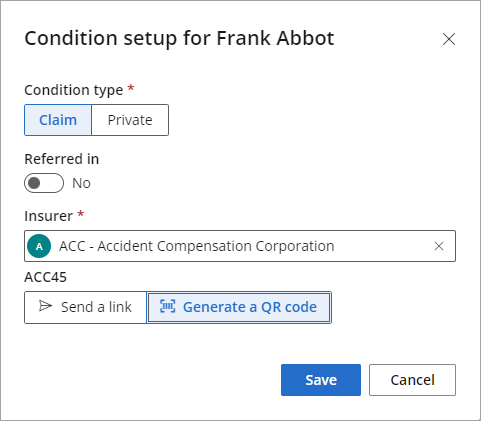
Send the ACC45 claim details form
You can send the ACC45 claim details form from:
- The Condition setup when creating a new appointment
- The Actions button beside in the Appointment information modal
- The Actions button beside claims from Admin > ACC Claims
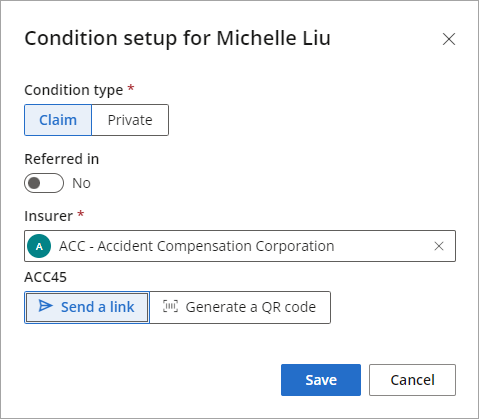


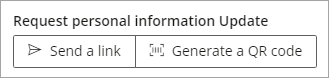
IMPORTANT To send links to online forms, ensure you have entered a mobile phone number or email address for the patient that the form can be sent to.
You can send the Demographic Information form and the ACC45 form at the same time when creating an appointment or when left or right-clicking the appointment and selecting Forms > Send a form. The forms will be sent together as a single form.
For more information on how to send online forms from the New appointment screen, see Book, Edit, Cancel or Reschedule an Appointment.
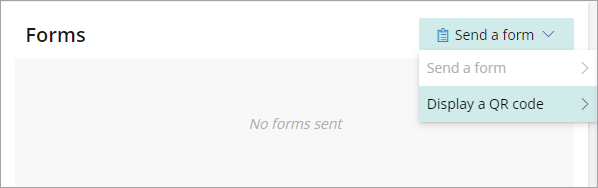
Generate QR codes
Reception staff can generate a QR code that can be scanned with a practice device (such as a tablet) to launch the form on. The device can then be given to patients to fill out.
This ensures that patients who have either failed to fill out a form prior to their appointment or do not have a suitable device, can do so before attending their appointment.
You can generate a QR code:
- From the appointment details screen, select the Forms icon > Display a QR code and select the form that you would like to generate a QR code for.
- Right-click on an appointment, select Forms > Display a QR code and select the Personal details or New Patient Form.
- From the Condition setup screen when creating a new appointment with a new Condition.
- From the Forms section of the patient details screen, a QR code can be generated for a Pending form.

Create custom online forms
Custom online forms can be created for specific practice needs.
- Go to Admin > Manage templates & forms > Online forms.
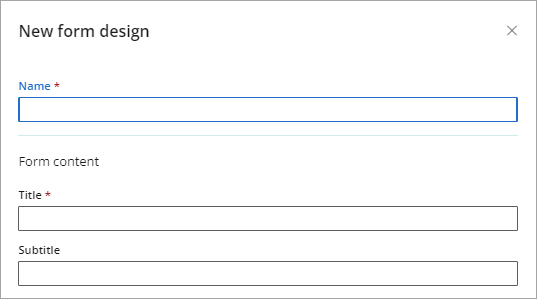
- Select Create a new form.
- Fill out the following fields to identify your form:
- Name - The name for internal use.
- Title - The title of the form that is seen by the user.
- Subtitle - Additional information you would like the user to see.
- Next, choose the context to take form elements from. The available contexts are:
- ACC - ACC45 details.
- PracticeManagement - Individual demographic information.
- Forms - Arbitrary fields that get collected but are not mapped to the database.
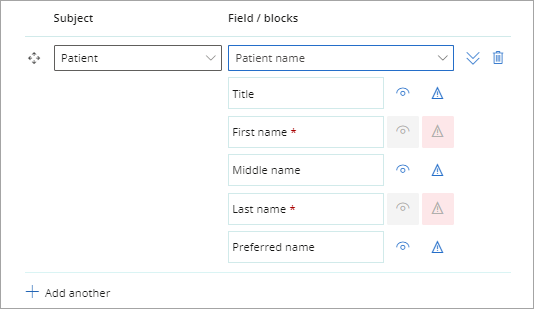
- Select a set of form inputs to add. These have been grouped for convenience.
- Once a group has been selected, you can adjust which fields will be visible to the client.
-
When the form is complete it can be saved and made active, or saved as a draft and previewed.

The available options are:
|
Icon |
Definition |
|---|---|
|
|
Show the field. |
|
|
Not required. |
|
|
Hide the field. |
|
|
Make the field required (shows a red asterisk and disables the option to hide). |
|
|
When both icons are unavailable, this field is required by the software and cannot be configured. |


Select the ellipses next to the form for further menu options to:
- Edit an online form.
- Preview an online form or QR code for the form.
- Make the form a draft.
- Duplicate & edit the form.
- Delete a form.

NOTE The form will be available to send based on the context of the elements that have been added to the form.
If Patient elements have been added, the form will be available to send in the same places that the 'Send the Demographic Information' form is available to send. If Claim elements have been added, the form becomes available in the same locations as the 'Send the ACC45' form.
If there are elements from more than one context, the form becomes available for all areas. 'Custom' elements do not have a context.
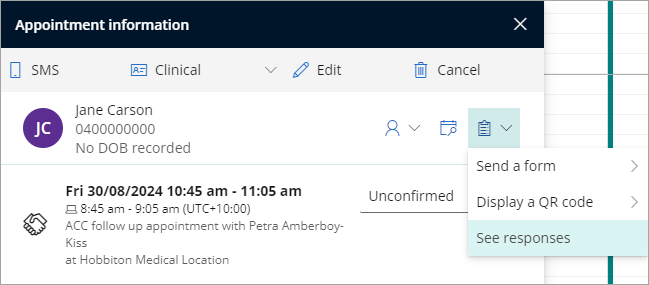
View online form responses
From the left or right-click appointment menu options, select Forms > See responses. The Patient or Client demographic information will open in the Forms section.
- Responses to the demographic information forms will update the patient or client's demographic information.
- Responses to the ACC45 form will update the patient sections to the ACC45 form related to the appointment it was sent from.
Online Clinical forms will be returned as a PDF in the Correspondence folder and as clinical data used to create a completed version of the Clinical Tool.
Last updated: 29 August 2024.


 AU
AU 