This article explains how to book, edit, or cancel an appointment in Bp Omni.
In this article:
Create a new appointment
- Open the new appointment screen via one of the following options:
- select Appointments > New appointment
- click the plus icon in the top right corner of the menu bar and select New appointment
- double-click a timeslot in the appointment book
- click + Add appointment in the top-right corner of the appointment book.
- Type the patient or client's name into the Patient or Client field to search for them.
- Select Send a link or Generate a QR code to send the patient details form to the patient's recorded email or SMS mobile number.
- Select an appointment Type.
- If you are not creating an appointment by double-clicking a slot in the appointment book, click in the Appointment details section to enter a date, time, and provider for the appointment.
- Click Link or create a condition.
- Select an existing condition under In progress, or click New condition in the top-right.
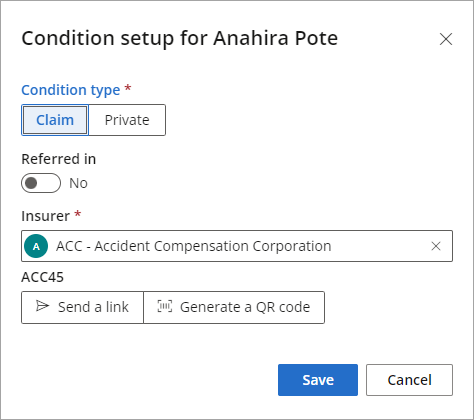
- If you are creating a new condition, select Claim or Private as the Condition type.
- If you selected Claim, ACC will be listed under Insurer.
- Indicate if the patient was Referred in. If the patient was referred in, add the Date, Reference and Provider.
- Select Send a link or Generate a QR code to send the ACC45 form to the patient's recorded email or SMS mobile number.
- Click Save.
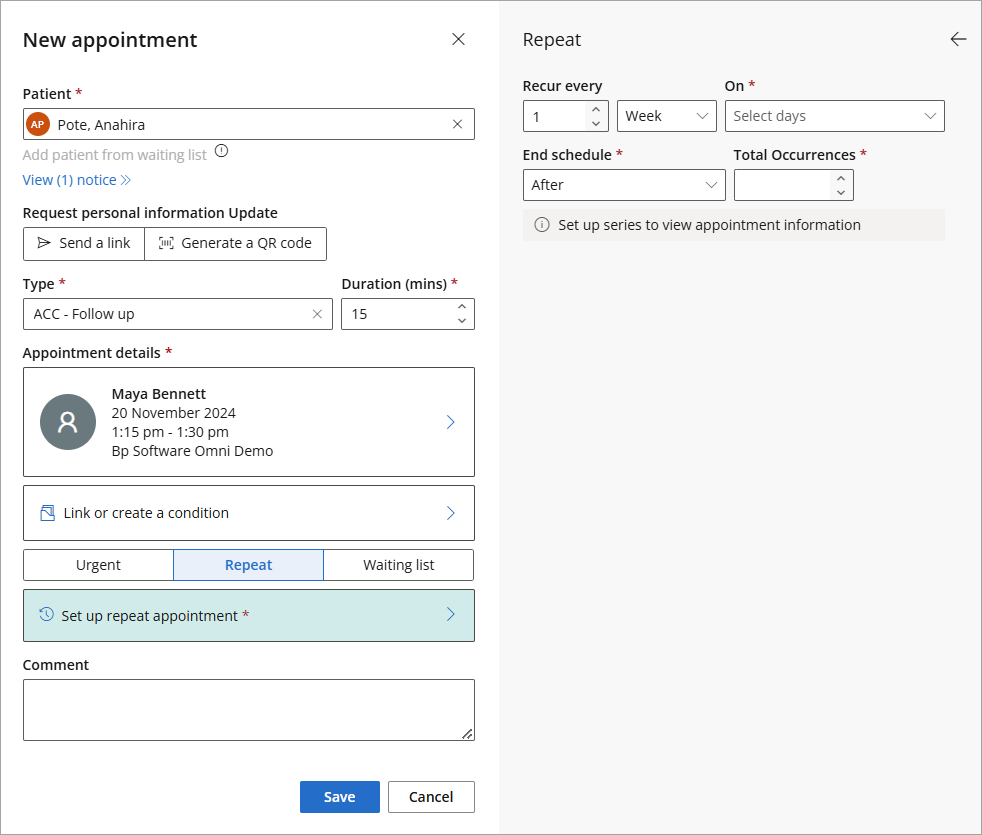
- Indicate that the appointment is Urgent if required.
- Select Repeat if you wish to set up a series of recurring appointments.
- Click Waiting list if the patient would like to be added to the waiting list for an earlier appointment.
- Add a Comment if applicable. The comment will appear when the appointment is clicked in the appointment book.
- If the patient has an email address or mobile number listed in their demographic information, tick Send demographic information form to patient if you want the patient to fill out a demographic information form.
- Click Save appointment.
If you double-click a timeslot in the appointment book, the timeslot will be locked from use by others while you create the appointment. Other staff members will be able to see who the timeslot is locked by.

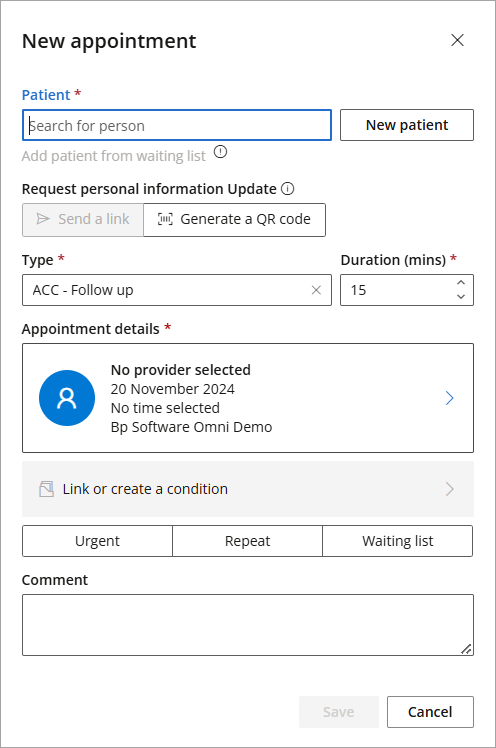
Once you select the patient or client, any notices about them will appear. An example of a notice might be that the patient or client has an amount owing to the practice, or that they would prefer to see a female provider.
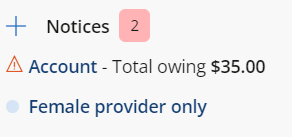
If the patient or client cannot be found in the database, click New patient or New client to enter their details, then click Save.
If you are creating the appointment for a patient who is currently in the waiting list, click Add patient from waiting list.
You can add or edit appointment types from the Settings menu. See Set Up the Appointment Book for more information. The appointment type will determine the appointment duration. However, the appointment duration can be changed if required.
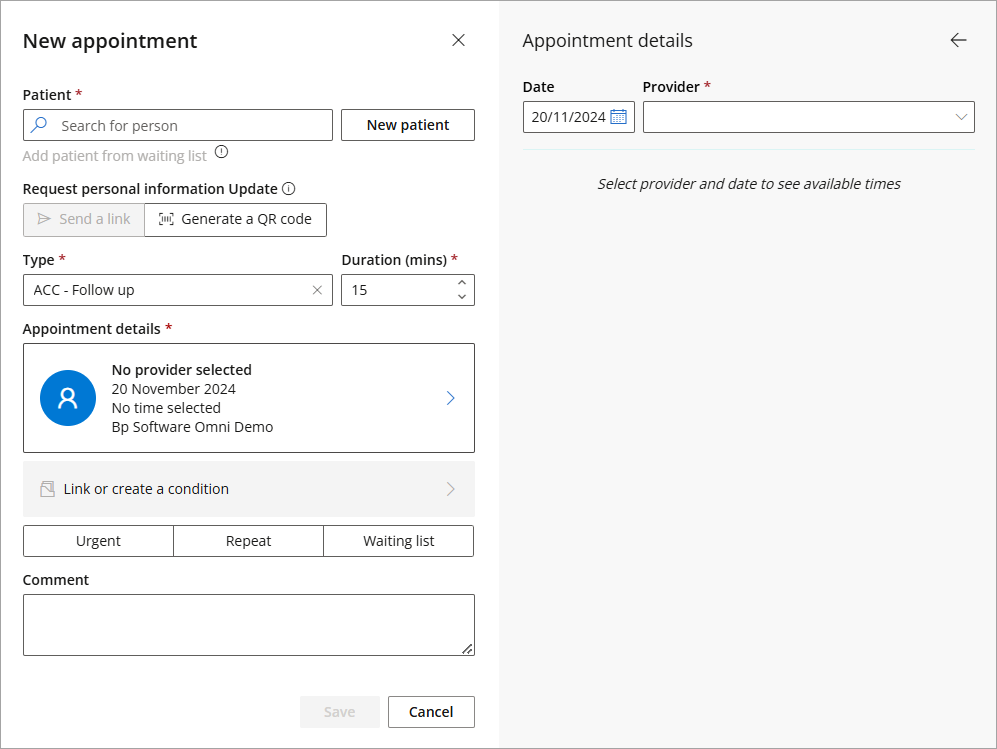
If you are creating the appointment by double clicking a slot in the appointment book, this information will be pre-filled.
Conditions
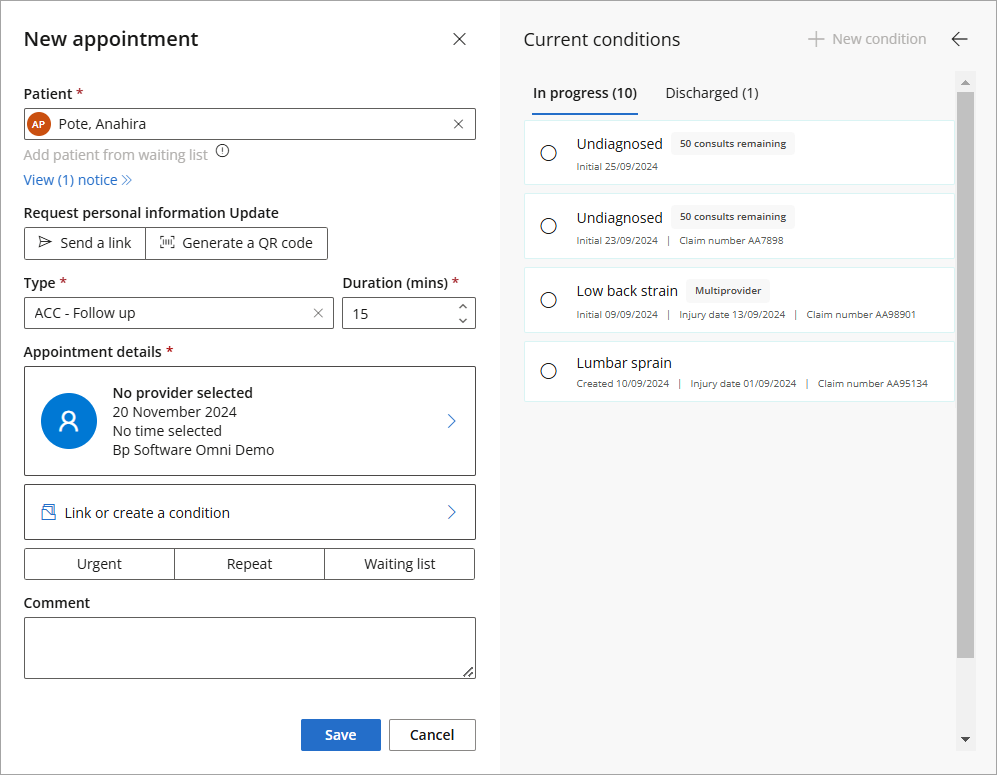
TIP When linking a condition to a new appointment, conditions will display a consults remaining badge for the provider type or a Multiprovider badge if more than one provider type is linked.
Urgent, repeat, or waiting list appointments
When setting up recurring appointments, Indicate how often the appointments should recur, on which days they should recur, and when the recurring appointments should cease (either on a particular date, of after a certain number of appointments).
When adding patients or clients to the waiting list, indicate the appointment's Priority, when the appointment should expire from the waiting list, and if the patient or client is willing to see Any provider.

See Add a Patient to The Waiting List for more information.
Save the appointment
Information entered into the form by the patient will automatically update their demographic information.
Edit an appointment
Edit an existing appointment's details
- In the appointment book, right or left-click the appointment and click Edit or Edit appointment.
- Make any required edits, and click Save appointment.
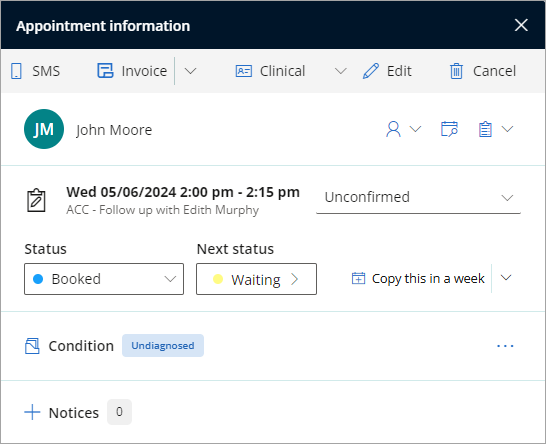
Left-clicking an appointment will display the Appointment information screen, while right-clicking an appointment will provide a list of quick actions. You can edit the appointment via either method.
Add a notice to an existing appointment
- In the appointment book, click the appointment and click the plus icon beside Notices.
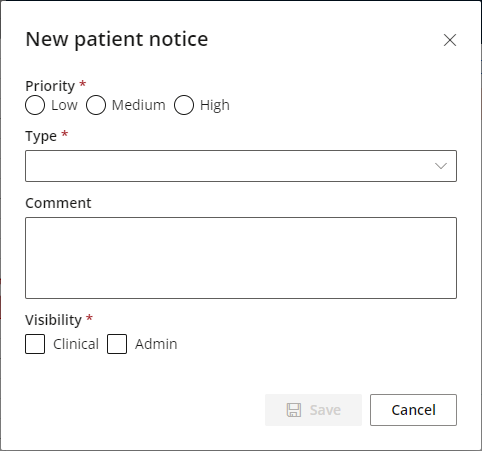
- Select a Priority for the notice.
- Enter a Notice Type.
- Add a Comment if necessary.
- Indicate the notice's visibility: Clinical or Admin.
- Click Save.
The New patient or New client notice screen will appear.
Move an appointment
- Click the appointment and drag it to a new timeslot.
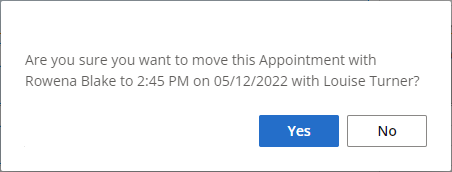
- A notification will appear asking if you are sure that you wish to move the appointment time.
- Click Yes to move the appointment.
Change an appointment's duration
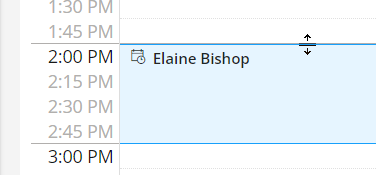
- Hover over the top or bottom of an appointment until the vertical resize icon appears.
- Click and drag to make the appointment longer or shorter.
- A notification will appear asking if you are sure that you wish to change the appointment's duration.
- Click Yes to change the appointment duration.
Cancel an appointment
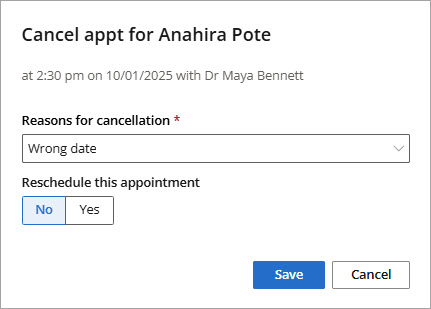
- In the appointment book, right or left-click the appointment you want to cancel, and click Cancel. The Cancellation reason modal will appear.
- Select a cancellation reason.
- Click Ok to cancel the appointment.
You can add or edit cancellation reasons from the Settings menu. See Set Up the Appointment Book for more information.
Reschedule an appointment
There are multiple ways to reschedule an appointment in Bp Omni:
Cancel and Reschedule
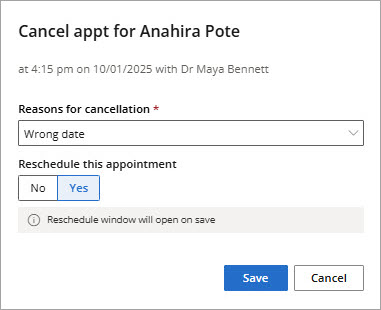
- In the appointment book, right click the appointment you want to reschedule, and click Cancel. The Cancellation reason modal will appear with the option to reschedule.
- Toggle the reschedule switch to 'Yes', enter a cancellation reason and select Save.
- The reschedule window will appear.
- Fill in the relevant fields to reschedule the appointment and select Save.
Edit and Reschedule
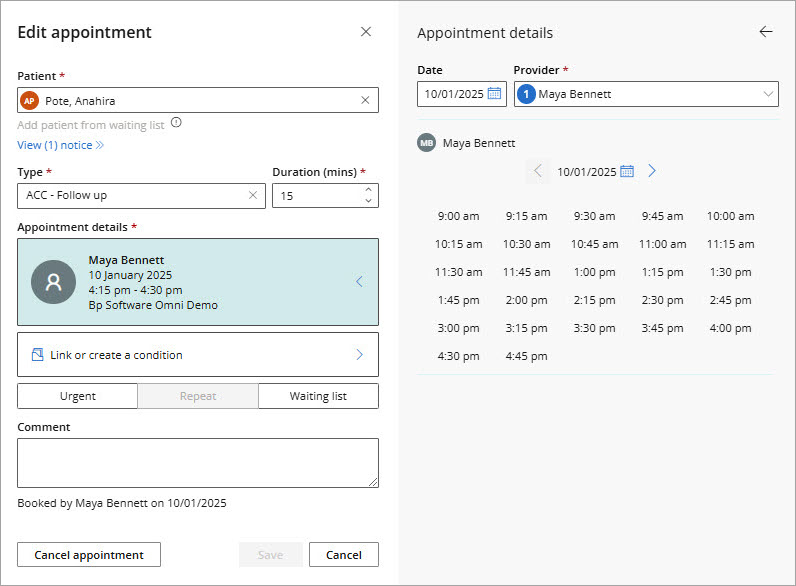
- In the appointment book, right click the appointment you want to reschedule, and click Edit appointment. The Edit appointment modal will appear.
- Select Appointment details.
- Select the new date, time and provider if applicable.
- Select Save.
Reschedule a Cancelled or 'Did not attend' appointment
NOTE In rare cases the new appointment modal may reopen without the condition attached.
- In the appointment book, select the Incomplete appointments list.
- Select 'Reschedule', the reschedule window will appear. The patient, provider and day will be populated from the appointment but can all be edited if necessary.
- Make the suitable changes that you require to the appointment, and select Save.
 Cancelled and DNA appointments will appear in the incomplete appointments list.

View appointment information
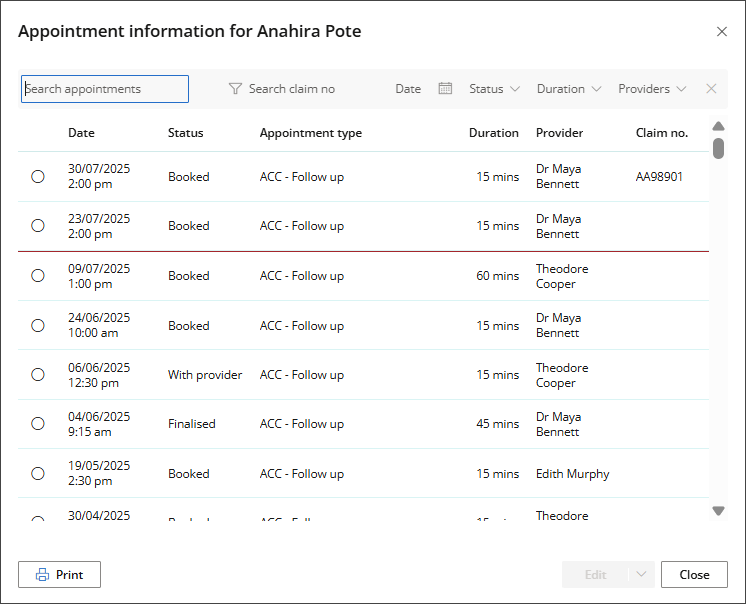
The Appointment Information modal allows you to view, filter, and manage a patient's appointment history.
- To view the patient's appointment information, click the search calendar icon to display the Appointment Information modal.
- The Appointment Information modal displays all appointments associated with the patient. The Appointment Information list includes the date and time of the appointment, status, type, duration, provider, and claim number (if available).
- To search for a specific Appointment Type, type in the Search Appointments field or use the Filters to narrow down the list:
- Search Claim No: Filters by full or partial claim numbers.
- Date: Filters by appointment date.
- Status: Filter by appointment status such as Booked or Waiting.
- Duration: Filter by the appointment duration.
- Provider: Filter by Provider name.
- To modify an appointment, select the radio button next to the appointment and then click Edit.
- Click Print to print a list of all appointments linked to the patient.
- Click Close to exit the Appointment Information modal.

View, edit and request patient information
Click on a booked appointment to open the Appointment information screen.

- Select the patient icon to View or Edit the patient's demographics.
- Select the search calendar icon to open the Appointment information screen to view or print a list of all appointments linked to the patient.
- Select the forms icon to send a New Patient, Personal details or ACC45 form to the recorded SMS or email address. See Understanding Online Forms
Last updated: 23 July 2025.