
Bp Premier installation requires administrator permissions to install software and configure Windows components. Before starting any of the instructions below, log in to the server computer as a Windows Administrator, or have your IT support carry out the installation.
Before you begin
If you have partially installed a Bp Premier client on the computer, completely uninstall Bp Premier and the SQL Server database from that machine before installing. The installer may attempt to upgrade the existing installation, or the install process may halt, if components of a prior installation still exist.
You will need to know the computer name or IP address of the Bp Premier server that the workstation will connect to.
Install Bp Premier Client
If you are installing Bp Premier for the first time, you will have downloaded an ISO file (which is a disc image file) for the latest version of Bp Premier.
- Download or copy the .iso file (such as BP1.12.0.998DVD.iso) to your Bp Premier client.
- Open a Windows File Explorer and browse to the downloaded file.
- Right-click the file BP<version>.iso and select Mount.
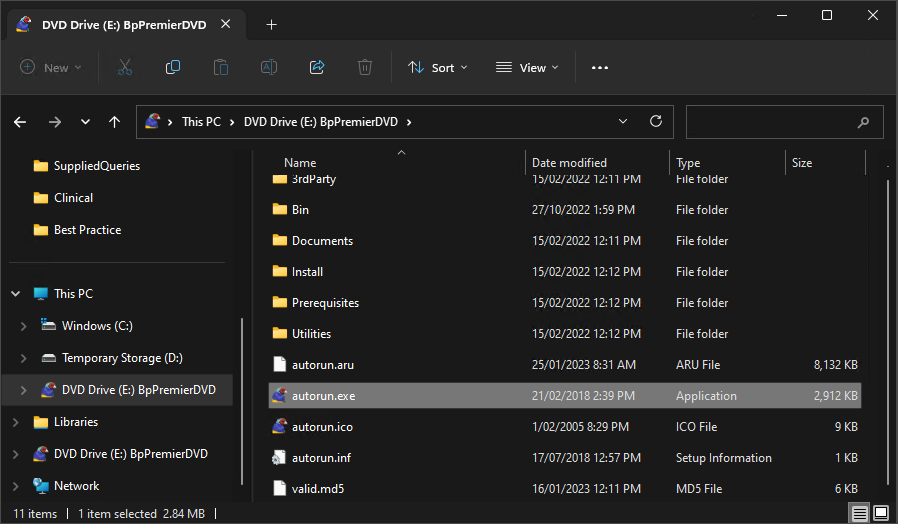
- If the DVD contents is not already open, select DVD Drive BpPremierDVD to show the contents of the mounted ISO.
- Double-click the application file autorun.exe to start the installation
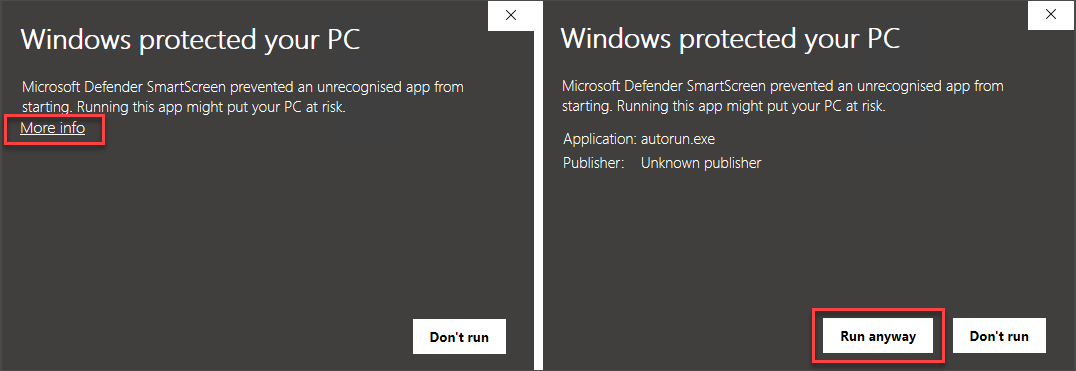
- If you have Microsoft Defender SmartScreen enabled on Windows, Windows will ask if you want to allow the installer to make changes to your device. Click More info and then click Run anyway.
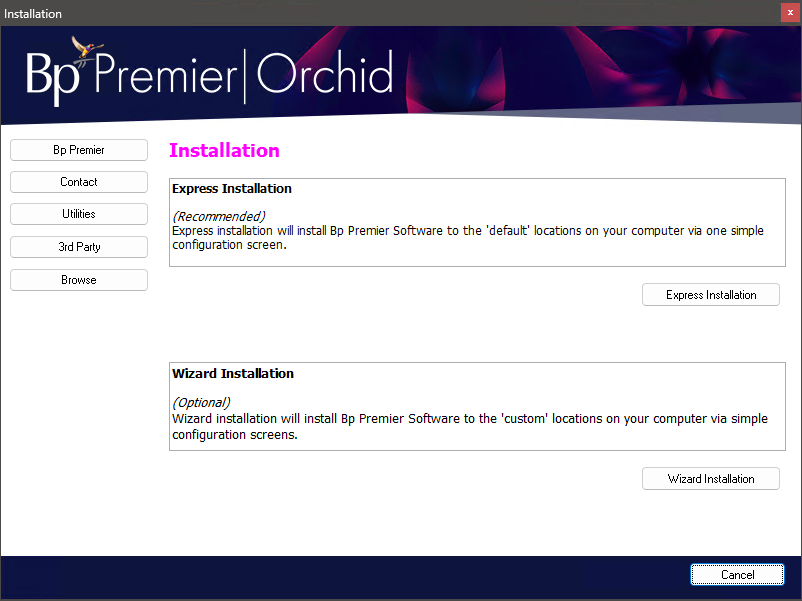
- The installer will open at the Prerequisites panel. Click Next. The installation panel is displayed. Follow the instructions in the installation wizard.
- If you need to install the client files for Bp Premier in a specific location on the workstation, such as a hard drive that is not mapped to 'C:\', click Wizard Installation. Otherwise, click Express Installation.
- The next screen displayed is the database selection screen.
- In the row that matches the database version you installed during the server installation, select Client, as shown.
- The Medicare Online Module is a legacy feature whose functionality has been replaced in Saffron SP3 and later by Medicare Web Services. You are no longer required to Install the Medicare Online Module.
- Select I agree at the bottom of the screen and click Next. Client and SQL Server component installation will begin.
- At the Finish screen, select the name of the Bp Premier server computer this client will connect to from the list on the right hand side. If the server name does not appear in the list, enter the IP address or computer name into the text field and click Finish.
- The client will attempt to connect to the server. If successful, client installation is complete. Otherwise, the installer may prompt to reselect the server you want to connect to.
- Repeat for each workstation that requires Bp Premier.


The client installation will place a Best Practice icon on the desktop. Double-click this icon to start Bp Premier.
If you cannot detect or connect to the Bp Premier server you installed, consult Troubleshoot installation.
You can also connect to the Bp Premier server from the software:
- Log in to the Bp Premier workstation you just installed.
- Select Setup > Configuration > Database.
- Click Change next to the Connect to field and select the computer name for the server you want to connect this workstation to.
Troubleshooting
Last updated: 08 December 2023.


 AU
AU 