This article explains how to record your HPI-O and HPI-I numbers in Bp Premier and import NASH certificates required to connect to the My Health Record system.
Before you begin:
Note the following before you start configuration:
- Make sure you have obtained all HPI-O numbers required.
- Make sure you have obtained HPI-I numbers for each provider in your practice.
- Ensure you have downloaded all NASH PKI certificates required via Healthcare Provider Online Services (HPOS).
- When performing all procedures below, log in to Windows on the Bp Premier server as an administrator user.
- Enable UAC (User Access Control) in Windows on the Bp Premier server, if your version of Windows enables UAC. UAC is required to grant permissions to the user to install certificates to the Windows certificate store.
How do I obtain a NASH certificate?
NASH certificates can be securely downloaded through HPOS (Healthcare Provider Online Services). A letter will be sent approximately 60 days before the certificate expires, notifying you of the expiration date and directing you to download a new certificate through HPOS.
Information on applying for a NASH certificate through HPOS is provided on the Services Australia website.
HPI-O (Organisation)
To add your default practice-wide HPI-O number:
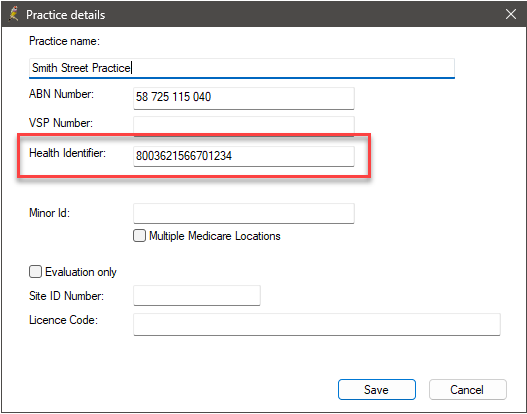
- From the main screen of Bp Premier, select Setup > Practice Details and click Change. The Practice Details screen will appear.
- Check that the correct practice name is displayed at the top of the screen.
- Enter the HPI-O into Health Identifier and click Save.
If your practice has multiple locations, and you wish to add an individual HPI-O for each location:
- From the Practice details screen, select the location that you wish to add a HPI-O for under Practice locations: and click Edit. The Location details screen will appear.
- Enter the location-specific HPI-O number into the Health Identifier: field and click Save.
- Repeat for all practice locations that require an individual HPI-O. Any locations that do not require an individual HPI-O will use the default practice wide HPI-O instead.
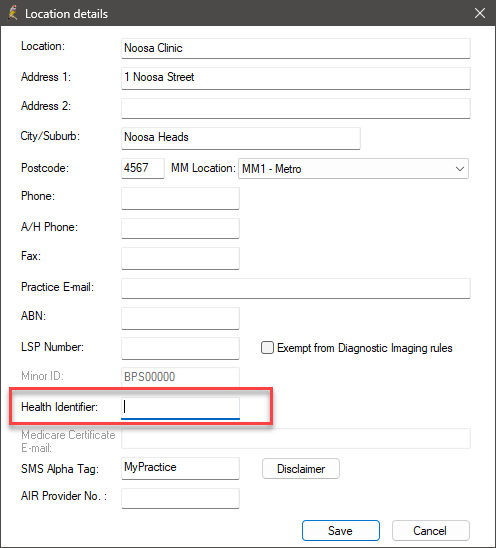
You must add the practice-wide or default HPI-O before you can add location-specific HPI-Os. If you attempt to add a location specific HPI-O before adding the default HPI-O, the Health Identifier field in the Location details screen will be greyed-out.
HPI-I (Individual)
Each provider who wishes to utilise the My Health Record service requires a health identifier (HPI-I) entered in their user details.
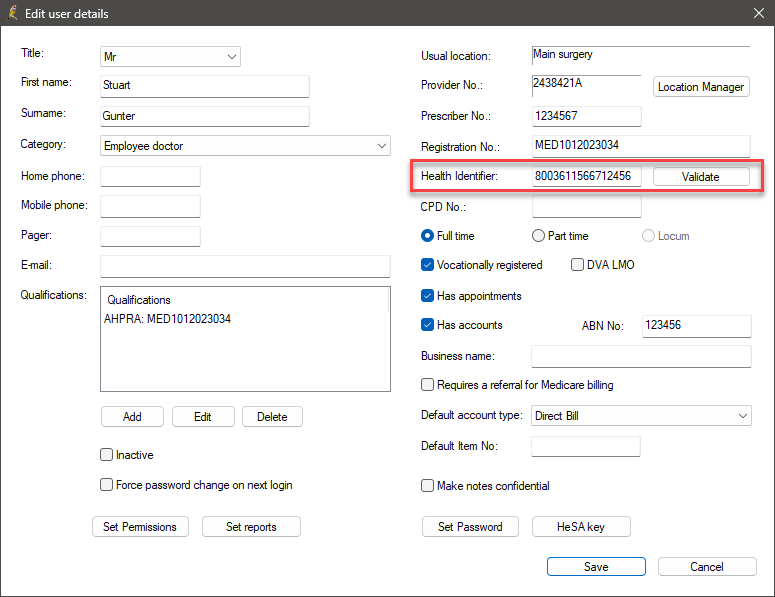
- From the main screen of Bp Premier, select Setup > Users.
- Highlight the user and click the Edit button.
- Enter the HPI-I into the Health Identifier field and click Save.
To import NASH certificates, you will need:
- Your digital NASH PKI certificates downloaded through HPOS. These certificates allows you to access the My Health Record component of eHealth.
- NASH certificate passphrases. This is the PIC code provided by Medicare when you apply for your NASH certificate. The PIC code will either be provided with your physical CD in a separate letter, or sent by SMS to the phone number registered through HPOS.
Perform the following procedures on the Bp Premier server only.
IMPORTANT If you are prompted for the Windows Administrator password when importing certificates, you may need your IT technician or a Windows Administrator to import the certificates.
- Copy your downloaded digital NASH certificate file (or files wish to use separate NASH certificates for individual locations) to the Bp Premier server, or insert the memory stick that contains the certificate file(s).
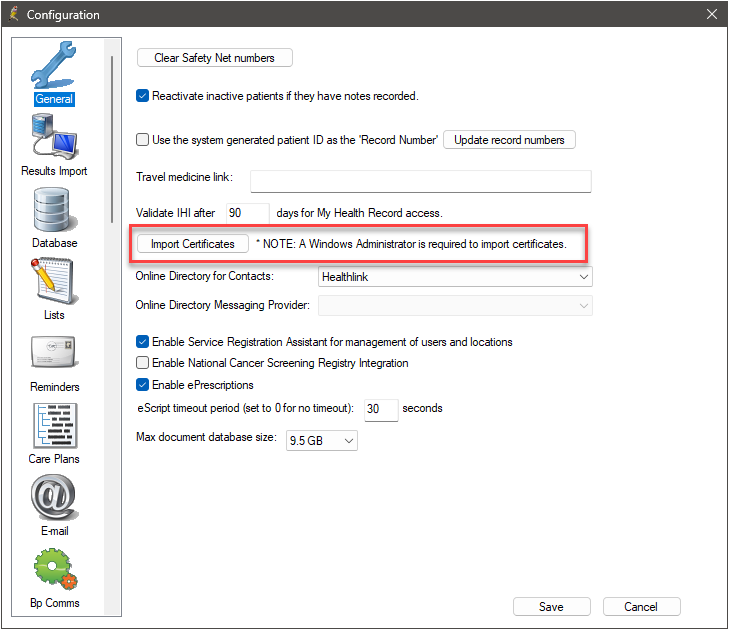
- From the Bp Premier home screen, select Setup > Configuration. The Configuration screen will appear.
- Click Import Certificates. If prompted by Windows, select Yes to Do you want to allow this app to make changes to your device?. The Certificate Manager Login screen will appear.
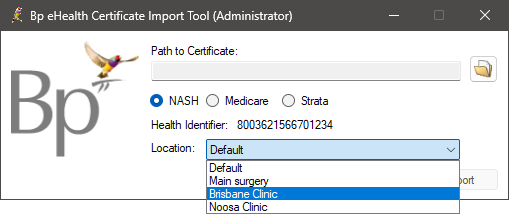
- Select your name from the User: drop-down menu, enter your password and click Login. The Bp eHealth Certificate Import Tool will appear.
- Select NASH. The Location: menu will be enabled.
- Select the folder icon, navigate to and select the NASH certificate, and click Open.
- Type your Certificate Passphrase in. This is the PIC code provided to the practice by Medicare when you applied for your NASH certificate.
- Click Import.
- If you wish to use separate NASH certificates for individual locations, repeat this process for all locations that require a NASH certificate.
- Once all required NASH certificates have been imported, click Save.
If you wish to use separate NASH certificates for individual locations, from the Location: menu, select the location that you wish to add a NASH certificate to.
If you wish to add a default NASH certificate for all locations, select Default.
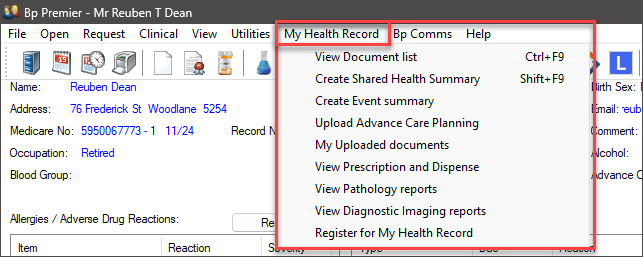
If the NASH certificate has been imported correctly, you will find that you have a new My Health Record menu item when viewing a patient record.
If the My Health Record menu is not visible, check:
- the logged-in user has an HPI-I number entered in their user record
- the user has permission to access My Health Record.
You do not have to take any action to import certificates on Bp Premier workstations.
After you have confirmed that the server is working correctly for both HI lookups and My Health Record access, each time someone logs in on a workstation, Bp Premier will automatically import the certificates required for HI and My Health Record.
However, if you are using terminal servers for workstations in your network, you must log in as each Windows user so that the system can import the certificates into the current user’s certificate store in Windows.
Perform the following steps for each Bp Premier user who requires access to My Health Record for patients.
- Select Setup > Users from the main Bp Premier screen.
- Select the user who you wish to update and click Edit. The Edit User Details screen will appear.
- Click the Set Permissions button in the bottom left of the screen.
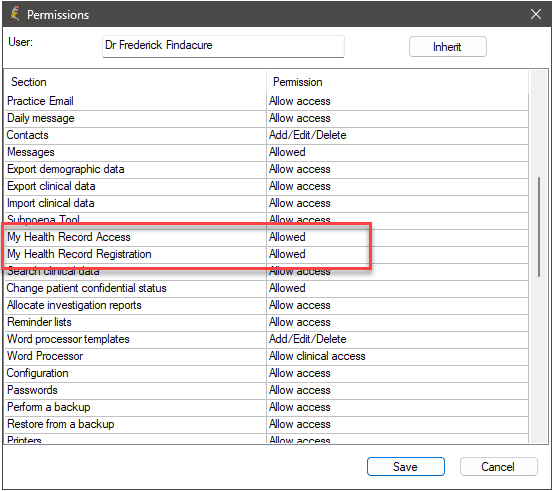
- If the user must be able to upload or download a patient's My Health Record information, set My Health Record Access to Allowed. The user would usually be a Health Practitioner.
NOTE Assisted Registration has been deprecated as a function of My Health Record and is no longer available. The option for assisted registration in Bp Premier will be removed in a future program update.
Disable My Health Record access
If a user no longer requires access to My Health Record, set the My Health Record Access in the Set Permissions screen of their user properties to Not Allowed. The user will no longer see the My Health Record button on the patient record screen.
The user must log out and back in to Bp Premier for this change to take effect.
Set User Preferences
For users who have My Health Record access, settings in the Setup > User preferences > Clinical screen control how the user is prompted for information.
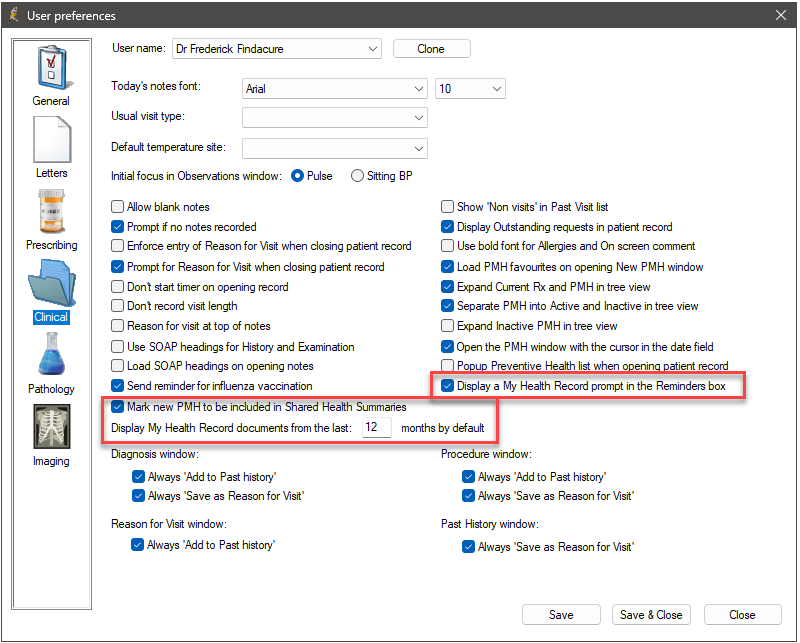
- Display a My Health Record prompt in the Reminders box prompts the user to include Reminder information in the patient's Shared Health Summary.
- Mark new PMH to be included in Shared Health Summaries will automatically display new part medical history items when creating a Shared Heath Summary.
- Display My Health Record Documents from the last 12 months by default. My Health Record documents from the previous 12 months are displayed by default. You may choose to increase or decrease this number.
User configuration is complete.
All Australians have a My Health Record, unless they have chosen to opt out. If a patient does not have a My Health Record, they can register themselves and their children. Visit the My Health Record website to find out more.
NOTE Assisted Registration has been deprecated as a function of My Health Record and is no longer available. The option for assisted registration in Bp Premier will be removed in a future program update.
View the below articles to troubleshoot issues with configuring My Health Record.
Last updated: 31 May 2024.