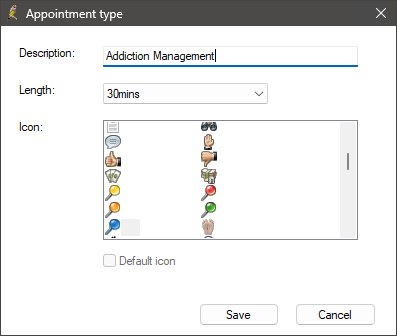
Appointment types help indicate what should be booked into an available slot. Types also define the default appointment length, and the icon that appears in the appointment book.
- Select Setup > Configuration from the main menu. Select the Lists tab.
- Under the Appointment Type list, click Add. The Appointment type screen will appear.
- Enter a Description for the type and select the default appointment Length when this type is booked.
- Select an Icon to represent the type in the appointment book.
- Click Save to save the appointment type and return to the Configuration screen.

Non-patient appointment types
You can use the following appointment types to create non-patient appointments in the Appointment Book:
- Meeting
- Assist
- Nursing Home visit
- Teleconference
- Drug rep
- Other.
If these appointment types do not adequately describe the non-patient appointment, book the non-patient appointment under Other, and add further information in the Details: field. See Book or update an appointment for more information.
Deleted appointment types
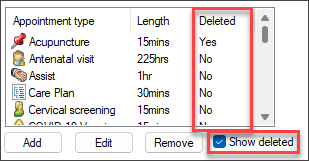
- Appointment types that are removed from the list in the Configuration screen are not deleted, but removed from display.
- Tick Show deleted to view appointment types that have been deleted.
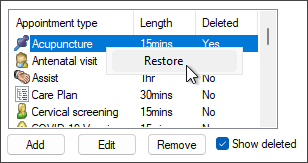
- To recover a deleted appointment type, right-click on it and select Restore.
- The appointment type will be restored and displayed in the list of available appointment types.


Appointment cancellation reasons
You can create practice-specific reasons for patients or the practice cancelling an appointment. This saves practice staff free-typing a cancellation reason.
- From the main Bp Premier screen, select Setup > Configuration. The Configuration screen will appear.
- Select the Lists tab.
- To add a new reason for cancelling an appointment, go to Reason for cancelling appointment and click Add. The Reason for Cancellation screen will appear.
- Enter a Reason and click Save.


What do I do next?
Last updated: 14 May 2024.