You may encounter the following issues while working with templates containing fields within the word processor.
A problem has been detected while filling your template
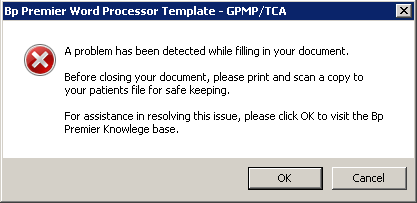
If you receive an error indicating that 'A problem has been detected while filling in your document', the data fields within the template cannot be correctly filled in.

IMPORTANT If this error appears, you will still be able to print the template you're working on. Print the document and scan it into the patient record to ensure that no information is lost.
Supplied templates
When encountering this issue in a template supplied by Best Practice Software, ensure you have upgraded to the latest data update. If you have customised a template using a supplied template as a base, you may need to adjust or recreate the custom template to pass on any fixes from a data update.
User templates
When looking over the template, you may notice some data fields that do not appear as you would expect after they have been populated. For example, the Telephone field in the document hasn't been populated correctly:

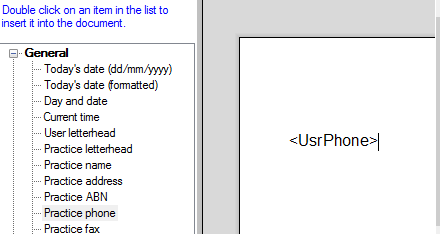
However, in the template, the field will appear to be fine:

Once you've identified one of these fields, you will need to:
- Click on the data field (<UsrPhone> in our example).
- Press Delete on your keyboard to remove the data field.
- Add the field back in using the list on the left hand side of the Word Processor:

If no fields are obviously malformed, you may need to replace all data fields in your template to ensure that they are created correctly.
Recreate template
Although the least convenient option, recreating the template in Orchid SP1 Revision 1 will allow fields to be added without this issue occurring.
Insufficient Memory
If you receive an error indicating 'Insufficient Memory', you may have data fields inside tables that do not have enough space to display correctly.
- From the main screen of Bp Premier, click on the icon
 to open the word processor.
 - Select Templates > Edit Templates.
- Select the template that shows the error when saving and click Open to load the template.
- Look for any of the following template fields that have been inserted inside of a table cell:
- Once you have found a table cell with one of the above template fields inserted inside, click inside the table cell and select Table > Properties from the menu.
- In the Table Properties screen, there are four cell margins: Top, Bottom, Left, and Right. Change each cell margin to '0.02' and click OK.

- Ensure the width of the table cell is wide enough for the information that will be populated into that table.
- Repeat steps 4–7 until all the affected table cells have been adjusted.
- Select File > Save.
NOTE A table cell containing <PMHAll> needs to be wide enough to populate the date, name, and details of a patient's past history.
Last updated: 23 July 2020