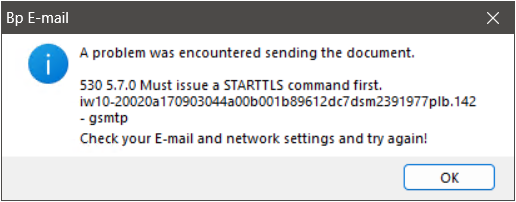
This article explains how to configure email in Bp Premier. While functionality for both incoming and outgoing email exists in Bp Premier, incoming email functionality has been deprecated. Best Practice Software recommends only using outgoing email functionality in Bp Premier.
Configure Outgoing Email with Modern Authentication (OAuth2.0)
Open Authorisation 2.0 (OAuth2.0) is a standardised protocol that enables secure access to user data without requiring the user to disclose their credentials. It has become the preferred method for granting third-party applications restricted access to user accounts while maintaining robust security.
Basic authentication has been used by applications to connect to servers, services, and API endpoints for several years. Basic authentication requires a user name and password to be transmitted with each request and these credentials are typically saved or cached on the device. Anyone able to intercept the communication can discover the user name and password, making it simple for attackers to steal them.
Modern Authentication is based on the use of OAuth2.0 tokens. The access tokens issued by OAuth2.0 have a limited lifespan and are restricted to the applications and resources for which they were issued, making it considerably more difficult for attackers to reuse them for another purpose.
After upgrading to Orchid SP2, email functionality will continue to work as long as Basic Authentication is still enabled for your organisation. If your Practice does not wish to enable Modern Authentication, do not click the Microsoft or Gmail button under Setup > Configuration > Email > Add/Edit.
In the event that Microsoft has deactivated Basic Authentication for your organisation, all Microsoft 365 Work or School email accounts will be required to use Modern Authentication (OAuth2.0).
If your Practice does not have an Office 365 Work and School account, you should not attempt to enable Modern Authentication by pressing the Microsoft button in Setup > Configuration > Email.
If you have attempted to enable Modern Authentication but are not configured to use it, authentication errors will occur.
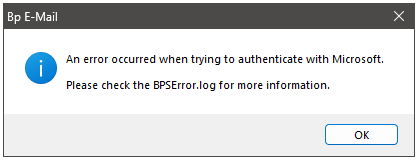
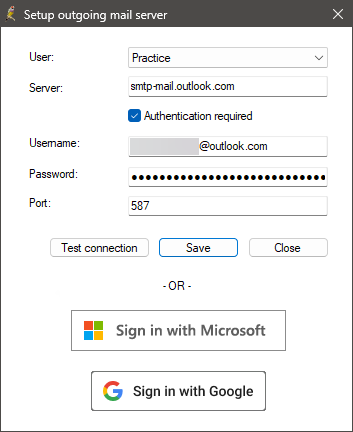
To resolve these errors, you must delete the email address and reconfigure your email using your previous Outlook server settings. Below is an example of a personal Outlook email account configured with basic authentication in Bp Premier.
- Log into the Bp Premier server as a user with access to the Setup > Configuration screen.
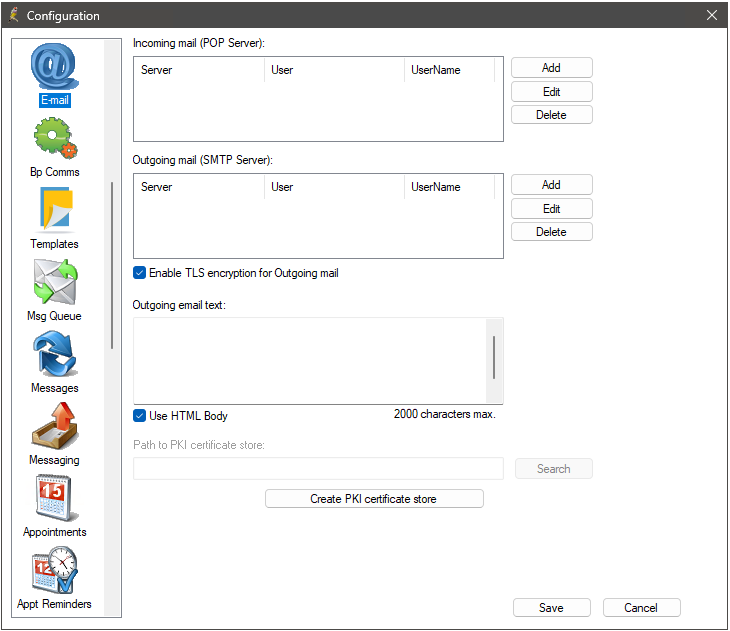
- From the main screen, select Setup > Configuration > Email.
- Enable TLS encryption for outgoing mail will be ticked by default. Check that your email server supports TLS encryption, and if not, untick Enable TLS encryption for outgoing mail. TLS encryption provides a higher level of security than unencrypted emails.
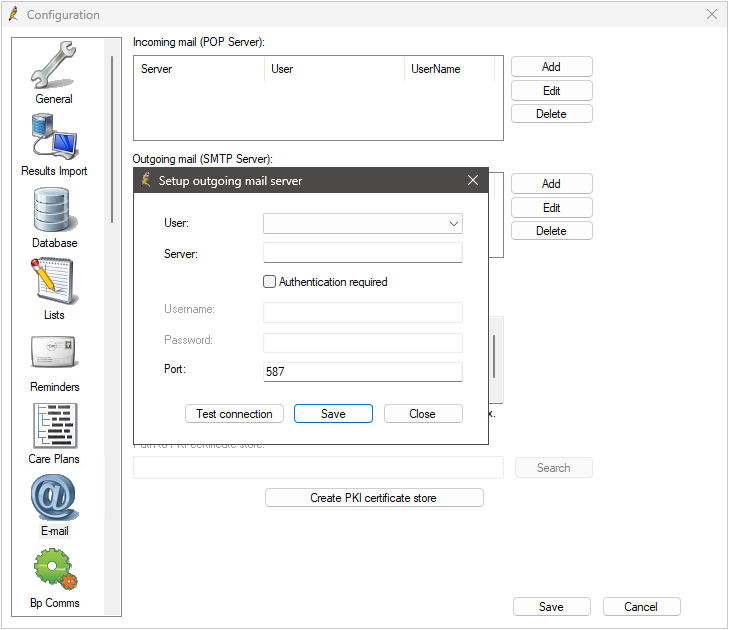
- Under Outgoing mail (SMTP server), click Add. The Setup outgoing mail server screen will appear.
- Complete the fields in this screen:
- User – Select a user to set up email for, or select 'Practice' to set up the practice email.
- Server – Enter the outgoing email SMTP server name (for example, smtp.office365.com or smtp.gmail.com).
- Authentication required - Tick if the outgoing mail server requires authentication.
- Username – Enter the user name used to access the outgoing mail server (for example, username@bpsoftware.net).
- Password – Enter the password associated with the user name. The password is not displayed.
- Port - If you ticked Enable TLS encryption for outgoing email, the default port (587) will be pre-populated. You can change the port if you wish, but it should not be necessary.
- Click Test connection to check that the connection has been correctly set up.
- Click Save.
IMPORTANT To email Investigation Reports from the Patient Record in Spectra SP1, email accounts must have TLS encryption enabled. See Send emails from the Patient Record for more information.
NOTE Bp Premier does not support SSL encryption for emails.
NOTE If you are unable to send emails from Bp Premier via Microsoft 365 using the instructions provided above, you may need to enable Authenticated SMTP for the email account in the Microsoft 365 admin centre.
Send Emails on behalf of Practice
We've added a new permission type called Send Email on behalf of Practice, which gives you greater control over who can send emails using the shared Practice email account.
NOTE The Send Email on behalf of Practice permission will be set to Allow access by default.
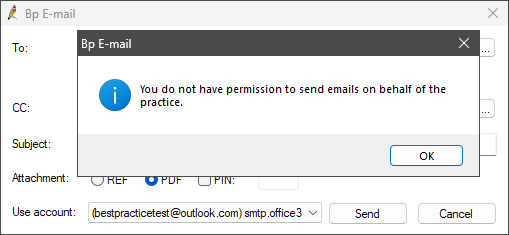
When a user with Send Email on Behalf of Practice set to Deny Access attempts to send an email using the Practice email address, a popup will alert them that they do not have permission to send emails on behalf of the Practice.
A known issue exists where a port cannot be set if TLS encryption is disabled for outgoing email.
If you wish to set up outgoing email without TLS encryption, use the following workaround:
- When setting up outgoing email via Setup > Configuration > Email, tick Enable TLS encryption for Outgoing mail.
- In the Outgoing mail (STMP Server): section, click Add or Edit. The Setup outgoing mail server screen will appear.
- Specify the port you wish to use or keep the default port. If you are adding a new email, complete the rest of the fields on the screen and click Save.
- Untick Enable TLS encryption for Outgoing mail.
Ignore the message that the SMTP test connection has failed.
For Orchid:
- Log into the Bp Premier server as a user with access to the Setup > Configuration screen.
- From the main screen, select Setup > Configuration > Email.
- Add your custom outgoing email text.
The limit for custom outgoing email text is 500 characters.
If set, outgoing email text will be added to the body of all emails sent from the practice, and cannot be changed for each provider.
You may wish to use outgoing email text to include information in your emails such as:
- practice details (address, phone number, email. address)
- privacy disclaimer
- a 'no reply' message, for example: This email address is not monitored. If you need to contact us, please call us on 07 xxxx xxxx.
For Orchid SP1 and later:
In Orchid SP1, you can use HTML in the Body of outgoing emails.
- Log into the Bp Premier server as a user with access to the Setup > Configuration screen.
- From the main screen, select Setup > Configuration > Email.
- Tick Use HTML Body.
- Add your custom outgoing email text in HTML format and save.
- Once the HTML body has been configured, send a test email to ensure that the HTML is displayed correctly.
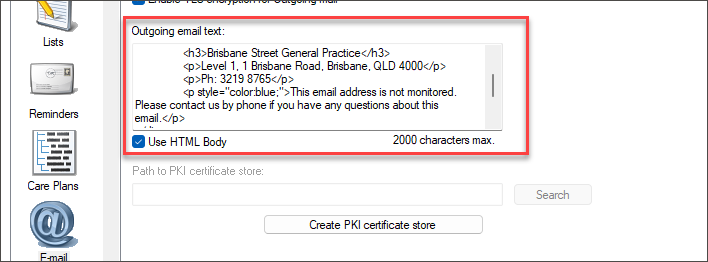
The limit for custom outgoing email text is 2000 characters.
If set, outgoing email text will be added to the body of all emails sent from the practice, and cannot be changed for each provider.
You may wish to use outgoing email text to include information in your emails such as:
- practice details (address, phone number, email. address)
- privacy disclaimer
- a 'no reply' message, for example: This email address is not monitored. If you need to contact us, please call us on 07 xxxx xxxx.
Google (like Microsoft) is restricting access to less secure apps (non-Google apps) that use a user name and password to access Google Accounts (basic authentication). Gmail accounts must transition to using OAuth2.0 with third-party apps to access Gmail, Google Calendar, and Google Contacts.
Visit the Google Support website for additional information on Less secure apps & your Google Account.
To ensure that Google's changes have no impact on Bp Premier customers, we have implemented OAuth2.0 support for Gmail accounts.
- Log onto the Bp Premier server as a user with access to the Setup > Configuration screen.
- From the main screen, select Setup > Configuration > Email.
- Enable TLS encryption for outgoing mail will be ticked by default. For modern authentication, this should remain ticked.
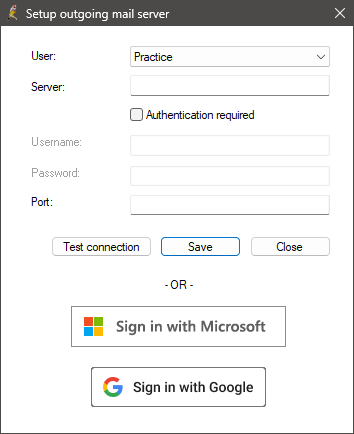
- Under Outgoing mail (SMTP server), click Add. The Setup outgoing mail server screen will appear.
- Select a User from the drop down menu and click the Sign in with Google button.
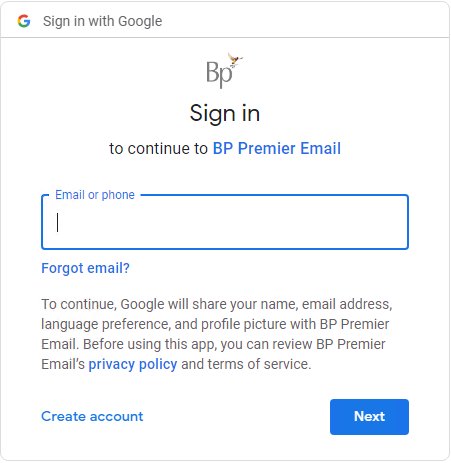
- Bp Premier will connect to Google; enter your Google Account email address or phone number and click Next.
- Enter your Password and click Next.
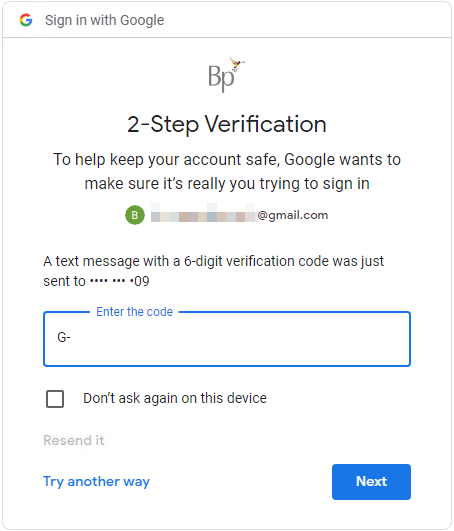
- If you have enabled multi-factor authentication on your Google account, you will be prompted to verify your identity.
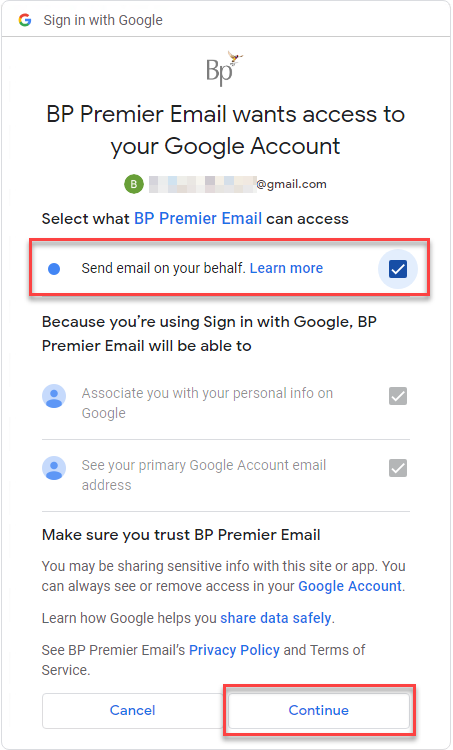
- Bp Premier will request permission to share data. Select what Bp Premier Email can access by ticking the box if you agree to allow Bp Premier Email to Send email on your behalf. Click Continue.
- The Google sign in process is complete. Bp Premier will confirm that your Google account was successfully added.
- Send a test email from Bp Premier to an email address that you can check and confirm that the test email was received successfully.
NOTE If your Practice has already configured Gmail in Bp Premier, we recommend taking a screenshot of your settings before enabling Modern Authentication in case you need to refer to them later.

IMPORTANT To email Investigation Reports from the Patient Record in Spectra SP1, email accounts must have TLS encryption enabled. See Send emails from the Patient Record for more information.
NOTE Bp Premier Email will only send emails from your Gmail account and will not read, compose, or permanently delete any emails.
Users may be prompted to authenticate with Gmail outside of the configuration workflow. This can occur if Bp Premier is unable to locate the access token cache file, if the access token has expired, or if the password for the email account has recently been changed.
To enhance the security of Microsoft 365 user accounts, Microsoft is phasing out the use of Basic Authentication protocols which are outdated and less secure. Moving away from antiquated protocols is one of the most important security steps that Microsoft 365 users can take. Visit the Microsoft website for additional information on the Deprecation of Basic Authentication in Exchange Online.
We have incorporated Microsoft's OAuth 2.0 token-based authentication in Orchid SP2 to ensure this change won't impact customers.
IMPORTANT Modern Authentication is only compatible with Microsoft 365 Work and School accounts.
- Log onto the Bp Premier server as a user with access to the Setup > Configuration screen.
- From the main screen, select Setup > Configuration > Email.
- Enable TLS encryption for outgoing mail will be ticked by default. For modern authentication, this should remain ticked.
- Under Outgoing mail (SMTP server), click Add. The Setup outgoing mail server screen will appear.
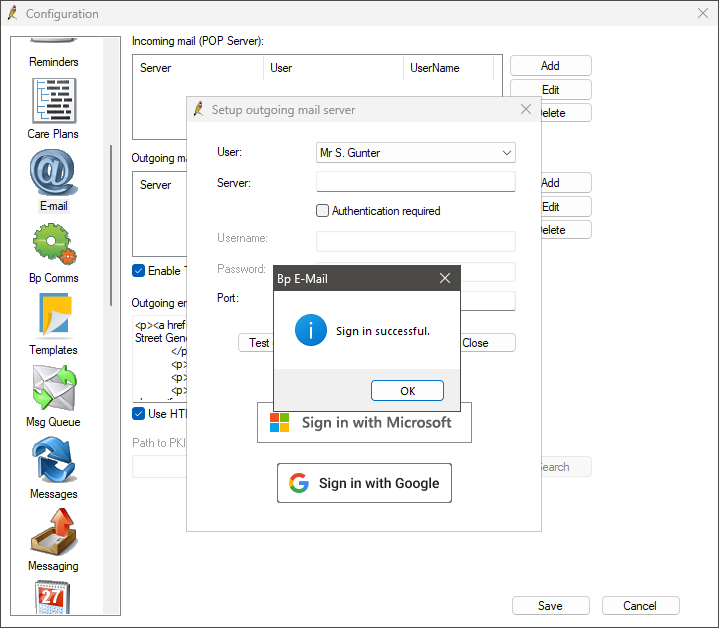
- Select a User from the drop down menu and click Sign in with Microsoft.
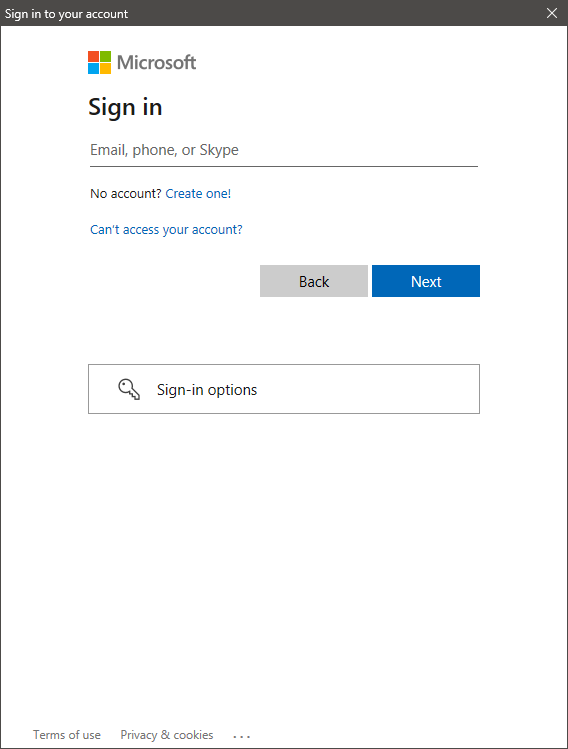
- Bp Premier will connect to Microsoft, where you will be prompted to enter your Microsoft 365 user name and password to complete the sign-in process.
-
Bp Premier will request permission to share data. Click Accept if you agree to the terms and conditions.
- The Microsoft Sign in process is completed. Bp Premier will confirm that your Microsoft 365 account was successfully added.
- Send a test email from Bp Premier to an email address that you can check and confirm that the test email was received successfully.
NOTE If your Practice has already configured Microsoft 365 in Bp Premier, we recommend taking a screenshot of your settings before enabling Modern Authentication in case you need to refer to them later.

IMPORTANT To email Investigation Reports from the Patient Record in Spectra SP1, email accounts must have TLS encryption enabled. See Send emails from the Patient Record for more information.

If multi-factor authentication is enabled for your Microsoft 365 account, you will be prompted to verify your identity.
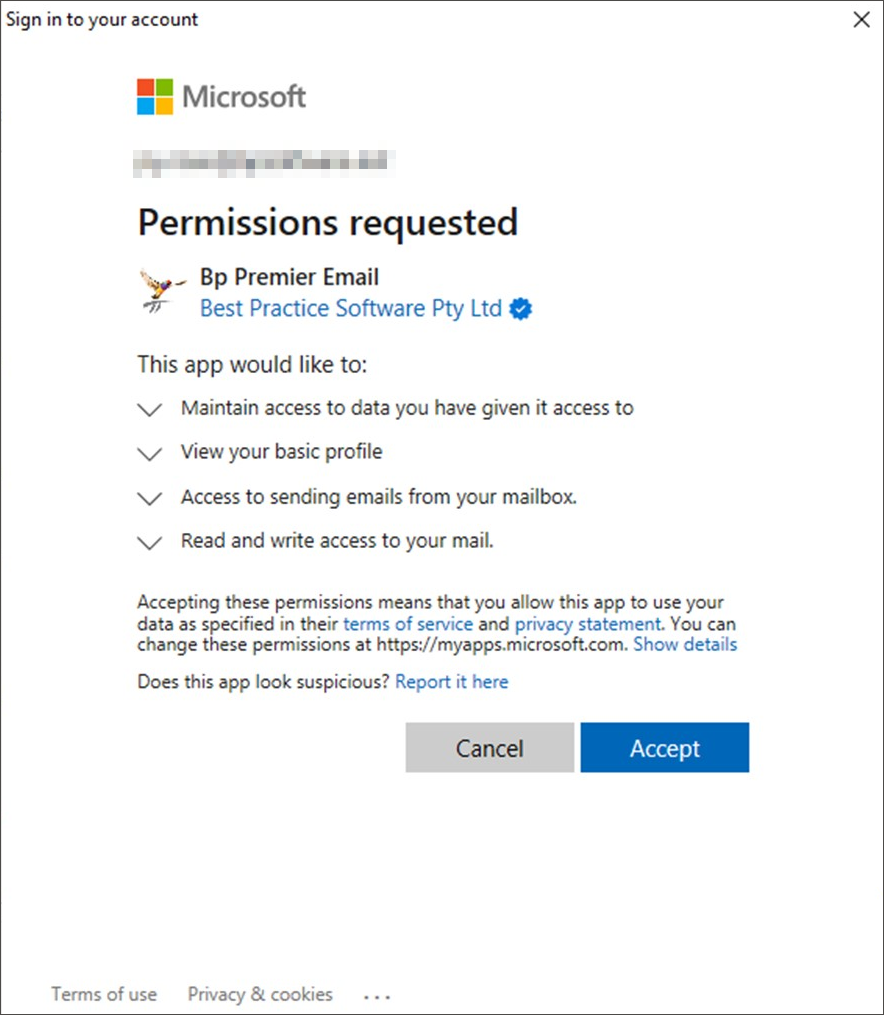
Users may be prompted to authenticate with Microsoft outside of the configuration workflow. This can occur if Bp Premier is unable to locate the access token cache file, if the access token has expired, or if the password for the email account has recently been changed.
NOTE Receiving incoming emails in Bp Premier has been deprecated. You may wish to set up a no-reply email address (for example, noreply@yourdomain.com.au) to send all practice email from, to discourage patients from replying to emails.
- Log in to the Bp Premier server as a user with access to the Setup > Configuration screen.
- Select Setup > Configuration > Email from the main screen.
- Click Add next to the Incoming mail (Pop Server) list. The Setup incoming mail server screen appears.
- Complete the fields in this screen:
- User – Select the BP user who will receive emails, or select 'Practice' to set up the practice email.
- Server – Enter the incoming email POP server name.
- Username – Enter the user name used to access the incoming mail server.
- Password – Enter the password associated with the user name. The password is not displayed.
- Port - Enter 110 as the port number. This is the default port number for incoming mail.
- Click Save to return to the Configuration screen.
- Repeat steps 3–4 for each user able to receive incoming email.
- Click Save on the Configuration screen.
This section contains troubleshooting tips for issues encountered when setting up email in Bp Premier.
|
Issue |
Solution |
|---|---|
|
Unable to send email from Bp Premier with Microsoft 365 using Basic Authentication |
If you are unable to send emails from Bp Premier using Microsoft 365, you may need to enable Authenticated SMTP for the email account in the Microsoft 365 admin centre. You may require assistance from your IT provider. Enable authenticated SMTPTo enable authenticated STMP for a user:
Turn off multi-factor authenticationYou can try turning off multi-factor authentication for the account.
|
|
|
Check that the Enable TLS encryption for outgoing email check box is ticked in Setup > Configuration > Email. |
|
Bp E-Mail An error occurred when testing the SMTP server connection. Please Check the BPSError.log for more information |
Contact Microsoft Support for assistance with this error. |
Information correct at time of publishing (20 February 2025).
