HealthLink is a secure messaging service provider, offering SMD-compliant messaging to more than 15,000 practices and 55,000 medical professionals from General Practice, Specialist Practice, Allied Health, Hospitals, and Diagnostic Services. Access to HealthLink SmartForms is provided free for all Bp Premier users.
HealthLink SmartForms provide template medical forms to your practitioners in an easy-to-complete, autofilled format. Forms are updated automatically in Bp Premier as soon as they are available from the Healthlink source.
Clinical and demographic data stored within the clinical record, including selectable attachments, are prepopulated directly to the form, while additional information and recommended fields are flagged for quick entry into the form by the clinician. Clinicians can park forms for completion at a later time. Forms also have an autosave feature.
To set up access to HealthLink forms for the first time, you must:
- Obtain a HealthLink account and install the HealthLink client.
- Set up HealthLink as a messaging provider in Bp Premier.
- Set up an inbound rule in the Bp Premier server firewall for the HealthLink TCP port (8080 by default).
Install the HealthLink client
If you do not have a HealthLink account, or are unsure if you have an account, contact the HealthLink Registrations Team on 1800 125 036 (select option 4) or by email request@healthlink.net. All General Practices who join HealthLink can send and receive entirely free of charge including unlimited support. Access to HealthLink SmartForms is provided free of charge for all Best Practice Users.
After creating an account, HealthLink will arrange with you to install their client on the Bp Premier server. The default installation directory is C:\HLINK. Bp Premier will look for configuration files in this folder.
Set up HealthLink as a messaging provider
- From the main Bp Premier screen, select Setup > Configuration > Messaging tab.
- Click Add and the Messaging provider screen will appear.
- Enter a Provider Name of 'HealthLink'.
- Click Load Config. Bp Premier will look for the HealthLink configuration file hms_config.xml in the default installation directory C:\HLINK\.
- Bp Premier will load HealthLink configuration into the Messaging provider screen.
- Click Save to save and exit. See Set up a messaging provider for more information.
If Bp Premier cannot find the file, a popup will prompt for the location of this file. Browse to the configuration file and click OK.
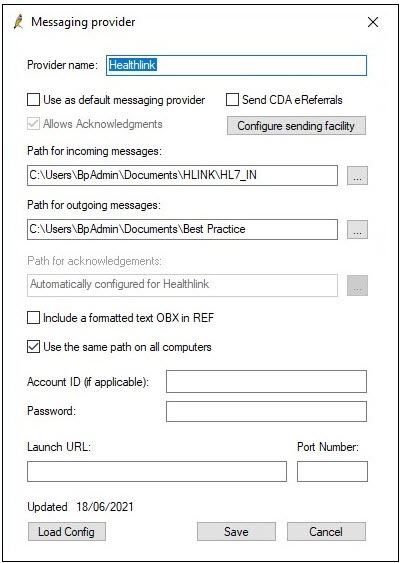
Open the port in the Windows firewall
If this is the first time you have set up HealthLink, you need to set up an inbound rule in the Windows firewall on the Bp Premier server.
By default, the TCP port used by the HealthLink client is 8080. The Windows firewall must accept incoming connections through this port. If this port is already in use by other software, or you need to change the port for any reason, modify the Port Number in the Messaging Providers screen and set the firewall to the new port number.
Grant permission to access HealthLink forms
By default, all clinical users are given access to HealthLink forms. You may decide to grant access to other users:
- Select Setup > Users from the main Bp Premier screen.
- Highlight the user and select Edit button.
- Click the Set Permissions button and scroll down to the permission called HealthLink.
- Set the permission to Allow access to allow the user to access the HealthLink forms, or Deny access to hide the HealthLink forms functionality from this user.
- Select View > HealthLink Forms from the main Bp Premier screen, or from the patient clinical record. The HealthLink Forms screen will appear.
- If you open the screen from the main Bp Premier screen, all completed or partly completed forms for the last 12 months will be displayed.
- If you open the screen from within a patient record, only those forms related to the current patient will be displayed.
- Select File > New Form or click the
 icon. You will be prompted for the patient to create the form for.
 - Search for the patient, select the patient name, and click Select. The HealthLink Forms Browser screen will appear with a list of forms relevant to the patient.
- Click on the form you want to create. The form will be displayed with fields prefilled from the practice, user, and patient information.
-
Work through the form completing all the relevant information. At any time, you can Preview, Submit, or Park a form. There is also a Help button that provides information about the form.
Alternately, you can click the HealthLink icon in the patient record, or in the Word processor when opened from the patient record, to navigate directly to the HealthLink new forms screen.
![]()
To make it simpler to find patients we made the Enhanced Patient Search functionality available for use with HealthLink Smart Forms. See Find a patient for more information.
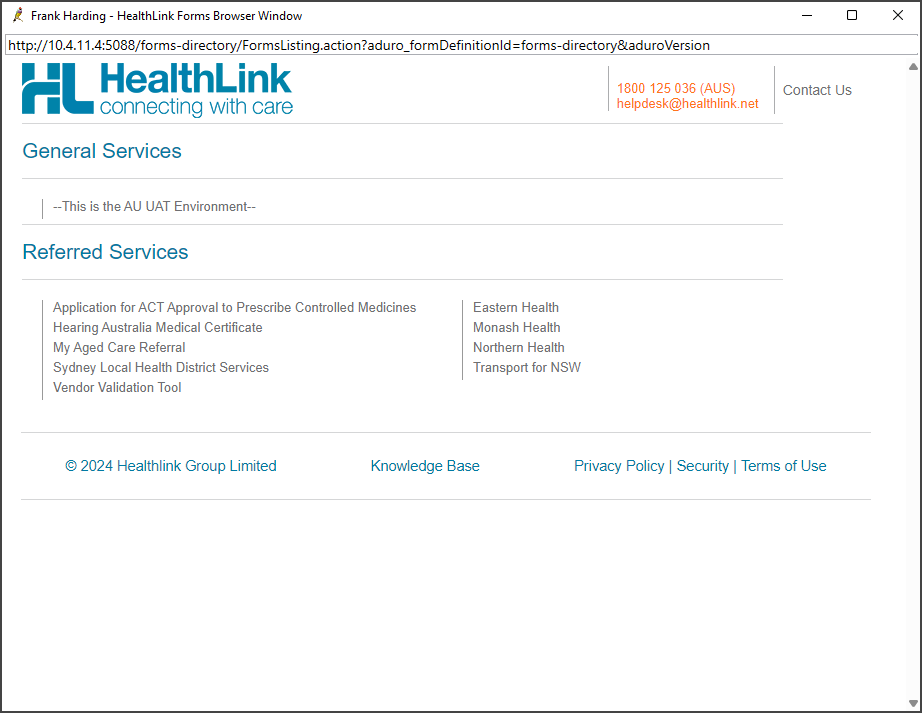
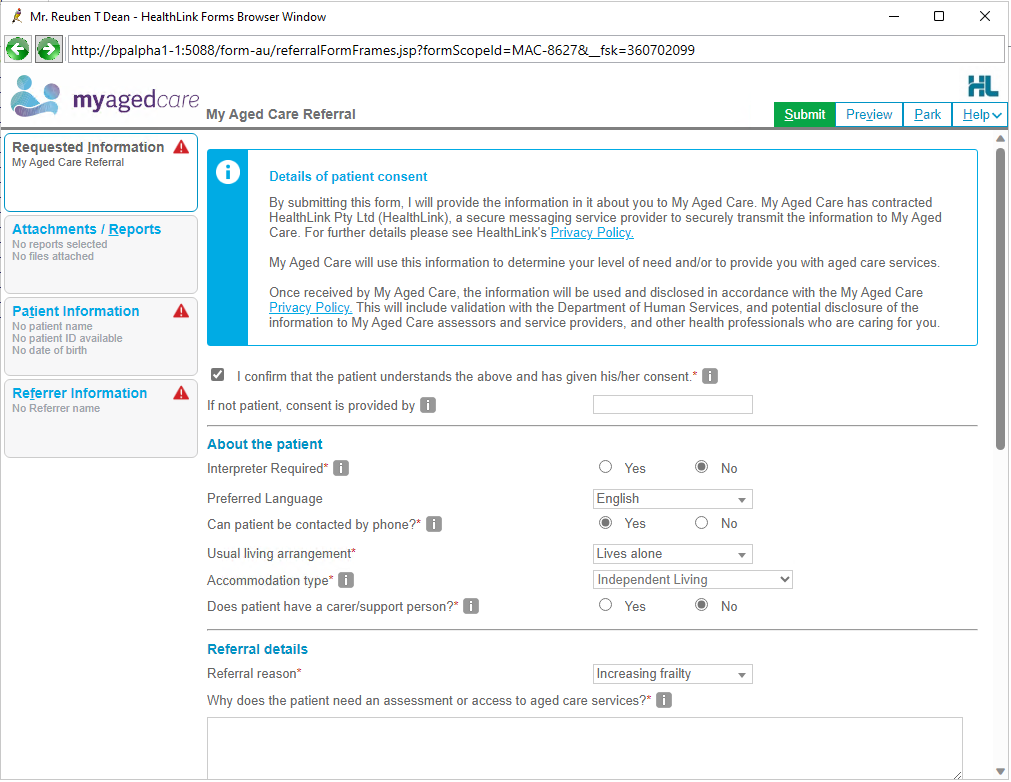
The format of the form will depend upon the information required and the recipient. All required fields are marked with a red *.
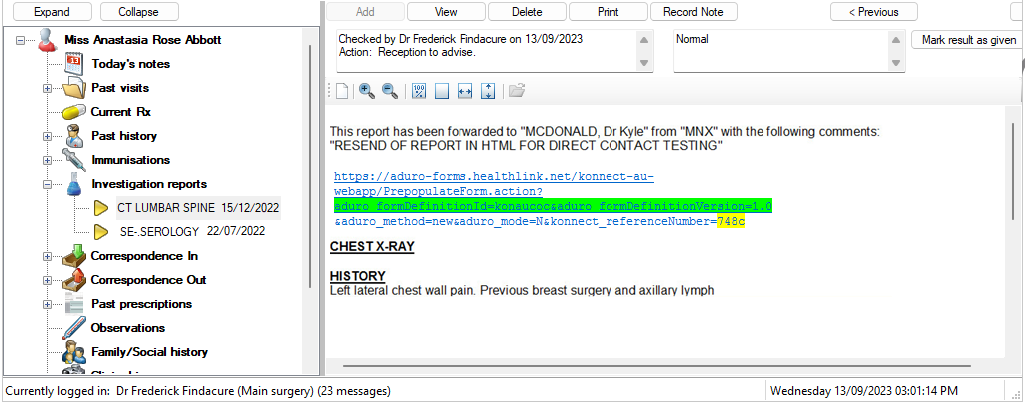
If a link to a HealthLink Form or report is embedded in a viewable document, such as an investigation report, click the link in Bp Premier to open the form in Bp Premier's internal HealthLink browser.
The following example shows a form link embedded in an investigation report. You can open links from anywhere in Bp Premier, including the patient record and provider's Inbox.
The Preview button runs a validation check on the data entered and highlights any fields that have not been completed. A message appears at the top of the screen indicating any errors.
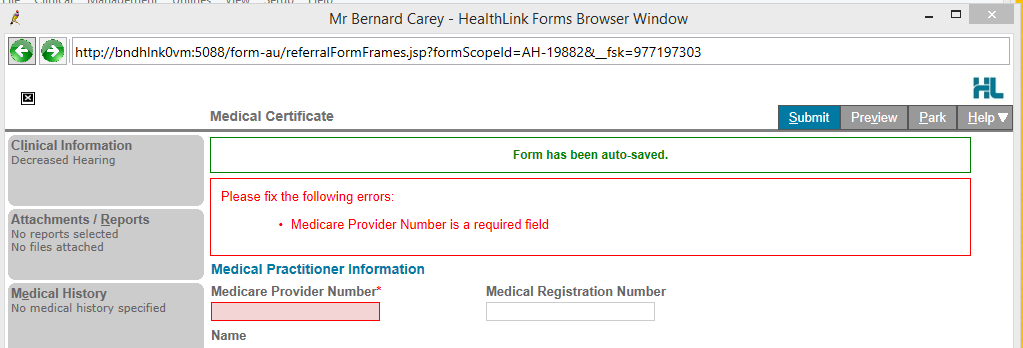
Once all required data is completed, the form will appear in a new window. When you are happy with the contents, click Submit.
Example of Preview of Australia Hearing Form Medical Certificate
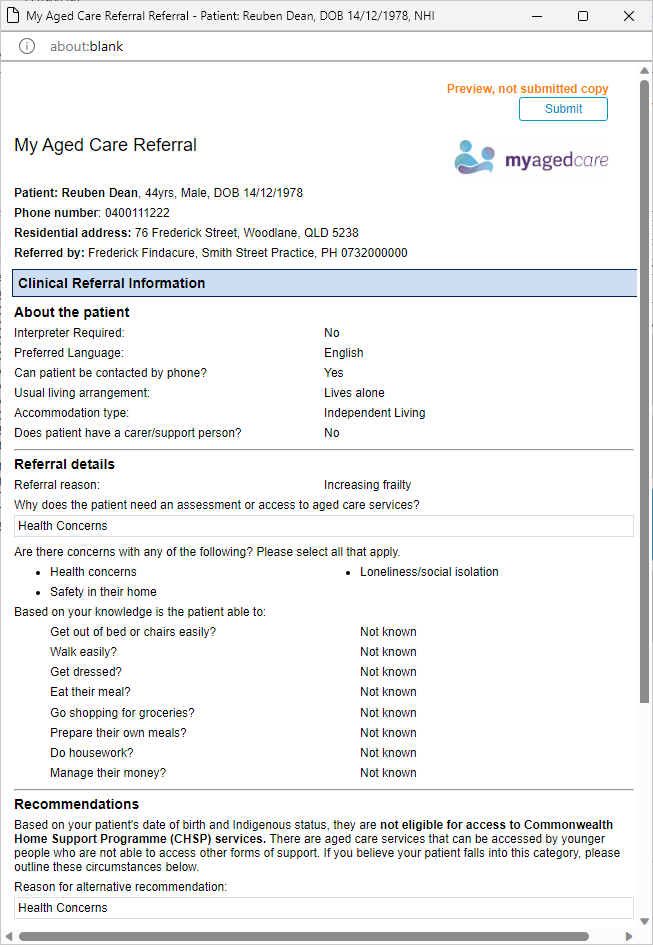
Once errors have been resolved, click Submit. The form will be submitted and a confirmation screen will appear indicating the form has been sent and acknowledged together with the formatted form.
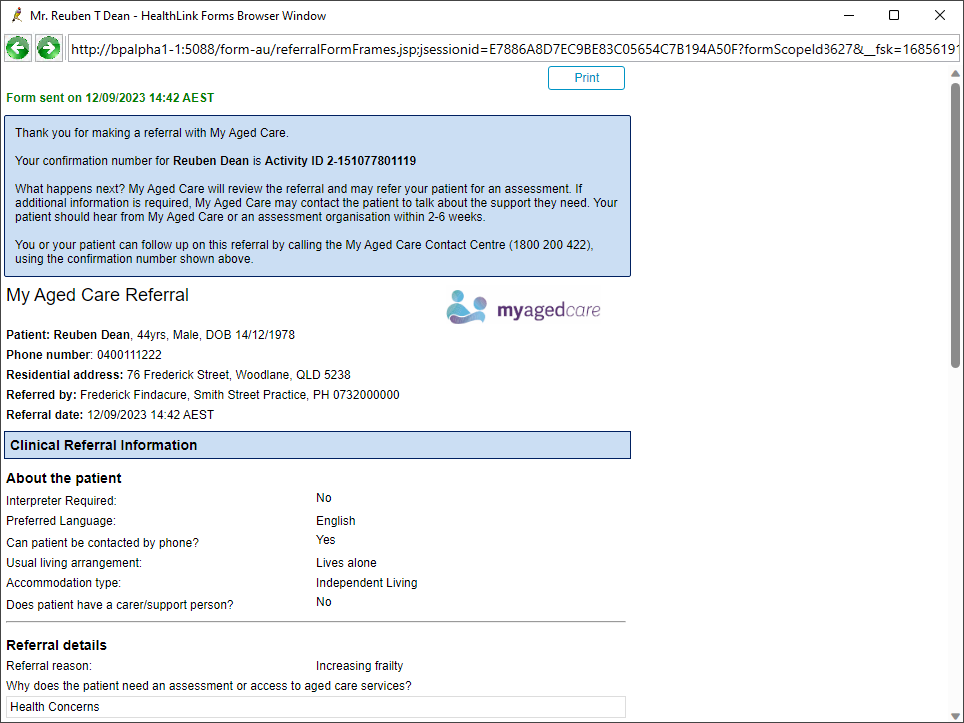
The form is saved into the Correspondence Out section of the patient record and can be viewed or printed at a later time.
In Orchid SP2, HealthLink Smart Forms started from the patient's clinical record via View > HealthLink forms, or the New HealthLink form icon will add a comment to the patient's Today's notes when the form is parked or sent during the same visit.

At any time, it is possible to Park the form. This will save the form with the current selections so that you can come back to complete the form at a later stage.

In Orchid SP2, HealthLink Smart Forms started from the patient's clinical record via View > HealthLink forms, or the HealthLink form icon will add an Action comment to Today's notes when the form is parked or sent during the same visit.
When a HealthLink Online Form is started from the patient clinical record and then parked, an action, Created and saved as draft, will be recorded in Today's Notes. If you access and submit a Parked Healthlink Online Form during the same visit, the action previously recorded as Created and saved as draft in Today's Notes will be changed to Created and sent.
The following images demonstrate how the Action in Today's Notes changes from Created and saved as draft to Created and sent when a Healthlink Online Form started from a patient clinical record is parked, accessed, and then submitted during the same visit.
- When a HealthLink Online Form is started from the patient clinical record and subsequently parked, an Action Created and saved as draft be recorded in Today's notes.
- If a Parked Healthlink Online Form is accessed and submitted during the same visit, the action previously recorded as Created and saved as draft in Today's notes will be updated to Created and sent.


To access a parked form, open the patient record and select View > HealthLink forms. This will show any forms that have been sent or parked for this patient. Select the parked form to resume editing.
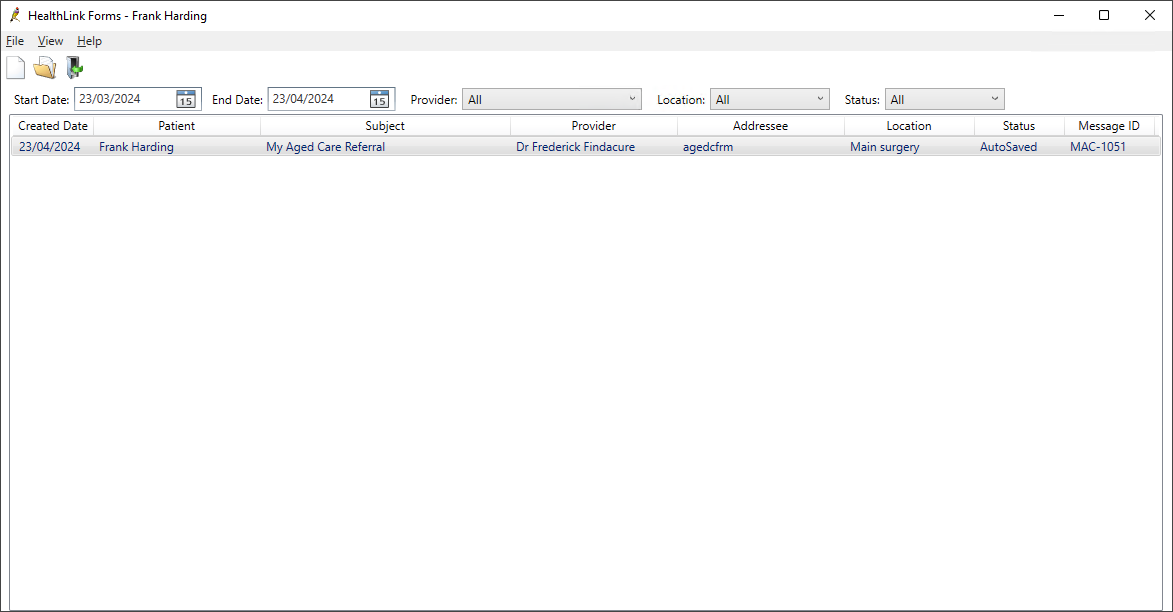
Healthlink Online Forms that have been parked can be accessed from Correspondence Out in the patient record. Parked Healthlink Online Forms will be saved with a draft status. To edit or submit the form, double-click on the form or right-click on the form and select Edit.

Last updated 23 April 2024.