This article explains how Bp VIP.net can be used to record diagnosed problem codes.
- The ICD10(AM) Problem Coding list is a licensed product, contact coding_helpdesk@health.govt.nz for licensing inquiries.
- Contact support@bpsoftware.net to request a file of the ICD10(AM) Problem Code list to import into Bp VIP.net.
On this page
Record the preferred problem coding list for the provider
When a provider searches for a new problem code, their preferred coding system can be recorded to ensure they primarily use that list.
- Click Setup > Providers > This Clinic.
- Select the relevant provider from the Providers screen and click the Modify button.
- Click the Internal tab.
- Select the preferred coding list from the Preferred Problem Coding section and click OK.
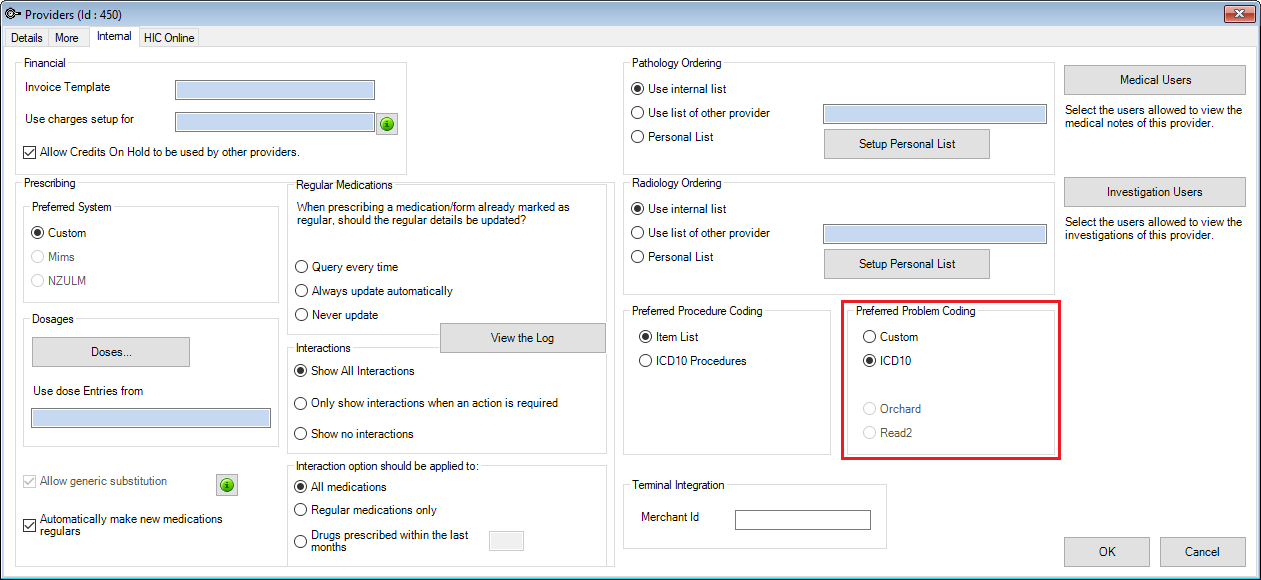
TIP The Custom code list is a list set up by the clinic. Follow the instructions in Managing problem code lists and preferences to set up a Custom list.
Record preferences for problem searching and recording
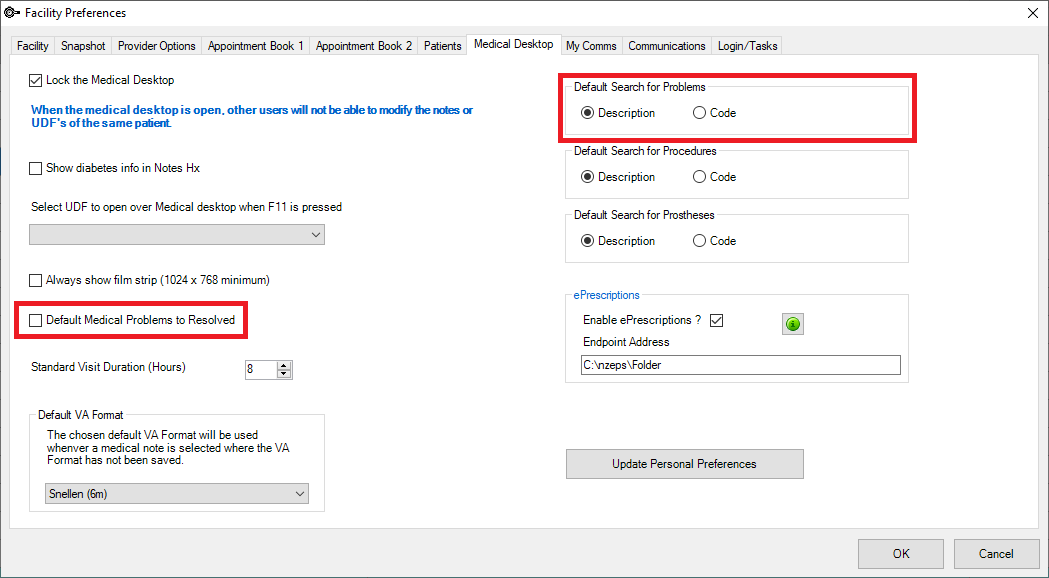
When searching for a problem code, you are able to search by a description or the code. To record the preference for the clinic:
- Click Setup > Facility Preferences > General Preferences.
- When the Facility Preferences are displayed, select the Medical Desktop tab.
- Select the preference for searching in the Default Search for Problems section.
- Click OK to save.
TIP You can also set all problems to resolved by selecting Default Medical Problems to Resolved. This will not affect problems added before the setting change.
Personal Preferences
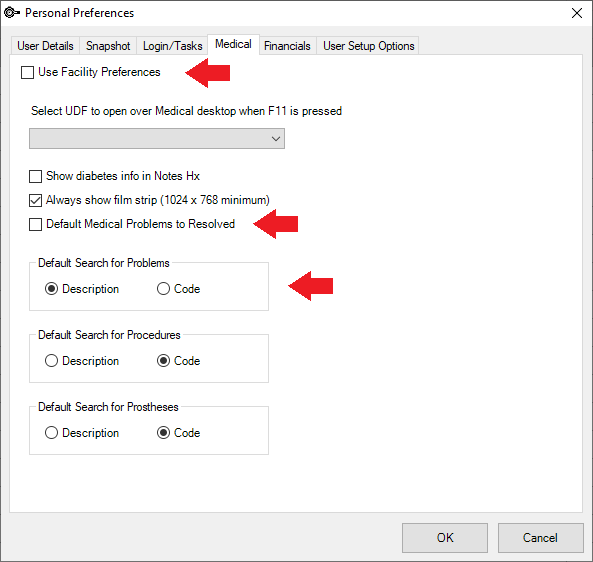
Users can also set their own personal preference:
- Click Setup > Personal Preferences and select the Medical tab.
- Select the preference for searching in the Default Search for Problems section.
- Click OK to save.
IMPORTANT To update Personal Preferences ensure that you untick Use Facility Preferences. Facility Preferences are the global settings defined in the General and Financial Preferences.
Add a problem to a patient's medical record
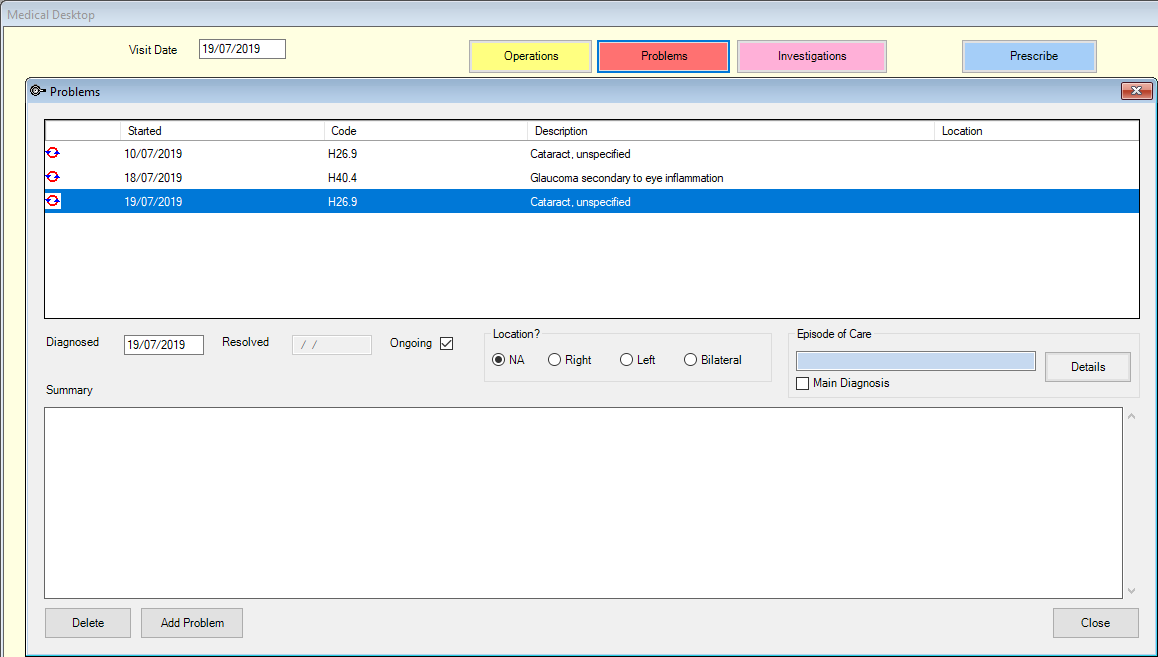
The Problems list contains the code and description of a patient's on-going and resolved problems.
- When the correct patient is displayed in the snapshot click Medical > Problems (Shift F9).
- From the patient's Medical Desktop, click the Problems button.
- Click the Add Problem button.
- Check the correct coding system is selected at the bottom of the screen.
- Enter either the description or the code in the Search field and ensure the required Search by radio button is selected.
- When the required problem code is displayed, highlight it and click the OK button.
NOTE The Problems list can also be accessed from the Medical Desktop (F11) if a Problems button link or the Problems display section has been added.
or
The Problems screen is displayed.
The Choose Problem screen is displayed.
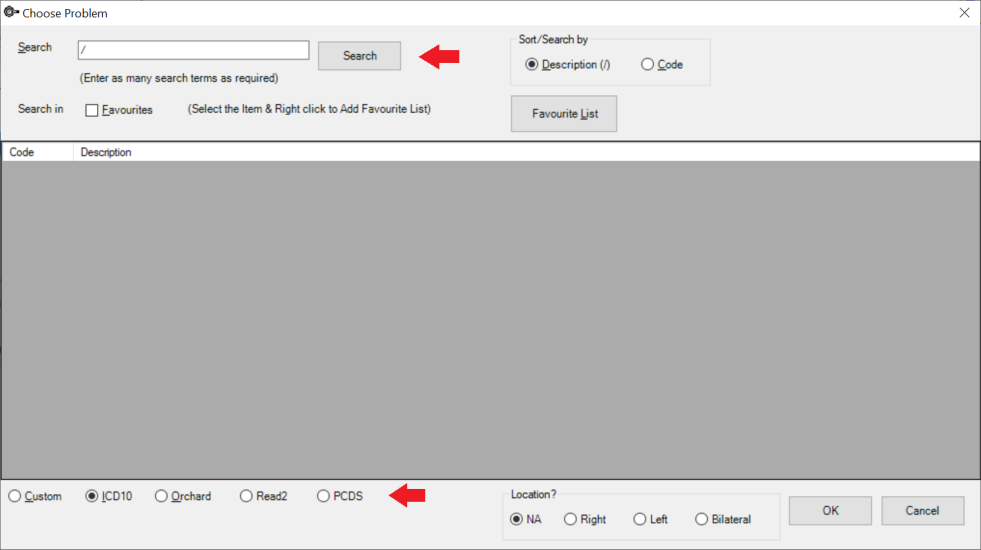
TIP You can prefix your search with / to activate the search by Description if the default search is by Code.
TIP If the coding system has multiple levels, click the + symbol to expand the list.
- The date of diagnosis is defaulted to the current date but this can be changed in the Diagnosed field if required.
- Record the Location.
- Enter notes associated with this problem in the Summary field.
- Click Close to save or Add Problem to add an additional problem.
The problem is listed in the patients Problems screen.
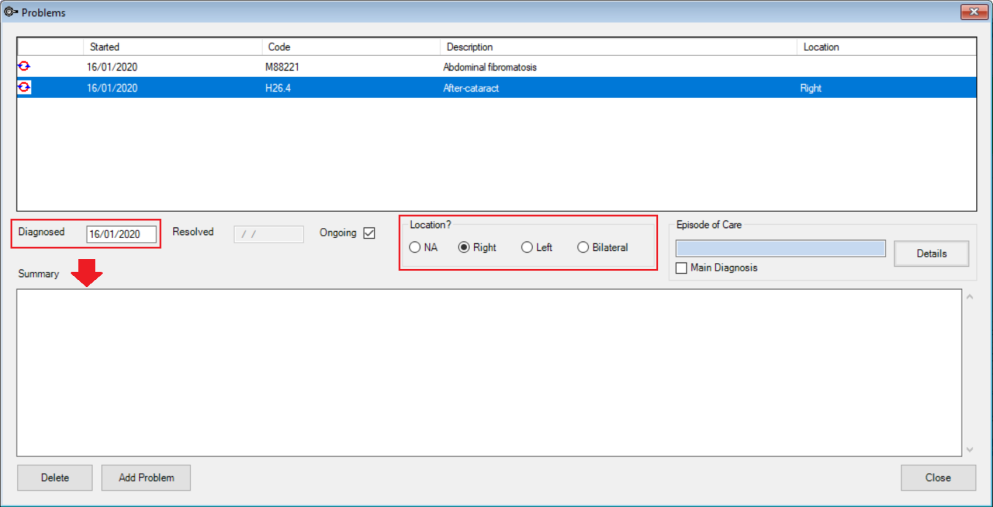
NOTE The Episode of Care section is for specialised Hospice Bp VIP.net clients.
The problem will display in the patients Problem screen and in the Medical Desktop Problem display field if this has been added to the User Defined Form.

Use the UDF Problems display section
If the Problem display has been added to the Medical Desktop UDF:
- Click the Code button to add a new problem code to the patients record.
- If the section is 'greyed out', the current visit record is uneditable - view the details by clicking the Problems button or Medical < Problems.
- If a new medical visit note has been created, select the down arrow to display the problem in the Problems field and click the Details button.
- Selecting the problem in the Problems field for a medical visit note will also display the problem in the Visit History section.


Mark an on-going problem as resolved
By default a problem is defined as ongoing in Bp VIP.net. To mark a problem as resolved:
- Open the Problem screen for the patient and select the problem.
- Uncheck the Ongoing box and enter the Resolved date.
IMPORTANT Problems can be marked as resolved by default. This is done through either Practice Preferences or Facility Preferences. Follow the instructions in Record preferences for problem searching and recording
Create an ICD-10 favourites list
When ICD-10 is selected as the problem coding list, the option to use a Favourites List is enabled. This narrows down the displayed list to the selected 'favourite' problem codes.
TIP Adding an ICD-10 problem code to your favourites list can be done while adding a code to a patient.
- Search for the required problem code in the Choose Problem screen.
- Right mouse click on the highlighted problem and select Add to Favourites.
- When a code has been added to the favourite list, it can be removed by right clicking and selecting Remove from Favourites.
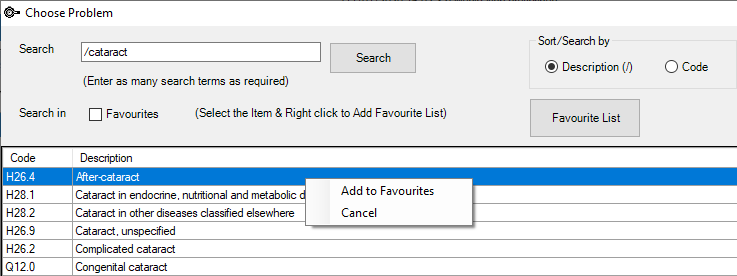
Next time you access the Choose Problem screen, the list of Favourites will display by default, enabling easy search and selection of problem codes.

NOTE To perform a general search, uncheck the Favourites tick box.
Related topics
Last modified: 18 August 2023