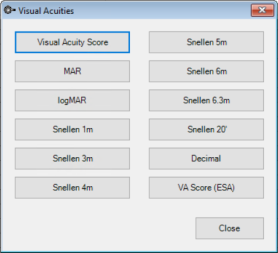
Bp VIP.net is installed with a wide range of values for common Visual Acuity charts. You can reduce the charts and values available to suit your practice.
You need access rights to the permission 'Visual Acuities' to set up this part of Bp VIP.net. See Users and security for more information.
Enable VA Measurements in the Medical Desktop
- Go to Setup > Visual Acuities.
- Click on a visual acuity measurement type.
- A minimum of one value must be selected.
- Select OK to save and close.
- The VA measurements selected will now display in the UDF field for the Medical Desktop.


NOTE If no values are selected for a measurement system, they will not display in the drop down list of measurements from the Medical Desktop.

Set up Visual Acuities
- Click Setup > Visual Acuities.
- For each Visual Acuity chart used at the practice, click the button to open the Select screen.
- For that Visual Acuity type, select only those values that will be used.
- Click OK to save.
- Repeat for each Visual Acuity used by providers at your practice. Only the values selected will be shown as option in VA fields in Medical Desktop.

Add ophthalmology Medication Routes
You'll need to add medication routes for ophthalmology after installation.
- Click Setup > Medical > Medication Routes.
- Create the following routes for Ophthalmology usage:
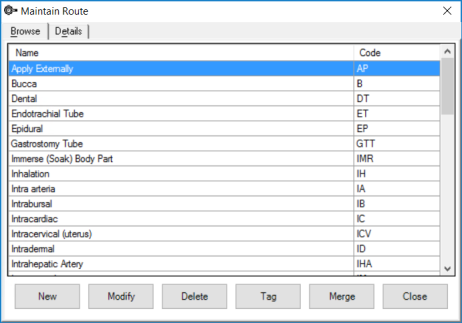
|
Name: Right Eye |
Code: RE |
|
Name: Left Eye |
Code: LE |
|
Name: Both Eyes |
Code: BE |
|
Name: Operated Eye |
Code: OE |
See Add a medication route for more information.
Last modified: 11 August 2023