Bp VIP.net can be configured to automatically import scanned documents from a nominated folder into patient records.
How Bp VIP.net imports the files
After bulk scanning has been set up, Bp VIP.net will scan the import folder every four minutes for new files. Files named 'DoB_surname_firstname' or ' DoB_surname_firstname_*' will be imported into the record of any patient whose name matches the file, where:
- DoB is the patient's date of birth in the format yyyymmdd
- '*' indicates a file number, when importing multiple files for the same patient.
Filenames are case-insensitive. Successfully imported files are placed into a subfolder of the import folder named Archive and deleted by Bp VIP.net after seven days. Files that cannot be imported are placed into a subfolder called BadFiles.
For example, say the folder contains the following files:
- 19760429_smith_john_1.jpg
- 19760429_Smith_John_2.jpg
- 19880321_brown_jack.bmp
- 1960_johnson_richard.pdf
The first two files will be imported into the patient record for 'John Smith' with a DOB of 29 April, 1976. The third file will be imported into the record for 'Jack Brown' with the supplied DOB. The fourth file will not be imported because the filename format is incorrect. An error will be recorded in the log and the file moved to the BadFiles folder.
Bp VIP.net will import the following file types: Jpg, Bmp, Gif, Png, Tif, Dcm, PDF.
Follow the instructions below in order to set up scanning documents.
Choose an external interface
Bp VIP.net offers a default set of external interfaces, including a 'BulkScan' interface to be used for bulk scanning. Your practice may need to modify or add a new interface definition, if the provided definition does not work.
There is nothing you need to do during first setup. In the next step, select an Interface of 'Bulkscan' and see if Bp VIP.net successfully imports files. If all other components are working but Bp VIP.net will not import files from the nominated folder, contact Bp VIP.net Support to guide you through modifying the default bulk scan interface.
Set up importing for the external interface
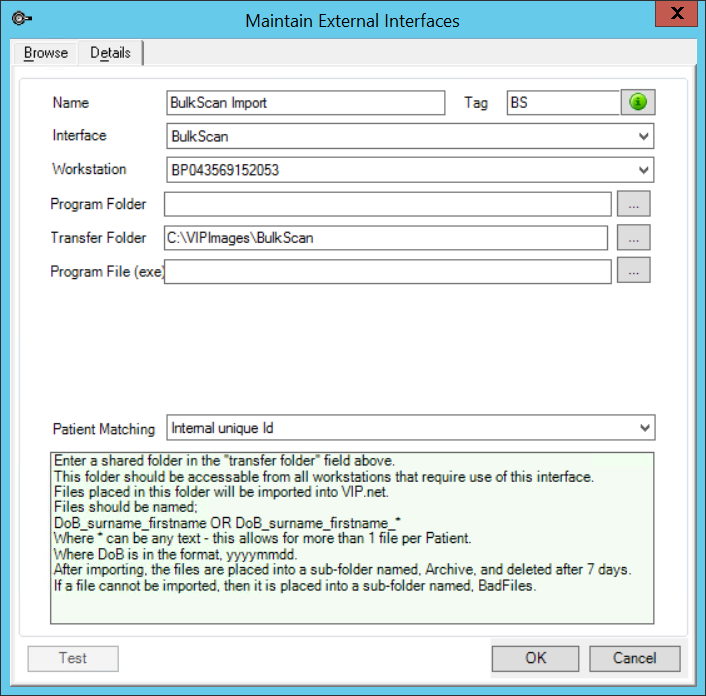
- In Bp VIP.net, select Setup > Medical > External Interfaces. The Maintain External Interfaces screen will appear.
- Enter a descriptive Name.
- Select 'BulkScan' for the Interface.
- Select the Workstation on which the folder containing the files is located.
- In the Transfer Folder field, enter the path on the folder that will contain the import files.
- Select Patient Matching of 'Internal unique ID' .
- Click OK to save changes.

Share the import folder
In Windows, you will need to share the nominated transfer folder and set access permissions so that other Bp VIP.net workstations can bulk import files. Your IT support can assist with sharing the transfer folder.
- Browse to the folder, right-click, and select Properties > Sharing.
- Click Advanced Sharing, tick Share this folder, click Permissions, select the user group Everyone and set Full Control to allowed.
- Click OK to close the Properties screen.
Related topics
Last modified: July 2020